
How Do You Waterproof Fabric at Home? A Textile Scientist’s Answer
Seeing your favorite jacket soak through or a backpack liner fail can be frustrating. I’ve spent years testing fabrics in the lab and field, and I can show you how to fix that with confidence.
This article will cover how fabric construction affects waterproofing, the real-world performance of DIY methods like wax and silicone sprays, and my tested steps for application and care.
Understanding Waterproofing: The Science Behind It
Let’s start with the most common point of confusion. Water-resistant and waterproof are not the same. Think of water-resistant as a light shower. The fabric might hold off moisture for a while, letting water bead up and roll off, but under sustained pressure or a heavy downpour, it will eventually wet through. Waterproof means a fabric should prevent water penetration entirely under the conditions it’s rated for, like a sturdy rain jacket in a storm.
The key is in how the fabric handles water. A water-resistant treatment encourages beading. A true waterproof barrier creates an impermeable layer.
How Treatments Work: A Molecular View
Different methods achieve this in different ways. Sprays and aerosols typically deposit a coating of water-repellent chemicals, like fluoropolymers or silicones, onto the surface of the fibers. This coating makes the fabric’s surface tension so low that water can’t spread out; it just balls up.
Wax-based products work by filling the tiny gaps in the fabric’s weave or knit, physically blocking the path of water. This is why wax is so effective on tightly woven cotton canvas-it transforms the fabric into a more solid, coated barrier.
Wash-in treatments are a different beast. These liquid solutions contain chemicals designed to bond directly with the molecular structure of certain fibers (especially synthetics like nylon and polyester) during a heat cycle from your dryer. This creates a durable water-repellent (DWR) finish that’s part of the fiber itself, not just sitting on top.
Water-Resistant vs. Waterproof Treatments
So, what’s the practical difference for your project? A standard spray-on waterproofer is often sufficient for making a cotton tote bag water-resistant or reviving the DWR on a jacket. For a tent fly, a sleeping bag shell, or gear that must keep you dry in a torrent, you need a heavier-duty, seam-sealing waterproofing treatment, often a brush-on or wash-in formula designed for that specific pressure rating.
The Breathability Question
This leads directly to a key trade-off: “how to make fabric waterproof but breathable.” Breathability is the fabric’s ability to let water vapor (your sweat) escape. A solid plastic bag is 100% waterproof and 0% breathable-you’ll get wet from condensation inside.
Most DIY methods add a layer that slightly reduces breathability; wax significantly reduces it, while modern spray-on DWR treatments are engineered to minimize this impact. For high-exertion activities, prioritize reactivating or applying a new DWR finish to technical fabrics rather than waxing them.
Which Fabrics Can You Waterproof? (And Which Should You Avoid)
Not all fabrics are good candidates. The best results start with the right base material. Think about the fabric’s inherent properties: its weave, its natural affinity for water, and its heat tolerance.
- Cotton & Canvas: The classic candidate. Tightly woven, natural fibers like cotton duck or canvas absorb waxes and coatings beautifully. The fibers swell slightly, and the treatment fills the weave, creating a superb physical barrier. Loose weaves or knits will be much harder to seal effectively.
- Polyester & Nylon: These synthetic workhorses are the backbone of modern rain gear. They have little natural absorbency, so treatments bond to their smooth surfaces. Wash-in revivers work exceptionally well here, as they are designed to chemically bond with these polymers. They also handle heat well for setting the treatment.
- Blends (e.g., Poly-Cotton): Common in casual jackets and bags. These can take to waterproofing well, but the result is a hybrid of the fiber behaviors. The synthetic parts may bond with chemistry, while the cotton parts accept coatings.
Fabric Properties That Matter
A crisp, tightly woven fabric provides a smooth “canvas” for an even coating. A fluffy, napped fabric like fleece or melton wool is tricky-you’ll use immense product just to coat all the fiber ends, and it may never achieve a reliable seal. Always test on an inside seam or scrap first.
Risk Assessment: When NOT to Use Certain Methods
This is where you can save a favorite garment from ruin.
Never apply heat-dependent wax (like iron-in beeswax) to delicate natural fibers like silk or fine wool, or to unknown synthetics. The iron’s heat can scorch silk, melt synthetic fibers, or felt wool. For these, a gentle, non-heat spray might be the only safe option.
Avoid heavy silicone-based sprays on garments where breathability is critical, like a running jacket. The silicone can create a more occlusive film that traps vapor.
Be very cautious with fabrics that have a special finish, like a delicate stain-resistant treatment on a dress shirt. The waterproofing chemicals can interact poorly and create blotches. For fabrics with waterproof properties, coatings can also affect feel and durability. Always test a small, inconspicuous area first.
Specific Use Cases
For “how to waterproof sunbrella fabric” (a solution-dyed acrylic outdoor fabric), you’re in luck. Acrylic takes well to specific UV-resistant, water-repellent sprays made for outdoor furniture. Avoid wax, which can attract dirt and degrade in the sun.
For “how to waterproof fabric hiking boots,” the leather or synthetic uppers require a conditioner or spray designed for footwear. These products contain softening agents and protectants that won’t crack with flexing. Never use a standard fabric wax on boots-it will stiffen the material and clog breathable membranes.
Best Fabrics for DIY Waterproofing
In my experience, you’ll get the most satisfying and durable results from tightly woven natural fibers like cotton canvas and from modern synthetics like polyester and nylon. These materials provide a predictable, stable base for the treatment to adhere to or bond with.
Gathering Your Tools: Common Methods and Household Fixes
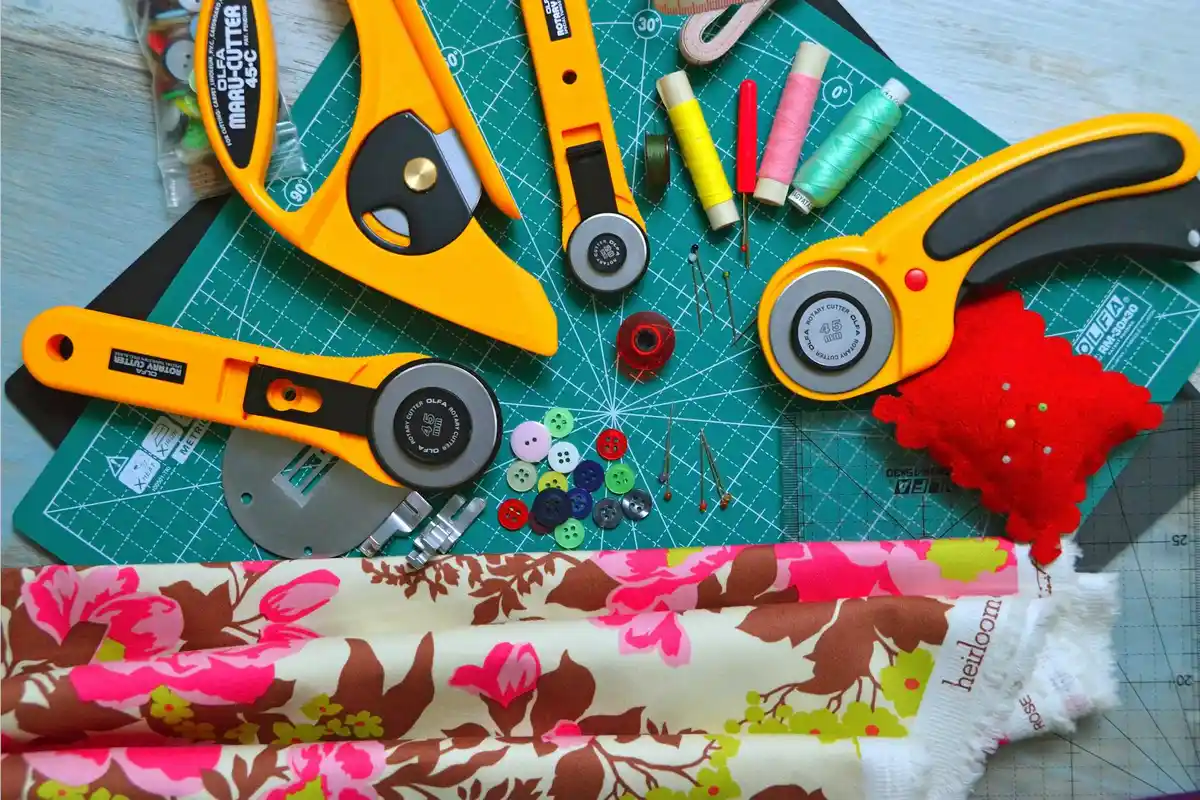
You have options, from store-bought solutions to pantry staples. The right choice depends on your fabric and project.
- Spray-On DWR (Durable Water Repellent): These are aerosol or pump sprays that coat individual fibers. They are perfect for reviving water-resistant jackets, backpacks, and outdoor gear made from nylon or polyester. Think of it as giving each fiber a tiny, slick raincoat.
- Wash-In Products: These are liquid treatments you add to your washing machine. They are excellent for evenly treating entire items like sleeping bags, tent floors, or technical outerwear where you want uniform coverage without missing a spot.
- Waxes (like Paraffin or Beeswax): Wax creates a physical, malleable barrier. It’s the classic choice for dense, tough fabrics like canvas, cotton duck, or leather. It gives that iconic waxy feel and sound. Use it for canvas bags, boots, or DIY fabric coasters.
- Oils and Silicone Sealants: These are heavy-duty, often permanent solutions. A thinned silicone sealant can make a cotton tarp nearly impervious. These methods significantly change the fabric’s hand (feel), making it stiffer.
For a DIY approach, look in your home. What can you use to waterproof fabric? Beeswax, paraffin (from candle making), and food-grade mineral oil are all effective household items. A simple beeswax and oil blend is a popular, natural option that avoids synthetic chemicals. If you’re seeking an eco-friendly waterproofing method, these natural wax mixtures are a great starting point, though they do require more frequent reapplication than some synthetic products.
No matter your chosen method, success starts with a clean slate. Proper fabric preparation is non-negotiable.
Step-by-Step: How to Apply Waterproofing Treatments
How to Prepare Fabric Before Treatment
This step is the most important one you will do. Skipping it guarantees poor results.
- Wash the fabric. Use a mild detergent and follow the garment’s care label. You must remove all dirt, body oils, and residual laundry detergent. These act as a barrier between the fabric and your waterproofing agent.
- Dry it completely. Any moisture left in the fibers will block the treatment. Tumble dry on a warm setting if the fabric allows, or air dry thoroughly.
- Set up your workspace. Always work in a well-ventilated area, like a garage with the door open or outdoors. Lay down cardboard or a drop cloth to protect surfaces.
How to Waterproof Fabric with a Spray-On Treatment
This is the simplest method for maintenance and spot treatment. What to spray on fabric to waterproof it? A commercial DWR spray designed for your fabric type is your best bet. For tougher water resistance or sealing seams, waterproof fabric adhesives can be a strong companion option. We’ll explore those options next with practical tips.
- Shake the can vigorously for the time stated on the label, usually about a minute.
- Hold the nozzle 6 to 8 inches (15-20 cm) from the fabric surface.
- Apply using steady, sweeping motions. Aim for a light, even mist. Soaking the fabric can cause drips and an uneven finish.
- Let the item dry completely, away from direct heat. Drying time can take several hours.
How to Use a Wash-In Waterproofing Product
This method is great for large, bulky items or ensuring full coverage.
- Place the clean, dry item in the washing machine alone.
- Add the recommended amount of wash-in waterproofing liquid directly into the drum or detergent dispenser. Do not use regular laundry detergent with it.
- Run a standard warm wash cycle and then a full rinse cycle.
- Tumble dry on a medium heat setting. The heat is crucial for activating and curing the treatment onto the fibers.
How to Wax Fabric for Waterproofing (Canvas, Boots, Coasters)
This hands-on method creates a classic, rugged finish. It’s the answer for how to make fabric coasters waterproof and durable.
- Grate or chip your wax (beeswax or paraffin) into small pieces for easier melting.
- Rub the wax generously over the dry, clean fabric. For harder waxes, you can use a hair dryer to slightly soften it as you work.
- Use a household iron on a medium-low setting (no steam). Place a thin, scrap cloth (like a pillowcase) over the waxed area. Iron over the cloth, moving constantly. You will see the wax melt and soak into the fabric.
- Let the fabric cool completely. Buff the surface with a clean, soft cloth to remove any excess wax and even out the finish.
How to Make and Apply a Beeswax and Oil Mixture
This natural blend is softer and more pliable than wax alone. I use a 2-to-1 or 3-to-1 ratio of beeswax to oil (like mineral or jojoba oil).
- Combine the beeswax and oil in a heat-proof jar or can.
- Create a double boiler by placing the jar in a pot of simmering water. Stir until fully melted and combined.
- Let the mixture cool slightly until it thickens to a paste-like consistency.
- Using a stiff brush or a cloth, work the paste into the fabric in circular motions, coating evenly.
- Use a hair dryer or an iron with a press cloth to melt the mixture into the fabric for a deeper seal.
How to Waterproof with a Silicone Sealant
This is a potent, semi-permanent method best for project fabrics like tarps. Ventilation is critical here-work outdoors or with strong fans.
- In a well-ventilated area, mix one part 100% silicone sealant (clear) with one part odorless mineral spirits in a disposable container. Stir until fully combined and smooth.
- Lay your fabric flat. Using a paintbrush or foam roller, apply the mixture evenly across the entire surface.
- Allow the fabric to cure for at least 24-48 hours, or as long as the silicone product instructions state. The mineral spirits must fully evaporate.
- The fabric will have a distinct, stiffer hand when the process is complete.
Testing and Care: Does Your DIY Waterproofing Work?
You’ve applied your chosen method. Now, how can you be sure it worked? I rely on two simple, at-home tests that give me a clear picture.
The first is the flat-surface bead test. Lay the fabric flat on a table. Using a pipette, spoon, or your fingers, place a few drops of water on it. A successful coating will cause the water to form tight, round beads that sit on top of the fabric and roll off easily when you tilt it. If the water soaks in immediately or darkens a spot (called “wetting out”), the fabric isn’t waterproof there. This is especially common with synthetic fabrics like polyester that are often used for outdoor gear.
The second test is for finished garments like jackets. Use a clean spray bottle set to a gentle mist. Lightly spritz the surface from about a foot away. You’re simulating a light rain, not a downpour. Watch closely. The water should bead up and roll down the fabric. Any areas where it soaks through need a touch-up.
How Long Will Your Waterproofing Last?
Don’t expect a DIY treatment to last forever. Think of it like seasoning a cast-iron pan-it needs maintenance. Three main factors break down the coating:
- Wear and Abrasion: Rubbing against backpacks, car seats, or even just frequent folding creases can physically scrape the coating off over time.
- Washing: Every wash cycle slowly degrades water-repellent finishes. Detergent, agitation, and heat are the culprits.
- UV Exposure: Sunlight is brutal to most polymers and waxes. It can make them brittle, crack, and lose effectiveness.
For a frequently used jacket treated with spray-on DWR, you might need to reapply every 3 to 6 months. A waxed cotton bag used occasionally could last a year or more.
How to Re-Waterproof Fabric
The good news is, re-waterproofing is simpler than the first treatment. The fabric is already primed. First, the fabric must be impeccably clean. Any dirt, oil, or old detergent residue will block the new coating. Wash it following the care protocol for technical outerwear, then ensure it’s completely dry.
For spray-on treatments, just apply a fresh, even coat to the outer fabric, following the product’s instructions. For wax, you often only need to spot-treat areas that look dry or pale, or where water soaks in, using less product than the initial application.
Care & Handling Protocol for Waterproofed Fabrics
How you wash and dry these items is what makes the coating last. This protocol is non-negotiable for longevity.
- Wash Infrequently and Gently: Only wash when necessary. Use a front-loading machine on a gentle or technical garment cycle with cold or warm water (not hot).
- Use a Mild, Technical Detergent: Avoid standard detergents with additives. Opt for a clean-rinsing detergent made for technical outerwear or a very mild liquid soap. This prevents residue that clogs the fabric’s pores.
- Avoid Fabric Softeners At All Costs: Fabric softeners and dryer sheets coat fibers with a waxy film that destroys water repellency. Never use them.
- Dry with Low Heat: Tumble dry on a low heat setting. The gentle heat helps reactivate and redistribute many durable water repellent (DWR) finishes. For waxed fabrics, air dry away from direct heat.
FAQs: Testing and Reapplication
How often should I test my waterproofing? Test it when you notice water not beading as well, or seasonally for gear you rely on, like before a rainy hiking season.
What’s the first sign the coating is failing? The fabric will “wet out”-it darkens in color where water hits because the fibers are absorbing it, even if it doesn’t soak through entirely.
Can I re-waterproof over an old, flaking wax coating? Not effectively. You must first remove the old wax with heat and a cloth, or by washing with a specialized tech wash, before applying a new layer.
Textile Expert’s Notes and Precautions
These are my lab-bench and workshop notes. They cover the nuanced decisions and non-negotiable safety steps you need for a successful project.
Pro-Tip for Breathability and Comfort
Waterproof and breathable are often competing goals. Your method choice matters. If you’re waterproofing activewear like a running shell, avoid heavy waxes; they dramatically reduce breathability by sealing the fabric’s pores. For these items, a spray-on fluorocarbon-free DWR is a better choice as it coats fibers without completely blocking the air spaces between them. For a static item like a pack cover, breathability is less critical, so wax is a great, durable option.
Pro-Tip for Sewing and Projects
Timing is everything. For the most reliable waterproofing, apply your finish after the item is fully sewn. This ensures the seams and stitch holes get coated, which is where water often wicks through. The exception is wax: pre-waxing fabric can make it very stiff and difficult to sew on a home machine. If you must pre-wax for a project, do a small test piece first to see if your machine can handle it.
Key Safety Precautions
Never skip these. Your health and safety are more important than any project.
- Ventilation is Paramount: Always work in a well-ventilated area-outdoors is ideal. Fumes from aerosol sprays and solvent-based products are harmful to inhale.
- Protect Yourself: Wear nitrile gloves and a properly fitted respirator mask (not a dust mask) rated for organic vapors when using chemical sprays or melting wax.
- Mind the Heat Source: When melting wax, use a double boiler or a dedicated warmer. Never place an open flame or a hot pot directly near flammable liquids like mineral spirits or the aerosol cans themselves.
Finally, remember the core trade-offs. Durability often trades with breathability-the toughest coatings let the least air through. Ease of use trades with mess; sprays are clean, wax is hands-on. Cost trades with effectiveness; a commercial spray is convenient, while a homemade wax blend is cheap but labor-intensive. Choose based on what your fabric’s job really is.
FAQs: General Precautions
Can I waterproof fabrics indoors? I strongly advise against it. Even with open windows, vapors can accumulate. Always spray or melt wax outdoors or in a garage with the door open.
Is it safe to waterproof children’s items or pet gear? With extreme caution. Use only plant-based, non-toxic formulations like certain beeswax blends or explicitly non-toxic, water-based sprays. Allow for a very long cure and air-out time before use.
What’s the biggest mistake people make? Applying too much product in one go. A thick, gloppy coat won’t dry properly, stays sticky, and performs worse than two thin, even, cured layers.
Final Notes on Fabric Performance
The most reliable step you can take is to test your chosen waterproofing method on a fabric scrap first. This simple practice session shows you exactly how the finish will look, feel, and perform on your specific material before you commit the entire project. Next, you can explore waterproofing fabrics techniques tailored to your material. Understanding coatings, seam sealing, and breathable finishes will guide your choice. Match your method to your fabric’s core personality-its fiber content, weave, and intended use-for a result that lasts.
Think of maintaining a waterproof finish as part of the garment’s care cycle, much like respecting the gentle wash cycle for wool or using cool water for dyed silks. I encourage you to repair and re-treat good items, and to keep learning about how fibers like cotton, polyester, and their blends interact with water, detergents, and the elements, especially when dealing with water-resistant fabrics.
Expert Resources and Citations
- How to Waterproof Fabric – 3 Best Ways at Home | TREASURIE
- How To Waterproof Fabric: 2 Ways that Really Work • Craving Some Creativity
- How to Waterproof Fabric (DIYer’s Guide) – Bob Vila
- Waterproof Fabric By The Yard | Fabric Wholesale Direct
- Waterproof Fabrics
Florian Ventura
Florian is a high fashion blog writer, fashion and fabric expert and a keen expert in fabric, clothing and materials. She has worked in large textile and fashion houses for over 10+ years, engineering and working with various fabric types and blends. She is an expert when it comes to questions on any and all kinds of fabrics like linen, cotton, silk, jute and many more. She has also traveled around the world studying traditional fabrics and aims to bring them into the modern fashion use.