
Can You Use Food Coloring to Dye and Tie-Dye Fabric?
You’re likely eyeing those little bottles in your kitchen, wondering if they can color a tired t-shirt. I’ve run this experiment in my lab, and yes, you can, but fabric choice changes everything.
I will guide you through how food coloring bonds to natural vs. synthetic fibers, a reliable step-by-step process for dyeing and tie-dyeing, and the crucial methods to set the color for lasting wear.
Executive Summary: The Quick Science of Food Coloring Dyes
Can you dye fabric with food coloring? Technically, yes. Will it last? Not really. The core issue is a fundamental one of textile science.
Food dyes are colorants designed to be safe for ingestion, not substantive dyes engineered to bond with fabric fibers. They sit on the surface, which leads to the primary challenges you’ll face.
The Core Pros
- Extremely Accessible: You likely already have it in your kitchen.
- Generally Non-Toxic: Perfect for supervised crafts with children.
- Great for Temporary Projects: Think seasonal table runners, one-time event banners, or a fun afternoon experiment.
The Core Cons
- Poor Washfastness: The color washes out easily.
- Poor Lightfastness: It will fade quickly in sunlight.
- Not for Laundered Wearables: I would never use it on a t-shirt you plan to wash and wear regularly.
Best Candidate Fabrics
Cellulose fibers are your best bet. These plant-based fibers are absorbent, like a sponge.
- Cotton (plain weave muslin is ideal for testing)
- Linen
- Rayon/Viscose
Protein fibers like silk and wool can sometimes hold a stain from food coloring, but it requires a heavy dose of a pH modifier like vinegar and even then, the result is unpredictable and fleeting.
Poor Candidate Fabrics
Synthetic fibers repel these water-based dyes. The color will barely adhere and will wash right out.
- Polyester
- Nylon
- Acrylic
Food Coloring vs. Fabric Dye: A Fiber Science Breakdown
Let’s get into the lab for a minute. Common liquid food colorings are acidic, water-soluble dyes. Their molecules are small and designed to disperse in water or fat, not to form a permanent bond with a polymer chain like cotton cellulose or wool protein.
A substantive fabric dye, like fiber-reactive dye for cotton or acid dye for wool, forms a permanent covalent chemical bond with the fiber molecule. It becomes part of the fabric. Food coloring, in contrast, is a physical stain. It gets trapped in the nooks and crannies of the fiber, much like how glitter gets stuck on a greasy surface-it’s there until you scrub it off.
The Sponge vs. Plastic Bag Analogy
Think of a piece of cotton as a sponge. When you pour colored water on it, the sponge soaks it up and holds it in its structure. That’s food coloring on cotton-it’s absorbed. Now think of a polyester fabric as a smooth plastic bag. Pour that colored water on it, and it beads up and runs off. There’s nowhere for the dye to be held. This is why natural fibers are your only real option when you dye fabrics.
The Role of pH Modifiers: Vinegar and Salt
You’ll see many tutorials mention vinegar or salt. Here’s what they actually do, from a chemistry standpoint.
Vinegar (an acid) helps slightly on protein fibers like silk and wool. In an acidic environment, the fiber’s molecular structure opens up a bit, potentially allowing more of the dye stain to be captured. It’s not creating a bond, but it can improve initial uptake.
For cotton and other cellulose fibers, salt acts as an electrolyte, helping to drive the dye molecules out of the water and toward the fiber. It encourages exhaustion of the dye bath. Don’t expect miracles, but it can lead to slightly darker, more even staining.
Why Washfastness is the Main Challenge
Washfastness simply means a dye’s ability to stay in the fabric when washed. It’s the number one metric for a successful dye job. Food coloring fails this test.
So, how long does food coloring tie-dye last? You need to set very modest expectations.
The vibrant swirls you create may survive one or two extremely gentle hand washes in cold water, but you will see noticeable fading and bleeding immediately. With each subsequent wash, more color will leave the fabric. Exposure to sunlight will also bleach the colors rapidly. If you wash the item with other clothes, expect the food coloring to bleed onto them.
My practical test is this: after your project is dry, rinse it under cold running water until the water runs almost clear. The color that remains after this aggressive rinse is all you’ll be keeping. It won’t be much.
Preparation Protocol: Getting Your Fabric Ready to Hold Color
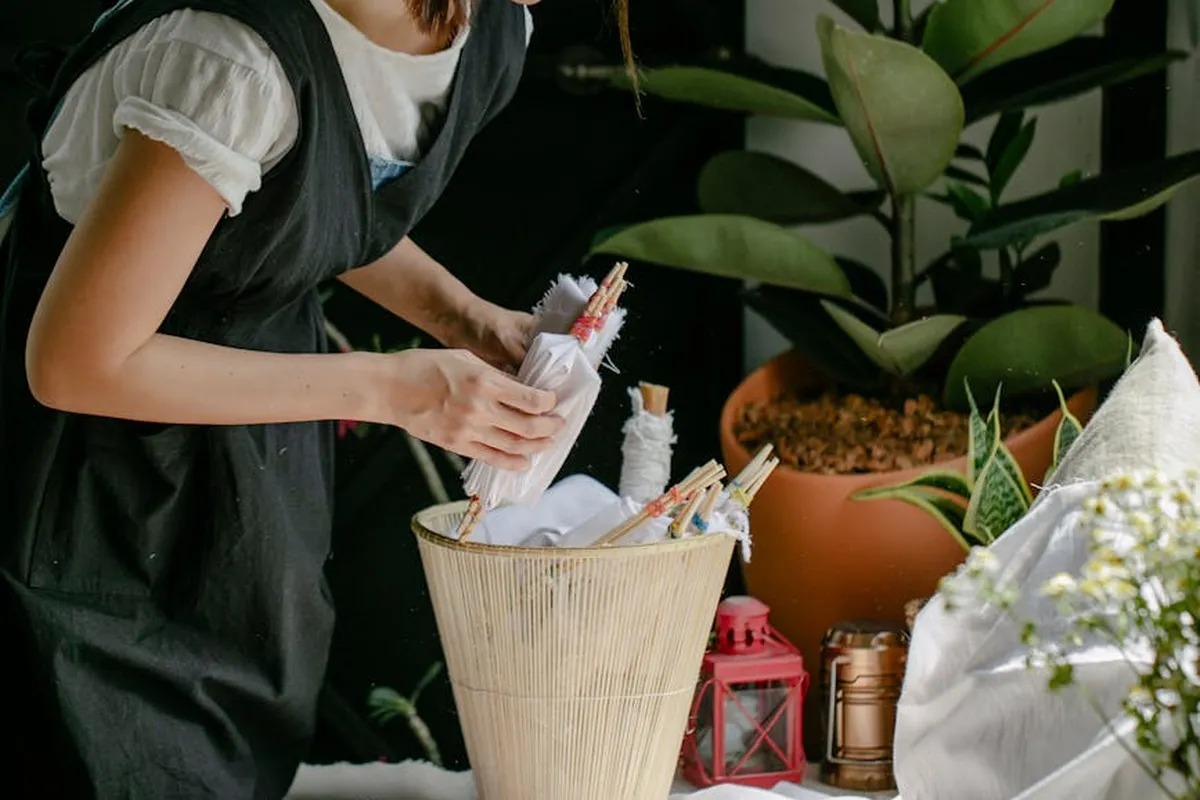
Pre-washing isn’t just a suggestion, it’s the foundation of even dyeing. You must pre-wash fabric to remove the invisible factory finishes, like starch or silicones, that coat your fabric. These act like a raincoat, repelling dye and giving you splotchy, weak color.
Run your fabric through a regular wash cycle using hot water and a plain detergent. Skip the fabric softener, as it leaves a residue that will block the dye. This hot wash also pre-shrinks your fabric, a critical step before you dye it, especially for delicate fabrics.
Now, let’s tackle the common “mordant” question. In professional dyeing, a mordant is a metal salt (like alum) that forms a chemical bridge between the dye molecule and the fiber, creating a permanent bond. Common household items like white vinegar or table salt are not true mordants.
They are better called fixatives or assistants. They work by changing the fiber’s environment to make it more receptive to the dye. Salt helps drive dye into plant-based cellulose fibers like cotton or linen. A mild acid like vinegar helps dye bond to animal-based protein fibers like wool or silk.
Here is my simple, lab-tested pre-soak method. For a cotton t-shirt or linen napkin, soak the wet, pre-washed fabric in a bowl of salty water (1/2 cup salt per gallon of cool water) for 30 minutes before dyeing. For a silk scarf or wool yarn, soak it in a vinegar water solution (1 cup white vinegar per gallon of cool water) for 30 minutes. You do not need to rinse the fabric after this soak, just wring it out lightly and move it straight to the dye pot.
Step-by-Step: How to Dye Fabric with Food Coloring
Think of this as immersion dyeing. It’s perfect for achieving a single solid color or, with careful manipulation, soft ombré gradients. This method gives you more control than sprinkling powder on a tied shirt.
Materials & Setup for a Dye Bath
Gather these items before you start. Having everything ready makes the process smooth.
- A large stainless steel or enamel pot you will not use for food again.
- Enough water to let your fabric move freely.
- White vinegar (for silk/wool) or non-iodized salt (for cotton/linen).
- Liquid food coloring. Gel paste works but must be fully dissolved.
- Tongs or a long wooden spoon for stirring.
- Your pre-washed, pre-soaked, and still damp fabric.
I keep a pot just for dye projects, as food coloring can stain even metal over time.
The Dyeing Process
Follow these steps in order. Patience here is the key to richer, more lasting color.
- Simmer your fixative solution. In your dedicated pot, bring your vinegar-water or salt-water solution to a gentle simmer. You should see small bubbles, not a rolling boil. Boiling is too harsh, especially for delicate protein fibers.
- Add the food coloring. Stir it in thoroughly. I start with a whole small bottle for a vibrant shade. The color in the pot will look much darker than your final result.
- Introduce the wet fabric. Carefully lower it into the pot. Use your tongs to submerge it fully and gently push out any air bubbles for uniform color.
- Maintain a gentle simmer for 30 to 60 minutes. Stir the fabric slowly every 5-10 minutes. This constant, even heat helps the color penetrate the fiber’s core. You will see the pot water become clearer as the dye transfers to your fabric.
- Cool and rinse. Turn off the heat. Let the fabric cool down right in the dye pot for another 30 minutes. Then, wearing gloves, rinse it under progressively cooler water until the water runs almost clear. Expect some color to rinse out, this is normal with food dyes.
Wash your dyed item alone for the first few cycles in cool water with a mild detergent. Food coloring is not lightfast or washfast like fiber-reactive dyes, so your beautiful color will fade with repeated washing and sunlight exposure. This is the trade-off for a fun, accessible project.
How to Tie-Dye with Food Coloring: Techniques & Textures

If you’re determined to use food coloring on fabric, tie-dye is your best path forward. Think of it as temporary textile art. The process is forgiving, fun, and doesn’t demand permanent results. You get a vibrant, one-of-a-kind piece with the full understanding that its story will fade with every wash. It’s a perfect project for a sunny afternoon, not a forever garment.
The Basic Bottle-Dye Method
This is your classic, hands-on approach. You’ll need white cotton fabric (a t-shirt, pillowcase, or bandana), food coloring, white vinegar, water, squeeze bottles, and rubber bands.
First, always pre-soak your tied item. Mix one part white vinegar to four parts cold water in a basin. Submerge your knotted fabric for at least 20 minutes. This acidic bath is non-negotiable; it preps the cotton fibers to grab hold of the dye molecules, even if only temporarily. Wring it out gently so it’s damp, not dripping. Understanding bleaching time before dyeing helps predict how the color will spread and settle. The upcoming steps will include related guidance on fabric dyeing bleaching time to fine-tune results.
While it soaks, mix your colors. In each squeeze bottle, combine about 1/2 cup warm water, 1 tablespoon of vinegar, and 20-30 drops of food coloring. Shake it well.
Now for the patterns. The tying method creates the resist that forms your design:
- Bullseye: Pinch the center of the fabric and pull up. Wrap rubber bands tightly down the length of this “stalk” to create segments.
- Spiral: Lay the item flat, pinch the center, and twist until the whole fabric is a flat disk. Secure with 3-4 rubber bands crossing the disk like pizza slices.
- Crumple: Simply scrunch the fabric into a random ball and tie rubber bands around it in every direction.
Apply your colors generously to different sections of the tied bundle. Let the colors soak through and blend at the edges. Once colored, wrap the whole bundle tightly in plastic wrap or seal it in a plastic bag. This keeps the fabric damp so the dye can migrate and cure. Let it sit for at least 6 hours, though I find 24 hours gives the most intensity.
Finally, rinse under cold running water until it runs clear, carefully snip off the rubber bands, rinse again, then wash separately in cold water. Line dry.
Alternative Craft Methods: Shaving Cream & Ice Dyeing
For softer, more ethereal effects, these methods are wonderful for craft projects like wall hangings or play silks.
Shaving cream marbling creates dreamy pastel swirls. Spread a layer of plain shaving cream in a shallow tray. Dot food coloring drops on top, then drag a skewer through to create a marbled pattern. Press your pre-soaked (vinegar and water) fabric onto the cream, gently smooth it, then lift. Scrape off the shaving cream with a card, and you’ll see the delicate color left behind.
Ice dyeing offers a watercolor bloom with speckled texture. Place your crumpled or tied, pre-soaked fabric in a colander over a bowl. Pile a mound of ice cubes on top of the fabric. Then, generously sprinkle powdered food coloring (or very concentrated liquid) directly over the ice. As the ice melts, it carries the dye slowly and unevenly onto the fabric, creating beautiful blooms and speckles where the dye granules land.
Both of these methods deposit even less dye into the fiber than the bottle method. The results are stunningly beautiful but will likely fade after one or two gentle washes. They are perfect for documenting with a photo and enjoying the impermanent art.
Fabric-Specific Guide: What Works, What Doesn’t
The success of food coloring dyeing hinges entirely on the fiber’s chemical structure. Here’s what to expect, broken down by type.
Best Results: Cotton, Linen, Rayon (Cellulose Fibers)
These plant-based fibers are hydrophilic, meaning they love water. Their molecular structure is like a thirsty sponge, readily absorbing the colored liquid. This makes them the prime candidates for food coloring experiments.
While vinegar helps, for cellulose fibers, salt is a more effective fixative with food dyes. You can add 1/2 cup of salt to your dye bath or vinegar soak. Expect a bright, initial result that looks fantastic when first dried, but anticipate noticeable fading and potential bleeding in the very next wash. The dye sits in the fiber but doesn’t form a strong chemical bond.
Moderate Results: Silk and Wool (Protein Fibers)
Fibers from animals, like silk and wool, are protein-based. They have a different chemical affinity and can bond with acid dyes-which is why vinegar (an acid) can help the food coloring adhere slightly better here than on cotton.
You must proceed with extreme care. Agitation and heat will felt wool, shrinking it into a dense mat. High heat can damage silk’s delicate proteins and strip its glorious luster. If you attempt this, use only cold dyeing techniques, like ice dyeing or a cold vinegar bath with color added, and handle the wet fabric as little as possible. The color may take, but it remains a fragile, non-permanent treatment.
Poor Results: Polyester, Nylon, Acrylic, Blends
So, can you dye polyester with food coloring? Practically speaking, no. The same goes for nylon and acrylic.
These synthetic fibers are hydrophobic. They are engineered to repel water, not absorb it. Food coloring molecules are water-soluble and have no ionic sites to bond to these plastic-based polymers. At best, you might see a faint tint on the surface that will vanish completely in the first rinse, leaving you with a damp, unchanged garment.
For any fabric blend containing more than 20% synthetic fiber, I advise against using food coloring. The synthetic content will block the dye uptake, and the result will be a weak, patchy color even on the natural fiber portions. Save your effort for 100% natural fiber fabrics.
The Care & Washing Protocol for Food-Colored Fabric

Let’s talk about the reality of your project. Food coloring bonds to fabric through a weak physical attraction, not a strong chemical bond. This isn’t a flaw-it’s the nature of the medium. Managing this expectation is the single most important thing you can do for your project’s longevity. Think of it as caring for a beautiful watercolor painting, not a piece of industrial vinyl.
Initial Aftercare: Setting and Rinsing
Once your tie-dye pattern has sat for the recommended time (at least 6-8 hours, but I often leave mine overnight), the real work begins. Do not wring it out. Gently carry the fabric to a sink or basin to carefully rinse your tie-dye or shibori fabric.
- Rinse under cool, running water. Cool water helps prevent the dyes from spreading further and blurring your hard-won patterns.
- Rinse until the water runs mostly clear. You will see a significant amount of dye flowing out. This is completely normal and expected-you are rinsing away the excess dye that never bonded.
- Do not panic if the colors appear lighter. They are settling into their final, true hue.
After the bulk of the loose dye is gone, prepare a final bath. Fill a basin or sink with cool water and add one cup of plain white vinegar. Submerge the fabric and let it soak for 15-20 minutes. The mild acidity can help slightly “set” the remaining dye molecules, offering a touch more stability for that first crucial wash. While it’s not a foolproof method, it can help when you prepare and troubleshoot your fabric dyeing.
Long-Term Laundering: How to Make It Last
From this point forward, your laundering routine determines the lifespan of your colors.
- Always hand wash, separately, in cool water. The agitation and heat of a washing machine will strip the color rapidly. Use a mild, pH-neutral detergent (like those made for wool or delicates).
- Avoid soaking and aggressive scrubbing. Gently swish the garment, then rinse thoroughly.
- You must wash this item alone or only with like colors forever. Even after the vinegar rinse, dye transfer is a high risk for several washes.
- Always air dry, and keep it away from direct sunlight. UV radiation is a powerful bleach and will fade these delicate colors faster than anything.
With this meticulous care, you might get a dozen or more gentle wears before significant fading occurs. This protocol is the difference between a fleeting stain and a temporary piece of wearable art.
When NOT to Use Food Coloring to Dye Fabric
Knowing when to avoid a technique is just as important as knowing how to do it. My lab experience tells me food coloring is a wonderful tool for specific, temporary applications, but it fails as a substitute for professional dye. Here are the absolute no-go scenarios.
- Heirloom or Vintage Textiles: The repeated rinsing and specialized care can stress fragile fibers and old seams.
- Any Garment You Plan to Machine Wash: A child’s everyday t-shirt or your favorite pair of jeans needs to survive the washer. This dye will not.
- Expensive Silk Blouses or Wool Sweaters: Protein fibers like silk and wool can stain unpredictably with food coloring. For these, you want professional acid dyes that bond chemically and are designed for the fiber.
- Polyester, Nylon, or Synthetic Blends: Food coloring has little to no affinity for synthetic fibers. It will barely tint the surface and wash out immediately, wasting your effort.
- Baby Clothes or Linens: The risk of residual dye transferring to skin or other fabrics is too high, and these items require frequent, vigorous washing.
Food coloring dye is for craft projects, art installations, or seasonal decor you’re okay with re-dyeing. It is not for creating durable, washable wardrobe staples.
If you love the effect but need permanence, invest in the right tool for the job. For plant-based fibers like cotton, use fiber-reactive dyes (like Procion MX). For animal fibers like wool or silk, use acid dyes. These form covalent chemical bonds with the fiber, making them colorfast and washable. They are the permanent solution you reach for when the project matters. Understanding fabric dye permanence helps ensure colors stay vivid through repeated washes. Stay tuned for a quick guide on fabric dye permanence in the next steps.
Final Notes on Home Dyeing with Food Color
The single most important rule is this: food coloring bonds poorly to fabric. Only use it on natural plant fibers like cotton or linen for a temporary, wash-fast project you don’t mind re-dyeing. Treat any vibrant result as a happy accident, not a permanent finish.
Every project teaches you more about how fibers behave. I always test a scrap first to see how the color takes and washes out. Understanding a fabric’s properties before you dye it is the key to getting the results you want and caring for them properly later.
Related Guides and Information
- Can You Use Food Colouring To Dye Fabric? | Mr X Stitch
- 3 Easy Ways to Dye Clothes with Food Coloring – wikiHow
- Can You Dye Fabric with Food Coloring? 6 Super Easy Steps
Florian Ventura
Florian is a high fashion blog writer, fashion and fabric expert and a keen expert in fabric, clothing and materials. She has worked in large textile and fashion houses for over 10+ years, engineering and working with various fabric types and blends. She is an expert when it comes to questions on any and all kinds of fabrics like linen, cotton, silk, jute and many more. She has also traveled around the world studying traditional fabrics and aims to bring them into the modern fashion use.