
How Do You Dye Fabric a Deep, Lasting Black at Home?
Getting a true, even black on fabric at home can seem daunting, but I’ve found that with a few textile science principles, it’s entirely within your reach.
This article breaks down the process, covering how to test your fabric’s fiber content, choose the right type of black dye, prepare your material to accept color, apply the dye for full coverage, and set the color properly to resist fading.
Can You Dye Any Fabric Black? The Truth About Fiber and Dye
You cannot dye every fabric a true black at home. The result depends entirely on a chemical handshake between the dye and the fiber molecules.
Think of dye molecules as tiny keys, and your fabric’s fibers as locks. For the color to stick, the key must fit. Natural fibers like cotton, linen, wool, and silk have molecular structures that readily bond with the dyes sold for home use. Synthetic fibers like polyester are built differently. Their locks require a different, much more industrial key. Different fabrics—cotton and wool in particular—dye differently from synthetics. Being aware of these differences helps when dyeing cotton, wool, or synthetics.
For a rich, lasting black, stick to these natural and regenerated fibers:
- Cotton, Linen, Rayon (Viscose): These cellulose fibers dye beautifully with fiber reactive dyes (like Procion MX) or all-purpose dyes. They absorb color evenly and deeply.
- Wool and Silk: These protein fibers require acid dyes. The dye bonds in a warm, mildly acidic bath, creating deep, vibrant shades. I always use citric acid or vinegar for this, as it’s gentle and effective.
Some fabrics are extremely difficult or impossible to dye successfully with home methods:
- Polyester, Nylon, Acetate: These require disperse dyes and a process involving near-boiling water (often 200°F+) sustained for 30-60 minutes. Even then, achieving an even black is a challenge. Commercial dyers use pressurized equipment to force the dye into these slick fibers.
- Fabrics with Permanent Finishes: Water-repellent, stain-resistant, or wrinkle-free finishes act like a plastic shield around the fibers. The dye simply cannot reach the fiber to bond.
A common follow-up question is, can you dye black fabric another color? The short answer is no, not directly. To dye over black, you must first use a chemical color remover, which is harsh, produces unpredictable results, and can seriously weaken or damage the fabric. It’s rarely worth the risk.
Your starting point dictates your finish. For that classic, inky black, begin with a white or very light grey fabric. Starting with tan, navy, or red will result in a muddy, tonal dark shade, not a pure black.
Your Fabric Check: Preparing to Dye for Success
Preparation is everything. Rushing this step leads to splotchy, disappointing color.
First, identify your fabric. Check the care label. If it’s missing or cut out, a burn test is your best friend. Snip a small snippet from a hidden seam:
- Cotton/Linen burns quickly with a yellow flame, smells like burning paper, and leaves soft, grey ash.
- Wool/Silk burns slowly, smells like burning hair, and leaves a crushable black bead.
- Polyester melts and burns with a black smoke, leaving a hard, black plastic bead.
Next, pre-wash your fabric. This is non-negotiable. Wash it in warm water with a small amount of clear, mild detergent (no fabric softener or dryer sheets). This strips away oils, dirt, and any manufacturing finishes that would block the dye. Dry the fabric completely.
Now, calculate your dye. Weigh your dry, clean fabric. Dye packages list capacity by weight. For a true black, I always use double the recommended amount of dye powder. Black requires a massive amount of pigment to achieve depth and avoid a faded grey look.
Consider what you’re dyeing. A simple piece of yardage dyes most evenly. A garment has complications:
- Seams and hems are thicker, absorbing dye differently and sometimes appearing lighter.
- Zippers, buttons, or interfacing may be made from a synthetic material that won’t dye, creating contrast.
- Any invisible stain (oil, sweat, deodorant) will resist dye, leaving a light spot.
Finally, a note on patterns. Dyeing a patterned fabric black will not give you a solid black. The existing colors will mix with the black dye, creating a dark, muted, tonal version of the original pattern. The black dye overlays, it does not erase. This is especially true for synthetic fabrics which are often more difficult to dye evenly.
Choosing Your Black: Dye Chemistry for Different Fibers
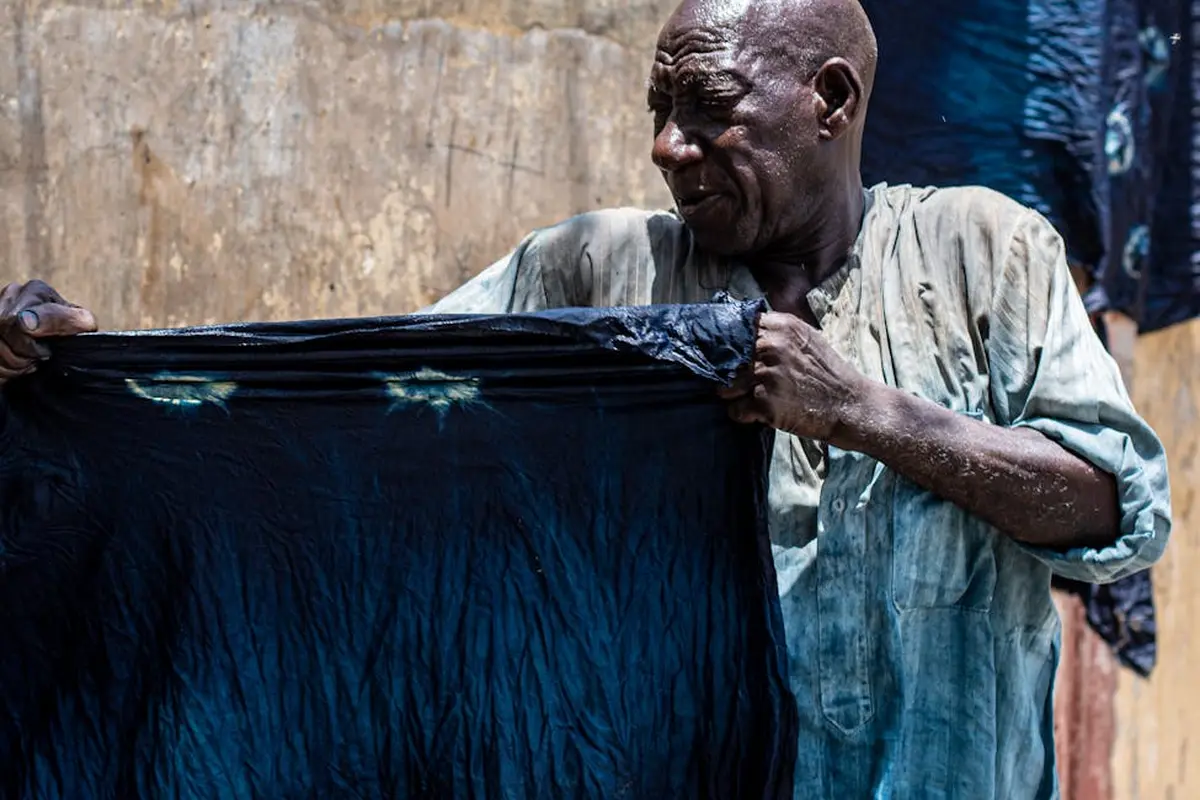
Think of dye like a key and your fabric as a lock. The right key must fit the specific molecular structure of the fiber. Using the wrong dye leads to pale, splotchy, or temporary color that washes right out. For lasting color, fabric dye permanence matters—it’s what keeps the hue from fading over time. In the next steps, we’ll look at how to maximize dye permanence.
For Plant Fibers: Cotton, Linen, Rayon
Fibers like cotton and linen come from cellulose, a plant sugar. For a rich, permanent black on these fabrics, I always recommend fiber-reactive dyes, such as Procion MX. These dyes work in cool water and form a covalent bond with the fiber. This bond is incredibly strong.
A covalent bond means the dye molecule becomes a permanent part of the cellulose chain, resulting in exceptional wash-fastness that lasts for years.
All-purpose dyes, like standard Rit, are an easier alternative. They simply stain the fiber. The black will look good initially but will fade faster with washing, especially on linen which can be stubborn.
Yes, you can dye linen black. Use a fiber-reactive dye for the best result, and be prepared to use more dye powder than you would for cotton or other plant fibers, as linen’s dense structure absorbs color slowly.
For Protein Fibers: Silk, Wool, Cashmere
Protein fibers come from animals. Their molecules have positive charges that attract specific dyes in an acidic bath. This is where acid dyes come in. They require an acidic environment, usually created with white vinegar or citric acid, to bond properly.
Handling is everything here, especially with precious wools and silks. Vigorous stirring or shocking temperature changes will felt wool, turning your soft sweater into a stiff, shrunken mat.
For wool, keep the dye bath at a gentle simmer, around 180°F (82°C), and avoid agitating it. For delicate silk, an even lower heat of 160°F (71°C) is safer to preserve its sleek hand.
For Synthetics: Polyester, Nylon, Acetate
These are the tough ones. Synthetic fibers are like slick plastic; most dyes just slide off. They require disperse dyes. These dyes work by dissolving into the fiber under very high heat, which temporarily opens up the tight polymer chains.
You need near-boiling water, often for 30 minutes or more. This process is demanding and can be risky for structured items like blazers, as the heat can distort them.
For home dyers, specialized kits like iDye Poly or Rit DyeMore are formulated for this challenge. They work reasonably well on nylon but require extreme care and constant, hot agitation for polyester to avoid a streaky, uneven result.
The Natural Dye Experiment
I often get questions about dyeing with black beans or blackberries. It’s a wonderful experiment, but you must manage expectations. These materials do not produce a true, lightfast black.
Black beans typically give a soft blue-grey. Blackberries yield a lovely purple that fades to lavender. Achieving a real black with natural dyes is a multi-day process requiring an iron modifier, like iron sulfate, which “saddens” other colors to a dark grey-black.
Always use a separate pot for natural dyeing with iron, and wear gloves and a mask when handling the modifier powder, as it can be irritating.
The Step-by-Step Dyeing Guide: From Pot to Fixative
Now, let’s get your hands dyed. Here are the core methods. Your workspace should be well-ventilated. Wear old clothes, gloves, and a dust mask when handling dye powder.
Method 1: Dyeing Cotton and Linen with Fiber-Reactive Dye
This is a cold-water, bucket-based method perfect for yardage or t-shirts.
You will need:
- Fiber-reactive dye (like Procion MX Black)
- Soda ash (the fixer)
- Non-iodized salt
- Two large plastic buckets
- Rubber gloves and a particle mask
- A dedicated measuring cup and spoon
The Process:
- Wash your fabric to remove any finishes. Keep it wet.
- In Bucket 1, dissolve your dye powder in a little warm water to make a smooth paste, then add more water.
- Place the wet fabric in Bucket 2. Add the dissolved dye and enough water to move the fabric freely.
- Stir for 10 minutes. Then, sprinkle in the salt and stir for another 10. The salt helps drive the dye toward the fiber.
- Dissolve the soda ash in warm water. Add this solution to the bucket. This step starts the permanent chemical reaction, so stir consistently for the next 30 to 60 minutes.
- Rinse the fabric under cool water until it runs clear. Wash it separately in warm water with a little soap to remove any unattached dye, then dry.
Method 2: Dyeing Silk and Wool with Acid Dye
You will use a pot on the stove. Dedicate this pot to dyeing only.
You will need:
- Acid dye (like Jacquard Acid Dye in Jet Black)
- White vinegar
- A large stainless steel pot
- Candy thermometer
- Tongs for gentle handling
The Process:
- Soak your clean, pre-wetted fabric in a pot of warm water with a cup of vinegar for about 30 minutes.
- In a separate jar, dissolve the dye powder in a small amount of very hot water.
- Heat the pot with the fabric to your target temperature (180°F/82°C for wool, 160°F/71°C for silk). Do not boil.
- Add the dissolved dye. Stir very gently to avoid felting wool. Maintain the temperature for 30 minutes, stirring occasionally.
- Turn off the heat. Let the pot cool completely to room temperature with the fabric still inside. This slow cooling is crucial; it allows the dye to fully bond and prevents shocking delicate fibers.
- Rinse the fabric in lukewarm water with a pH-neutral soap until the water runs clear.
Method 3: Using an All-Purpose Dye for Blends
This is your best option for a 50/50 cotton-polyester blend t-shirt, but know it’s a compromise. The dye will take well to the cotton but only stain the polyester.
The result will be a lighter, less vibrant black, and the polyester threads may appear as a greyish hue over time. Follow your dye brand’s instructions for the stovetop or washing machine method. The key is constant, vigorous agitation to help the dye penetrate as evenly as possible.
A quick but important note: you might wonder about dyeing fabric black with India ink. Do not do this. India ink is designed for paper. On fabric, it sits on the surface like paint, will crack, feel stiff, and rub off. It is not washable and will ruin your project.
Fixing Common Problems: Uneven Color, Fading, and Mistakes
Even with careful planning, things can go a bit sideways. Here’s how to diagnose and solve the most frequent issues I see.
Problem: Uneven, Splotchy Black
You pull your fabric from the dye bath, only to find it’s a patchwork of dark and light areas. This is almost always a preparation or process issue. The most common cause is fabric that wasn’t perfectly clean and wet before dyeing. Any oil, dirt, or sizing acts as a resist. Other culprits are using too little dye powder, not stirring the fabric enough in the bath, or the water temperature being too low for the dye type to penetrate properly.
The fix is to re-dye the entire piece. Start from scratch: wash the fabric with a strong detergent to remove the failed dye attempt, then re-wet it thoroughly. Mix a fresh dye bath, ensuring it’s hot enough for your fiber, and stir constantly for the first 10-15 minutes.
Problem: Dye Washes Out (Poor Colorfastness)
Your black looks great until the first wash, when it turns your washing machine water gray. This isn’t fading; it’s dye loss. This happens when the dye molecules fail to form a permanent bond with the fiber. You likely used the wrong dye type (like an all-purpose dye on polyester) or, more commonly, skipped the crucial chemical fixative step. Reactive dyes need soda ash. Acid dyes need an acidic environment from vinegar or citric acid. Without it, the dye just sits on the fiber surface.
Wash the item separately in cold water with a dye-trapping sheet for now. To fix it permanently, you must re-dye using the correct fixative for the dye and fiber. Follow the instructions to the letter this time, ensuring the fabric soaks in the fixative-enhanced bath for the full recommended time.
Problem: The Black Looks Brown, Navy, or Charcoal
You wanted jet black but got a murky, off-tone shade. This is a color theory problem. Black dye is rarely just black; it’s a dense mix of other pigments. A “green-based” black over a pinkish fabric can yield a muddy brown. Starting with a deep red or navy fabric will also shift your final color.
For colored starting fabrics, use a color remover first to strip as much original dye as possible. But no amount of bleach or time will get you a clean slate. Then, choose a “neutral” or “blue-based” black dye, and use at least double the recommended amount. For a true, deep black, you need an overwhelming concentration of dye molecules to mask everything beneath.
A quick note on spray dyes: You might see “black fabric dye in spray” cans. These are for craft projects, Halloween costumes, or temporary effects. Spray dyes coat only the surface, create a stiff hand, and will wash out or rub off completely. They cannot achieve the saturated, permanent black you want for a garment.
Care for Your Newly Black Fabric: Making It Last
The work isn’t over once the dye is set. How you handle the next few washes determines the long-term richness of your black. This protocol minimizes dye loss and protects the fibers.
- Initial Rinse. After dyeing, rinse the fabric in cool water until the water runs completely clear. This removes any excess, un-bonded dye. I do this in a clean sink or bucket, not in my washing machine, to avoid staining.
- First Wash. Wash the item alone in your machine. Use cold water and the gentle cycle with a mild, neutral pH detergent (like one for wool or delicates). This first wash will still catch some loose dye, so don’t add other clothes.
- Drying. Always air dry your newly dyed black items away from direct sunlight. The UV rays in sunlight break down dye molecules rapidly, causing fading. High heat from a dryer can also set in shrinkage and stress the fibers.
- Ongoing Care. Wash in cold water with similar dark colors. Turn garments inside out to minimize surface abrasion. Every few washes, use a color-safe laundry booster to help suspend any stray dye particles in the water, preventing them from re-depositing on your fabric.
Here’s the simple science behind these steps. Heat and mechanical agitation (the tumbling of the wash) cause tiny scales on natural fibers to open and synthetic fibers to relax their structure. This physical change can release dye molecules that aren’t fully locked in. Cold water and gentle cycles keep the fiber structure more stable, holding the dye tight inside where it belongs.
When NOT to Dye: A Textile Expert’s Risk Assessment

Before you heat a single pot of water, let’s talk about what not to touch with dye. Knowing when to walk away saves your favorite items and your sanity. I assess every project through this lens of risk versus reward.
-
Do not dye dry-clean only garments. That label is a major warning sign. The outer fabric might be fine, but the inner materials are a mystery. A sleek polyester lining can melt or shrink violently in hot dye water. Interfacings and fusibles (the stiffeners in collars) often dissolve, leaving you with a limp, gummy mess. The risk of ruining the garment’s structure is extremely high, especially when dyeing delicate fabrics.
-
Do not dye fabric with an unknown fiber content. Guessing the fiber is a recipe for wasted time and dye. A fabric that feels like cotton might be rayon, which needs a different dye type. That “wool” sweater might be acrylic. Always check the care label first. If it’s missing, do a simple burn test on a hidden seam allowance. Cotton smells like burning paper, synthetics like polyester melt and bead, and wool smells like burning hair.
-
Do not dye fabrics with specialty finishes. Waterproof, stain-resistant, or wrinkle-free coatings are designed to repel liquids. The dye will simply bead up and run off, creating a blotchy, uneven result. You can often feel these finishes as a slight, stiff, or waxy hand on the fabric.
-
Do not dye leather, suede, or fur. These materials require specific, often acidic, dyes and professional-grade techniques. Attempting to dye them in a pot with fabric dye will result in a stiff, cracked, and discolored disaster. The process is entirely different from dyeing woven or knitted textiles.
-
Do not use all-purpose or fiber-reactive dyes on 100% polyester, acetate, or spandex. These dyes are chemically designed to bond with natural fibers like cotton, wool, and silk. Polyester and acetate require disperse dyes and a sustained, high heat (often near boiling) that is difficult to achieve evenly at home. Spandex (Lycra, elastane) will not accept these dyes at all. Using the wrong dye means the color washes straight out, leaving you with the original fabric.
-
Do not attempt to dye a dark fabric a lighter color at home. The question “can you dye black fabric white?” comes up often. The answer is a firm no, not without industrial-scale bleaching and stripping agents. Dye adds color, it cannot remove it. You can only go darker, and even then, the original color will influence the final shade (dyeing navy blue black is easier than dyeing red black).
Handling Pro-Tip: The Reality of Blends
What about that 60% cotton / 40% polyester t-shirt? You can dye it, but you must manage your expectations. The cotton fibers will absorb the black dye beautifully. The polyester fibers will remain their original color (often a light grey or off-white). The result is not a solid, jet black, but a deep, heathered charcoal. I think this effect can be quite stylish, but you need to expect it. For a truer solid black on blends, you need a dual-action dye formulated for both fiber types, or the patience for a two-step dyeing process — especially when dyeing synthetic fabrics.
Wearing Your Hand-Dyed Black
The single most important rule is this: match your dye type to your fabric’s fiber content. A cotton shirt needs a different dye than a polyester jacket, and getting this wrong is the main reason home dye jobs fail. Always start by checking the care label to confirm what you’re working with before you even open a dye packet.
Taking the time to dye a garment is an act of care that extends its life, a practice I consider fundamental to responsible ownership. Every project deepens your practical knowledge of fabric science, from how different fibers accept color to how your newly black item will need to be washed and cared for moving forward.
Expert Resources and Citations
- How to Dye Fabric Black: 12 Steps (with Pictures) – wikiHow
- r/dyeing on Reddit: Rit Dye Black
- How to Get as Dark a Color as Possible – Rit Dye
- How To Dye Cotton Fabric Black Naturally – Sew Historically
- 3 Natural Dyes You Have in Your Pantry: Turmeric, Onions & Black Beans
- Amazon.com: Natural Black Fabric Dye
Florian is a high fashion blog writer, fashion and fabric expert and a keen expert in fabric, clothing and materials. She has worked in large textile and fashion houses for over 10+ years, engineering and working with various fabric types and blends. She is an expert when it comes to questions on any and all kinds of fabrics like linen, cotton, silk, jute and many more. She has also traveled around the world studying traditional fabrics and aims to bring them into the modern fashion use.