
What Are the Best Sewing Stitches and Techniques for Stretch and Knit Fabrics?
You’re holding a soft, stretchy knit and dreading the puckered seams and popped stitches that can ruin it. I get it. With the right setup, your machine will glide through knits like a hot knife through butter.
This guide walks you through the fundamentals, covering the best machine stitches to use, why your needle choice is critical, how to adjust tension for a professional finish, and the finishing techniques that make all the difference.
Executive Summary: Knit Fabric Sewing at a Glance
The single rule for sewing knits is simple. A knit seam must stretch with the fabric, or it will snap the first time you move. Every choice you make with thread, stitch, and needle follows from this.
You will likely work with these common types:
- Cotton Jersey: Breathable and soft, but its loops can sag over time. It often benefits from a cotton/polyester blend thread for stability.
- Wool Interlock: Warm with excellent, springy recovery. Use a cool iron and press carefully to avoid matting the fibers.
- Polyester Athletic Knit: Durable and moisture-wicking, with high stretch. It’s less prone to shrinking but can be slippery to handle.
- Nylon/Spandex Blends: Offers the highest degree of stretch and recovery, common in swimwear and activewear. It requires stitches that can stretch over 100%.
If you are new to knits, start with these three forgiving stitch options:
- A narrow Zigzag stitch (width 1.0, length 2.5).
- The Lightening Bolt stitch (a multi-step zigzag).
- A Twin Needle for a professional, stretchy finish on hems.
Your thread choice is as critical as your stitch. Always use a polyester core thread or a specialty stretch thread like wooly nylon. These threads have inherent give. A standard cotton thread has almost none and is likely to break.
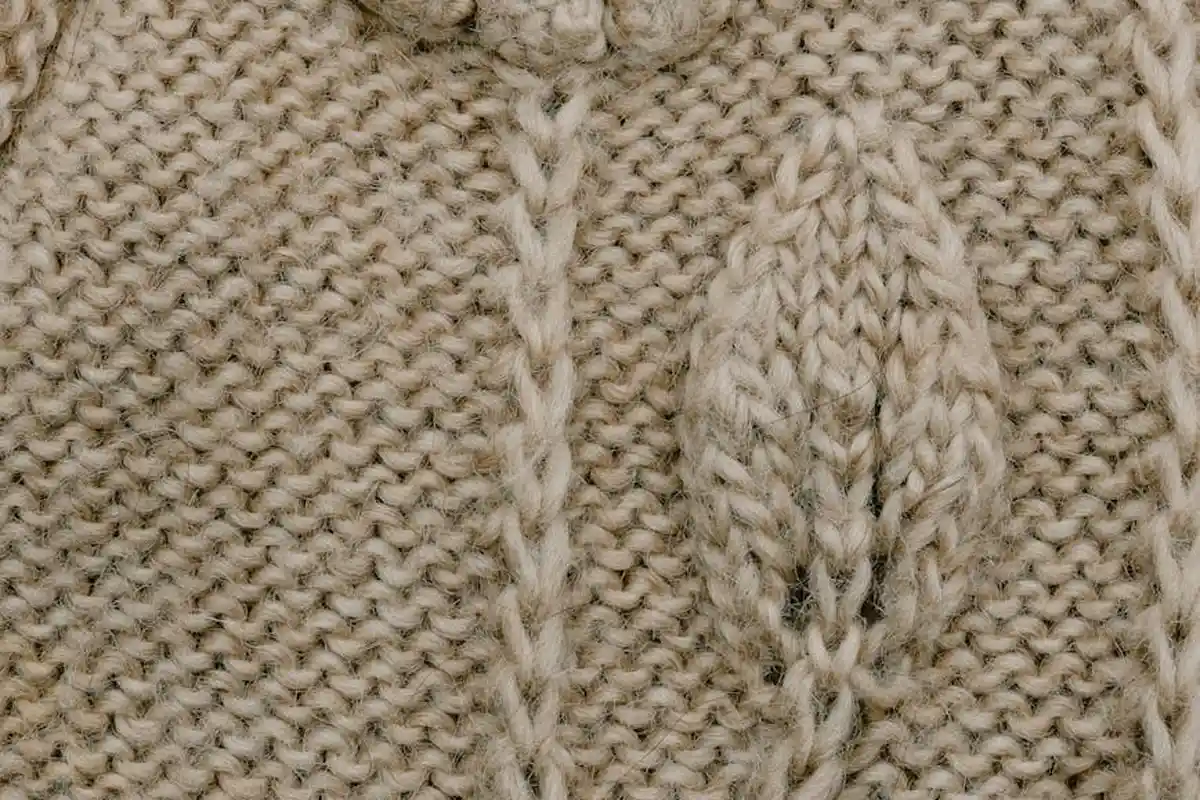
What is a Knit Fabric, Really? A Textile Science View
Think of the difference between a knitted sweater and a woven denim jacket. That is the heart of it. A woven fabric is made from threads interlaced at right angles, like a basket. This creates stability but little inherent give. A knit is made from a single continuous yarn looped around itself, row after row.
Those interlocking loops are why knit fabric stretches. They can pull apart and then spring back together. This structure also gives knits their characteristic drape-they flow over curves instead of standing away from the body like a stiff woven.

The fiber content then layers specific properties onto this looped structure:
- Cotton Knits: Breathable and absorbent, perfect for everyday tees. However, pure cotton lacks memory, so a jersey can stretch out and not fully rebound.
- Wool Knits: Naturally temperature-regulating and have superb recovery due to the crimp in the wool fiber. They resist sagging but require gentle, cool washing to prevent felting shrinkage.
- Polyester & Nylon Knits: These synthetic fibers are strong, resist wrinkles, and dry quickly. They hold their shape well but can be less breathable. Blends with spandex (also called Lycra or elastane) add significant stretch.
- Blends (e.g., Cotton/Polyester): Very common. The cotton offers comfort, while the polyester adds durability, reduces shrinkage, and improves shape retention.
Before you cut or sew, you need to know how much your fabric stretches. Here is a simple, lab-tested method you can do at home. To determine the stretch of your fabric, perform the 4-inch stretch test. Mark a 4-inch section on your fabric (unstretched, not on the selvage). Gently pull the fabric widthwise until you feel resistance. Measure how far the 4 inches stretches. If it stretches to 5 inches, it has 25% stretch (1 inch of stretch ÷ 4 original inches). If it stretches to 8 inches, it has 100% stretch. This number tells you what kind of garment the fabric is suited for and how elastic your seams need to be.
Why a Regular Straight Stitch Fails on Knits (The Physics of a Broken Seam)
Can you use a straight stitch on stretch fabric? For the main seams that hold your garment together, the answer is a firm no. I have spent hours in the lab and at my machine testing this, and the result is always the same: broken threads and failed seams. Reserve your machine’s straight stitch solely for very cautious topstitching on stable areas, never for joining pieces that need to stretch.
Here is exactly what happens. A standard straight stitch forms a tight, rigid line of thread through the fabric. Knit fabrics, whether a bouncy cotton jersey or a sleek athletic blend, are engineered to stretch because their looped structure can expand and contract. Jersey and interlock are two common types of stretch knit fabrics. When you move and the fabric stretches, those unyielding threads cannot elongate with it. The tension becomes too great, and the threads snap. You are left with a popped seam, often right under the arm or across the back.
Think of it like two different objects. A straight stitch is a chain-strong in a straight line, but if you pull it from the sides, the links don’t give and it breaks. A proper stretch stitch, which we’ll cover next, acts like a spring. It elongates when pulled and springs back to its original shape, moving in harmony with your fabric. Your goal is to match the elasticity of your thread and stitch to the elasticity of your knit, especially when working with spandex or stretch fabrics.
For that rare instance of topstitching, if you must use a straight stitch, follow these rules. Use a polyester thread, which has more give than cotton. Lengthen your stitch slightly to about 3mm. Always, always test first on a fabric scrap, stretching it as hard as you would in wear. If you see any thread snapping or the fabric puckering, stop immediately and switch to a stretch-friendly technique.
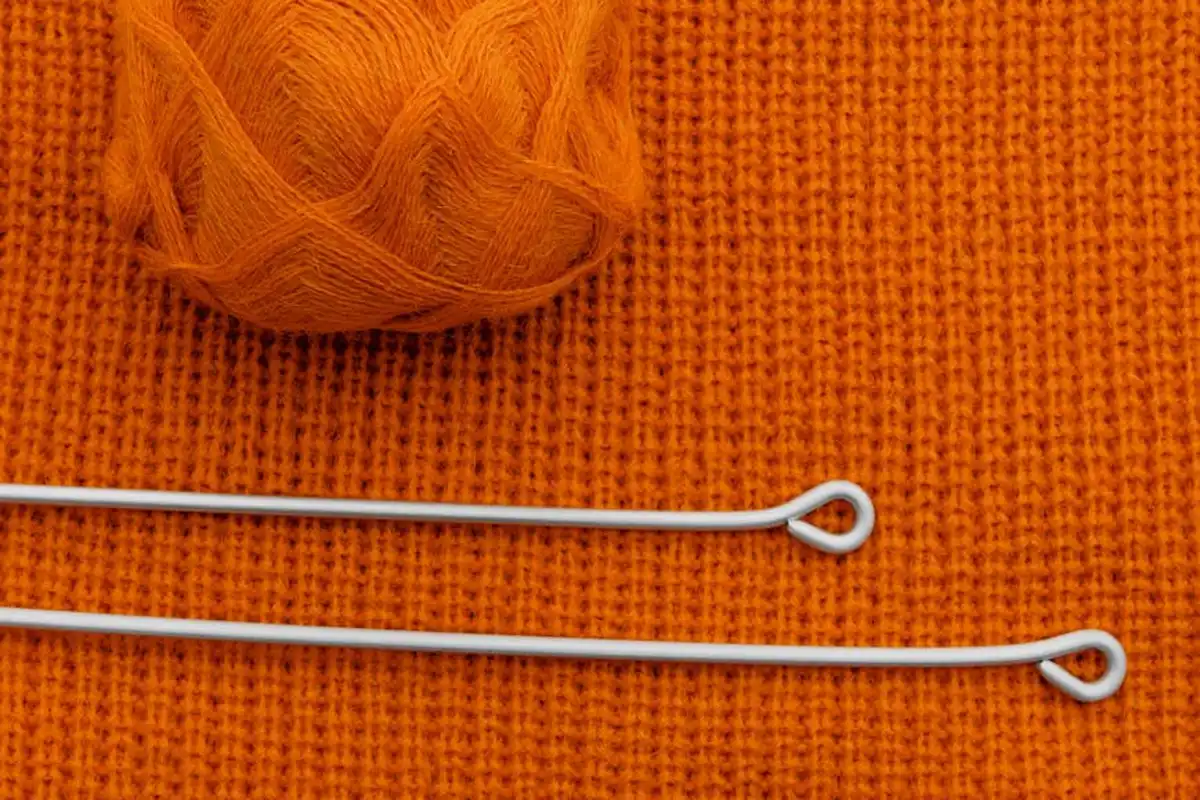
Your Toolkit: Needles, Thread, and Feed Dogs for Success
Think of sewing a knit like handling a delicate sponge. You don’t want to poke holes that tear. You want to work with its structure. Your standard “sharp” needle is the wrong tool. It pierces and severs the loops of yarn that give a knit its stretch, leading to snags and permanent damage. For stretch fabrics, you must swap to a specialized needle designed to slide between the fibers, not through them.
Needles: The First Point of Contact
A ballpoint needle, sometimes called a jersey needle, has a slightly rounded tip. I picture it like the end of a ballpoint pen. It pushes the loops of the knit aside as it enters the fabric. This preserves the integrity of the yarn and prevents runs, especially in fine jerseys and rib knits. For fabrics with very high spandex or lycra content-think athletic wear or swimsuit material-upgrade to a stretch needle. It has a deeper scarf (the indentation above the eye) which helps prevent skipped stitches when the fabric is stretching under the needle.
- Ballpoint/Jersey: Use for most cotton jerseys, interlocks, and stable knits.
- Stretch: Use for slippery, highly elastic fabrics like synthetic performance knits.
- Pro Tip: Change your needle after every 6-8 hours of sewing on knits. A dull needle is a primary cause of skipped stitches and fabric damage.
Thread: The Flexible Backbone
Your stitch needs to stretch with the fabric. If it doesn’t, the thread will snap the first time you pull the garment on. 100% cotton thread has little to no give and is a poor choice here. A good quality polyester thread is my standard recommendation. It has a slight inherent elasticity, much like the polyester fibers in many knits themselves. For seams that need to withstand extreme stretching, like on a swimsuit or dancewear, I use wooly nylon in my serger loopers. This fluffy, multi-filament thread is incredibly strong and elastic. You can also use it in your regular machine’s bobbin for a stretchy, barely-there topstitch.
- All-Purpose Polyester: Your reliable go-to for most knit sewing.
- Wooly Nylon: The secret weapon for high-stress seams and invisible hemming.
Machine Feet: Managing the Feed
Knits want to stretch and move under the presser foot, which can cause the top layer to feed faster than the bottom-a recipe for wavy, distorted seams. A walking foot has its own set of feed dogs that move in sync with your machine’s. It “walks” the layers together evenly. This is indispensable for sewing stable sweater knits or matching stripes. For most zigzag and stretch stitches, your basic zigzag foot works perfectly. Just reduce the presser foot pressure if your machine allows; this lessens fabric drag.
- Walking Foot: Essential for laminates, bulky knits, and perfect pattern matching.
- Zigzag Foot: Perfectly suitable for most everyday knit sewing.
Stabilizers: Your Temporary Assistant
Some areas are notoriously tricky. Necklines, shoulder seams, and zipper openings on knits can stretch out of shape during sewing. That’s where a temporary stabilizer saves the day. You can baste a strip of wash-away or tear-away stabilizer to the seamline, stitch right over it, and then remove it. This trick is also fundamental when learning how to manage stretch in fabric, especially when embroidering on knits, as it completely prevents the base fabric from puckering or distorting under the dense embroidery stitches.
- Wash-Away: A clear film or mesh that dissolves in water. Ideal for any area that will be washed.
- Tear-Away: A paper-like material you carefully tear off after stitching. Great for areas that won’t be under stress.
Always test your needle, thread, stitch, and stabilizer combination on a scrap of your actual fabric first. This two-minute step tells you everything you need to know about your tension and the finished seam’s stretch before you touch your garment.
The Stitch Library: Choosing the Right Stretch for Your Fabric
Think of your sewing machine stitches as tools in a toolkit. For wovens, a straight stitch is your trusty hammer. For knits, you need a set of flexible, spring-loaded tools that move with the fabric. The right stitch prevents popped seams and lets your garment stretch and recover, wash after wash.
I organize these stitches by what your machine can do, from the basic zigzag on a simple machine to the professional finish of a serger.
Basic Machine Stitches: Your Foundation
If you have a standard sewing machine, these are your go-to stitches for constructing sturdy, stretchy seams.
Narrow Zigzag (Width 0.5-1.5, Length 2.5-3mm)
This is the universal workhorse and my first recommendation for beginners. A straight stitch is a rigid line of thread. When the knit stretches, that line has no give and will snap. The zigzag creates little “V”s of thread that can open and close like an accordion.
For stable knits like ponte, scuba, or double knits, a narrow zigzag is often all you need for strong, flexible seams.
Start with a width of 1.0 and length of 2.5mm on a fabric scrap. The stitch should look neat and flat, not like a wide, loopy satin stitch. If the fabric puckers, lengthen the stitch slightly. This stitch answers the common plea for simple “stretchy knit stitches for beginners.”
Advanced Machine Stitches: For Heavy-Duty Stretch
Modern computerized machines have stitches specifically engineered for high-performance fabrics.
Lightning Bolt / Triple Stretch Stitch
This stitch looks like a zigzag that staggers forward and backward. It’s sometimes called a “stretch stitch” on machine dials. The mechanism is brilliant. It places three stitches for every one forward movement, creating a dense, elastic web of thread.
This is my top choice for seams that undergo extreme stress, like the crotch and side seams of leggings, swimwear, or athletic tops.
It uses more thread and is very difficult to unpick, so practice first. But for recovery and durability on spandex blends, nothing in the basic stitch library beats it.
Twin Needle (Double Needle) Hem
A twin needle creates two parallel rows of straight stitches on the top of the fabric. The secret is on the underside: the bobbin thread zigzags between these two top threads, forming a stretchy ladder.
You get the professional, ready-to-wear look of twin topstitching with built-in elasticity. This is the perfect, clean finish for hemming T-shirts, jersey dresses, and sleeve cuffs.
You need two spools of top thread and one bobbin. Use a ballpoint or stretch twin needle. Go slowly over thick side seams to avoid skipping stitches. The result is so satisfying.
Sergeant Stitches: The Professional Standard
A serger (overlocker) cuts, sews, and finishes the seam allowance all in one pass. It’s the engine of knit garment production.
Serged / Overlocked Seam (3-thread vs. 4-thread)
The looped threads of a serged seam have incredible inherent stretch and strength. It also neatly encases the raw edge, preventing fraying on cut knit edges.
A 3-thread overlock is the gold standard for most knit construction, offering a great balance of stretch, speed, and fabric efficiency.
A 4-thread safety stitch adds a second line of straight stitching for extra security, making it ideal for heavier knits or areas you want to reinforce. While a serger is a dedicated tool, its output is why store-bought knitwear feels so durable and neat inside.
Hand Stitches: For Repairs and Finishing Touches
You can absolutely hand sew stretch fabric for repairs or delicate finishing. The key is avoiding a tight, straight stitch. It’s especially important to consider when hemming stretch fabric.
The Stretch Backstitch & Catch Stitch
For repairing a small seam split by hand, use a stretch backstitch. Take a small stitch forward. Instead of coming back to meet the previous stitch, leapfrog a tiny bit ahead. This creates a slight zigzag in the thread path that allows for movement.
For securing hems or facings invisibly, the catch stitch (or herringbone stitch) is perfect. You work from left to right, taking tiny horizontal picks in the main fabric and the hem. The thread crosses between them, creating a flexible “X” that moves with the fabric.
When hand sewing, always use a polyester thread, as its slight springiness outperforms cotton thread on knits. This practical method is the real answer to “how to hand sew stretch fabric” for lasting repairs.
Handling Pro-Tip: Controlling Knit Fabrics Under the Needle
The biggest mistake I see is pulling on a knit as you sew. Your machine’s feed dogs are designed to move the fabric at a consistent pace. When you tug, you stretch the stitches as they form. Once you release, the fabric snaps back to its original shape, but the overstretched thread does not. This creates a wavy, puckered seam that can snap when worn.
Guide the fabric gently with your hands in front of and behind the presser foot, but let the machine do the feeding work. Think of it like holding a child’s hand on a walk-you’re there for stability, not to drag them.
Cutting for Success: No Pins, No Distortion
How you cut a knit determines how it behaves during construction. Pins can distort the loops of the fabric, creating little hills and valleys that throw your pattern pieces off. For stable knits, use pattern weights. For slippery jerseys or slinky synthetics, I always cut a single layer at a time. Place the first pattern piece, cut, then use that cut piece as a guide to perfectly match and cut the second. It takes a moment longer but guarantees symmetry.
Cutting single layers prevents the fabric from shifting and ensures your left and right sides are identical.
Understanding Grainline in a Knit World
Knits don’t have a straight grain like woven cloth. Instead, they have rows of loops called ribs or wales. These vertical rows run parallel to the selvage (the finished edge). The direction of greatest stretch is almost always across these ribs, from one side of the fabric to the other. This differs significantly from woven and nonwoven textiles, where stretch behavior is influenced by the fiber arrangement rather than loop structure.
Where you place your pattern changes everything. Cutting with the greatest stretch going around your body (horizontally) gives you the comfort and fit of a t-shirt. Cutting with the stretch running vertically changes the drape and can limit recovery, leading to a baggy garment. Always check your pattern layout guide.
The direction you cut a knit directly controls its stretch, recovery, and how the finished garment will hang on your body.
The Power of Pressing (Don’t Drag!)
Pressing knit seams as you sew is non-negotiable. It melds the stitches into the fabric and creates a flat, professional finish. Use lots of steam. Place the iron down on the seam, hold it for a few seconds to let the heat and moisture work, then lift it straight up. Never slide or drag the iron. Dragging can permanently stretch and distort the knit, creating a warped seam that you can’t fix.
A good steam press sets the stitches and smooths the seam allowance without distorting the fabric’s careful recovery.
Step-by-Step Techniques for Common Knit Tasks
Ready to put needle to fabric? Let’s walk through the core techniques. I always start by testing my stitch settings on a scrap of the exact fabric I’m using, with the same number of layers. It takes two minutes and saves a lot of frustration.
Seams: The Foundation of Your Garment
A straight stitch on knit fabric is a recipe for popped seams. It can’t stretch with the fabric. You need a stitch that moves. My go-to is a medium-width, medium-length zigzag. It creates a seam that can expand and recover like the fabric itself.
For a more refined look, use a lightning bolt stitch (sometimes called a stretch stitch or triple stitch). It looks like a jagged lightning bolt on your machine’s diagram. This stitch sews forward, back, and forward again over the same spot, creating an extremely durable and elastic seam. It’s perfect for areas of high stress, like the crotch or underarm.
Set your machine to a zigzag (width 2.0-3.0, length 2.0) or a lightning bolt stitch, and always use a ballpoint or stretch needle.
For seam allowance, I never go below ½ inch (1.3 cm). A ⅝ inch (1.6 cm) allowance is even better. The extra fabric gives you more stability when sewing and allows for adjustments if the fabric relaxes. Use a walking foot if you have one; it feeds the layers evenly to prevent the lower layer from stretching out as you sew.
Hems: A Clean, Professional Finish
A wavy, puckered hem is the classic sign of a knit garment sewn with the wrong technique. The goal is a hem that lies flat but stretches with the fabric. Here are three reliable methods, from simplest to most professional.
- Twin Needle Hem: This is my top recommendation for home machines. It creates two parallel rows of straight stitching on the top and a zigzag on the bobbin side, which provides the necessary stretch. Use a universal or ballpoint twin needle. Simply fold up your hem and stitch from the right side. The secret is to not pull the fabric taut as you guide it.
- Narrow Zigzag Hem: If you don’t have a twin needle, a very narrow, short zigzag (width 1.0, length 1.0) works well. Fold and stitch as you would with a straight stitch. The tiny zigzag is almost invisible and offers just enough give.
- Coverstitch Hem: This is the professional finish you see on store-bought tees, requiring a coverstitch machine. It makes two or three lines of parallel stitching on top with a looper thread on the back that looks like a serged edge. It lays perfectly flat and is supremely stretchy.
For a flawless twin needle hem, always test on a scrap first and use a quality polyester thread, which has more inherent stretch than cotton.
Gathering: Creating Soft Fullness
You cannot gather stretch fabric with a long straight basting stitch. The thread will break the first time you try to adjust the gathers. The solution is to use a strong cord as a drawstring inside a zigzag “casing.”
I use smooth, strong crochet thread or unwaxed dental floss. Set your machine to a wide (4.0-5.0), long (4.0) zigzag. Do not stitch on the cord. Instead, lay the cord directly on the fabric along the seam line you want to gather. Zigzag over the cord, being careful not to catch it with the needle.
Once stitched, hold the fabric at one end and gently slide it along the cord to create even gathers.
Distribute the fullness as needed, then pin and stitch your gathered piece to the corresponding garment section using your preferred stretch stitch. You can then pull the cord out from the zigzag casing completely and reuse it.
Necklines and Armholes: Stabilize to Prevent Stretching
These curved openings are vulnerable. Over time, they can stretch out from the weight of the fabric and from putting the garment on and taking it off. The fix is to add stability during construction.
For most knit necklines (crewnecks, scoopnecks), I stabilize with clear elastic. It’s thin, soft, and virtually invisible. Cut the elastic to the exact length of the neckline seam (do not stretch it). As you attach the neckband or facing, sandwich the elastic between the layers and sew it in with your stretch stitch. The elastic bears the stress, not the fabric.
For armholes and some necklines, a self-fabric band is a great stabilizer. Cut a strip of the same fabric, about 1 to 1.5 inches wide, on the cross-grain (for more stretch). Fold it in half lengthwise. When you attach a sleeve or finish an armhole, you sew this band into the seam. It acts like a gentle, integrated stay, preventing the opening from losing its shape. Always stabilize necklines and armholes during construction; it’s much harder to fix a stretched-out opening later.
Troubleshooting: Fixing Wavy Seams and Skipped Stitches
Even with the right tools, knits can be tricky. When a seam goes wrong, it’s usually one of these three issues. Don’t worry—I’ve fixed them all in my own studio. One common problem is when seams spiral on knit fabrics.
Problem: Wavy, Stretched-Out Seams
You finish a seam, press it open, and it looks rippled like a potato chip. The fabric itself is distorted.
The cause is almost always physical stretching during sewing. Knit fabric is a matrix of interlocking loops. A standard presser foot can push the top layer forward while the feed dogs pull the bottom layer, stretching those loops out of shape. Think of it like tugging on a spring-it elongates and doesn’t fully bounce back.
Here is how to fix and prevent it:
- Use a Walking Foot: This is my number one recommendation. A walking foot has its own set of feed dogs that move in sync with your machine’s, gripping the top and bottom layers of fabric evenly. It feeds the knit without pulling.
- Sew with Tissue Paper Underneath: If you don’t have a walking foot, this is a brilliant hack. Place a sheet of tissue paper or stabilizer under your fabric as you sew. The paper provides grip for the feed dogs and is torn away gently after stitching. It acts like a temporary backing.
- Steam Press Aggressively: For a seam that’s already wavy, grab your iron. Hold the steam iron just above the distorted seam and blast it with steam. The heat and moisture help the synthetic or natural fibers recover their original loop shape. Gently press the seam flat without dragging the iron. You’ll often see the waves relax and disappear.
Problem: Skipped Stitches or Thread Bunching
The machine makes a clicking sound, leaves gaps in the stitch line, or tangles the thread into a nest on the underside. This is a needle and thread issue.
A sharp needle is the enemy of knit fabric. A universal or sharp needle is designed to pierce woven threads. It can deflect off the elastic threads in a knit or miss the loop entirely, causing a skip. A ballpoint or stretch needle has a rounded tip that pushes between the knit loops without breaking them.
Follow this fix sequence:
- Install a New Ballpoint/Stretch Needle: Make this your first step. I change my needle for every new knit project. A size 75/11 or 80/12 is a good start for most jersey.
- Rethread the Machine Completely: Top and bobbin. An incorrect threading path is a common cause of bunching.
- Test Tension on a Scrap: Sew a line on a double layer of your project fabric. The ideal stitch has loops locked in the middle of the fabric layers. If you see the bobbin thread on top, lower the upper tension. If you see the top thread underneath, raise it slightly.
Problem: Stitches Pop When Fabric Stretches
You try on your garment and hear a faint *ping* as a seam stretches-a thread has broken. This happens after sewing, during wear.
A straight stitch has zero stretch. When the fabric stretches, the taut, inelastic thread is the weakest link and it snaps. A short, narrow zigzag doesn’t have enough give either. The stitch itself needs to be able to elongate.
The fix is to use the right stitch from the start:
- Switch to a Dedicated Stretch Stitch: Use a narrow zigzag (width 0.5-1.0, length 2.5-3.0) or a dedicated stitch like a lightning bolt or triple stitch. These stitches are designed to elongate with the fabric.
- Always Test on a Scrap First: Sew a line on a scrap, then stretch it firmly with your hands. You should see the stitches expand without breaking or the fabric puckering. This simple 30-second test saves hours of seam ripping later.
Care & Handling Protocol: Washing and Drying Your Knit Creations
You just put hours of love into sewing that stretchy fabric. Now, the real test begins: the first wash. Treating all knits the same is a fast track to disappointment. A shrunken cotton tee, a felted wool sweater, a saggy poly-blend dress-I’ve seen it all in the lab. The single most important rule is to base your care on the fiber content first, and the knit structure second. This focus on material science is what makes for clothing that lasts.
For Cotton Knits: Manage Shrinkage & Sag
Cotton jersey is a classic, but it’s prone to both shrinkage and distortion. The fibers swell with water, and the heat of agitation and drying causes the yarns to tighten permanently. I pre-wash my cotton knits in cool water on a gentle cycle to get most of the shrinkage (typically 3-8%) out before I even cut my pattern. For finished garments, stick with cool water washes. A tumble dry on low is okay, but for a perfect fit, lay them flat to dry. This prevents the shoulders from stretching on a hanger and the weight of the water from pulling the knit out of shape.
For Wool Knits: Gentle Hands Preserve Shape
Wool is a protein fiber with scales. Agitation, heat, and sudden temperature changes cause those scales to lock together, a process called felting. Your handmade sweater will shrink and become dense. To prevent this, hand wash is non-negotiable. Fill a basin with cool water and a pH-neutral wool wash. Submerge the garment, press gently to soak, then rinse in water of the same temperature. Never wring or twist. To dry, roll the knit in a clean towel to press out water, then reshape it and lay it completely flat on a drying rack. This method preserves the stitch definition and the garment’s original dimensions.
For Synthetic Knits (Polyester/Nylon/Spandex): Guard Against Heat & Pilling
Synthetics are less fussy about water temperature, but they are extremely sensitive to high heat. The spandex (or elastane) fibers that give the fabric its stretch can be damaged and lose their spring above 150°F (65°C). This leads to permanent bagginess. Wash in cool to warm water and always use a low-heat or no-heat dryer setting. Pilling is the other enemy-those little fabric balls form from surface friction. Turning synthetic knits inside out before washing significantly reduces pilling by protecting the outer face. A mesh laundry bag adds another layer of protection.
Your Universal Knit Care Routine
No matter the fiber, these three steps will extend the life of any knit you make or own:
- Turn it inside out. This protects the right side of the fabric from abrasion and fading.
- Use a gentle, neutral detergent. Avoid heavy surfactants and optical brighteners meant for cottons, especially on wool and silk.
- Skip the fabric softener entirely. It leaves a waxy coating on fibers. On synthetics, it traps odors. On natural fibers, it blocks the breathability and moisture-wicking properties you chose the fabric for.
Think of care as the final, crucial step in your sewing project. Getting it right means your creation will look and feel as good after twenty washes as it did the day you finished it.
Finishing Strong with Knits
Your stitch choice must honor the fabric’s stretch. I always test my stitch on a scrap first, washing and pulling it hard to see if the thread or seam gives way. A stretch stitch that moves with the fabric will outlast the strongest straight stitch every time.
Treat the garments you make with knowledge. Learn how your chosen fibers-like wool, silk, or polyester blends-react to heat, agitation, and dye. Think of your stitches as flexible joints in a moving system; caring for the whole fabric keeps your hard work looking new through many washes and wears.
Sources and Additional Information
- Types of Stretch Stitches for Sewing Knits including Video – Melly Sews
- Choosing a Stretch Stitch for Sewing Knit Fabric – Sew PDF
- How to Sew Knits and Stretch Fabrics – The Sewing Revival
- Stretch Stitch – Best Stretchy Stitch for Sewing Knits | TREASURIE
- Types Of Stretch Stitches On A Sewing Machine And When To Use Them
Florian Ventura
Florian is a high fashion blog writer, fashion and fabric expert and a keen expert in fabric, clothing and materials. She has worked in large textile and fashion houses for over 10+ years, engineering and working with various fabric types and blends. She is an expert when it comes to questions on any and all kinds of fabrics like linen, cotton, silk, jute and many more. She has also traveled around the world studying traditional fabrics and aims to bring them into the modern fashion use.