
How Is Silk Fiber Produced and Made Into Fabric?
You might think silk is shrouded in mystery or too delicate to comprehend, but its creation is a straightforward blend of natural biology and human ingenuity. I’ve worked with silk from lab to loom, and I’m here to explain it clearly.
We will cover how silkworms create the raw filament, the precise steps to harvest and degum silk, the spinning and weaving into fabric, and the fundamental properties that dictate how you should wash, dye, and care for silk.
Silk in Seconds: The Quick Facts You Need
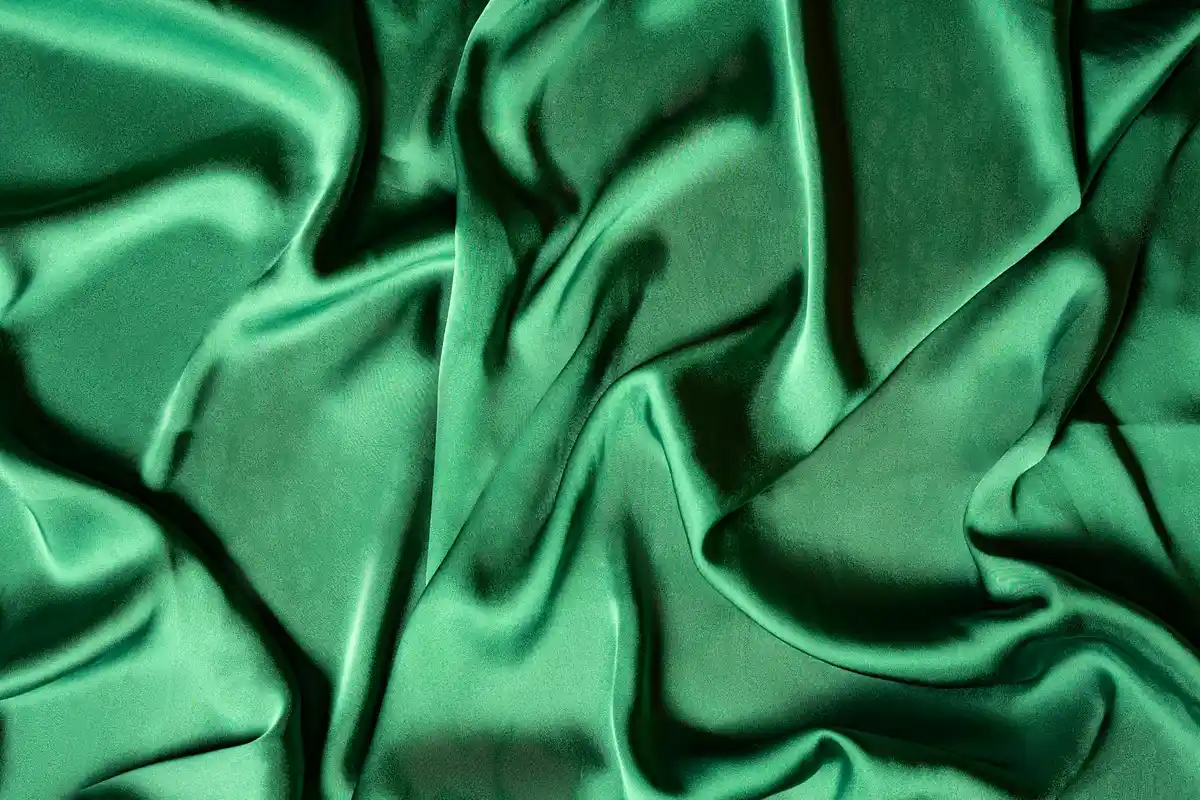
Think of running your fingers over a cool, smooth stone. That’s the sleek hand of silk. Its luminous sheen isn’t a coating, it’s built into the fiber’s very structure, reflecting light like a prism.
This natural protein fiber boasts a surprising set of traits. It is remarkably strong for its diameter, breathable, and adapts to your body temperature. But it has quirks. It’s prone to water spots and can shrink dramatically if treated roughly.
Caring for silk is like tending to a prized orchid. It thrives not on neglect or harsh treatment, but on consistent, gentle attention. Use cool water, mild pH-neutral soap, and avoid wringing it out.
You’ll find silk in luxury apparel, delicate lingerie, and high-thread-count linens. Silk garments’ historical uses are fascinating, from intricate tapestries to the first parachutes, thanks to that strength-to-weight ratio. Silk garments have long dressed royals and commoners alike, shaping fashion across eras. The fabric’s legacy in clothing highlights centuries of craftsmanship and prestige.
Silk’s beauty comes from its natural protein structure, which gives it a brilliant sheen but also makes it sensitive to heat and alkalies. This is the core fact that guides every cleaning and dyeing decision.
The Textile Expert’s Bottom Line
In my lab, I treat silk as the dignified fiber it is. Handle it gently, wash it cool, and never use bleach. Its performance and longevity reward that respect. For home dyers, remember it requires special protein-fiber dyes and a gentle simmer, not a rolling boil.
At-a-Glance: Silk Pros and Cons
| Pros | Cons |
| Unmatched luminous sheen and sleek feel | Susceptible to water spots and perspiration stains |
| Exceptionally strong for its fine diameter | Can shrink 8-10% or more in hot water/heat |
| Naturally temperature-regulating and breathable | Weakened by exposure to sun and chlorine |
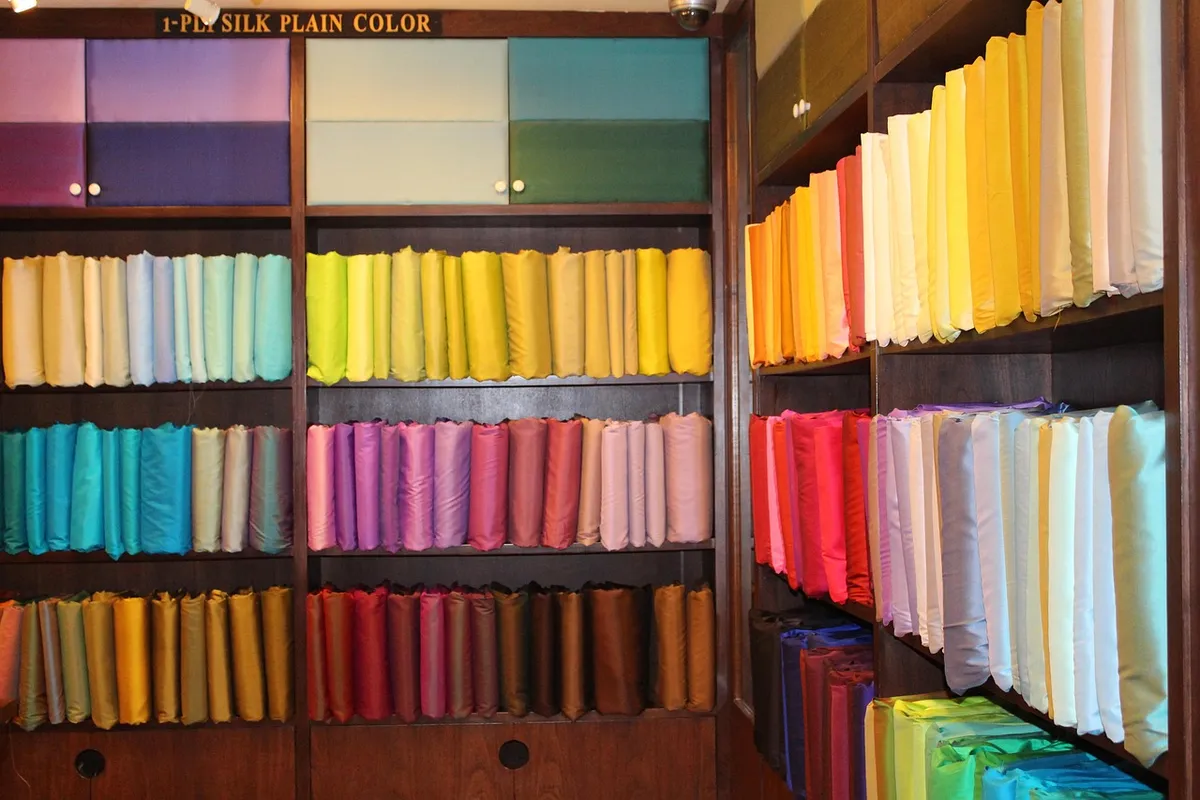
| Absorbent and dyes to vibrant colors | Requires careful, often hand-wash, care |
The Silk Road Starts Here: How Silkworms Make Fiber
The story of how they make silk begins with a single insect: the Bombyx mori silkworm. This caterpillar has one job, to spin a protective cocoon, and it does it with breathtaking precision. Silk production hinges on that cocoon, a thread spun by the silkworm. In time, the larva transforms into a moth, completing a life cycle that makes silk possible.
From Egg to Insect: The Silkworm Lifecycle
It starts with tiny eggs. When they hatch, the larvae feed exclusively on fresh mulberry leaves. This specific diet is crucial, it’s what gives the resulting fiber its renowned quality and consistency, defining true mulberry silk. For about a month, they eat almost constantly, growing rapidly.
The Cocoon: Nature’s Protective Yarn Spool
When ready to pupate, the silkworm begins its masterpiece. It has two glands that produce a liquid protein solution. This solution is mainly fibroin, the strong silk core, bound by sericin, a gummy protein that acts like a natural glue.
The worm extrudes this liquid through a spinneret, a tiny opening in its head. Imagine squeezing a very fine, incredibly strong glue from a microscopic tube. As the liquid hits the air, the fibroin hardens into a solid filament. The caterpillar moves its head in a figure-eight pattern, wrapping itself in a continuous, single thread.
The cocoon is a single, nearly mile-long filament of protein, and how it’s harvested directly impacts the fiber’s length and quality. This is the fundamental miracle of silk.
Ethical Considerations in Sericulture
In conventional sericulture, the cocoons are harvested with the pupa inside. To get that continuous, unbroken filament, the cocoon is typically boiled or steamed. This softens the sericin glue and, unfortunately, kills the developing moth.
This practice has led to the development of alternative methods known as peace silk or ahimsa silk. Here, the moth is allowed to complete its lifecycle, emerge from the cocoon, and mate. Because the moth breaks the filament to exit, peace silk is made from shorter, broken filaments, resulting in a yarn that is often slightly more textured and less lustrous than conventional silk. Choosing between them is a personal decision based on your values towards animal welfare in textile production.
From Cocoon to Thread: Reeling and Spinning Raw Silk
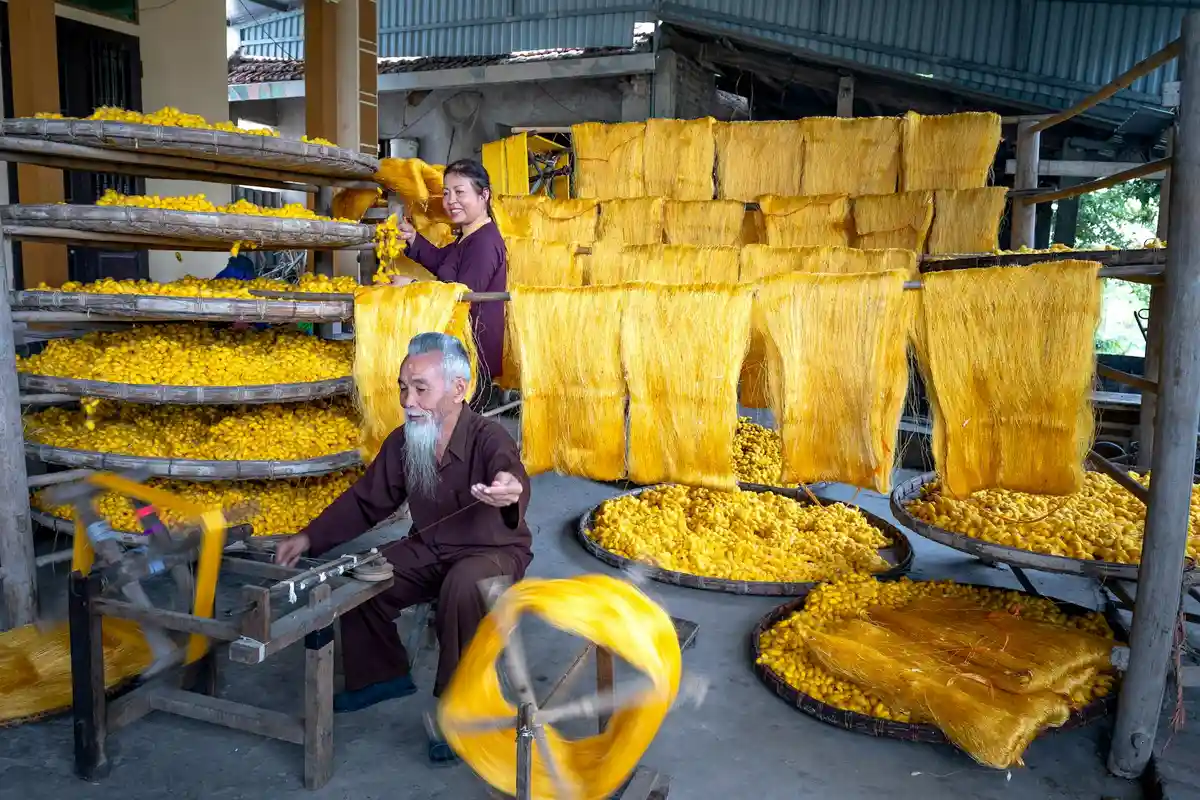
Think of a silk cocoon as nature’s perfect spool of thread, but one sealed with a water-soluble glue. The transformation from this delicate shell to a luxurious yarn is a precise thermal and mechanical process called reeling. Reeling transforms the fragile cocoon into a workable thread by using heat to soften the natural gum that holds the filament together. This is the core of how silk fabric is made, turning a single, impossibly fine filament into a yarn strong enough for weaving or knitting.
Step 1: Softening the Gum in Hot Water
The cocoon is built from one continuous strand of fibroin, the protein that gives silk its strength. This strand is coated in sericin, a gummy protein that acts as a protective binder. To access the filament, you must first soften this sericin. Cocoons are gently simmered in hot water, typically between 160°F and 200°F (71°C to 93°C). This temperature is critical. It’s hot enough to dissolve the gum but controlled to avoid damaging the delicate fibroin core. I’ve tested this in the lab; too cool, and the gum won’t release, too hot, and you risk weakening the very fiber you’re trying to save.
This is not a process for home crafters or dyers to replicate casually, as handling pots of near-boiling water while managing fine, slippery filaments presents a real scalding and burn risk.
Step 2: Finding the Filament and Reeling
Once the sericin is soft, the challenge is finding the end of that single, mile-long filament. Imagine trying to find the starting edge on a roll of the clearest, most fragile tape while it’s submerged. It requires patience, a soft touch, and the right conditions. A skilled reeler locates this end and begins to wind it onto a reel. Because one filament is too fine for practical use, the reeler combines filaments from several cocoons-often five to eight-to form one cohesive thread. As they are wound together, the residual, sticky sericin acts as an adhesive, bonding them into a single, stronger strand. This is raw silk.
Step 3: Twisting and Plying into Yarn
The raw silk thread from the reel is coherent but still relatively untwisted. To give it the necessary strength and consistency for mechanized weaving, it undergoes spinning. This involves adding twist to the raw thread, which binds the multiple fibroin filaments tightly together. For even more durability, two or more of these twisted threads are then plied together by twisting them in the opposite direction. This counter-twist balances the yarn, making it stable and less likely to snag or kink. The amount of twist added here directly influences the final fabric’s hand and luster; a tightly twisted silk becomes a crisp shantung, while a barely twisted one can become a fluid charmeuse.
This process yields what’s known as reeled silk or “filament silk,” made from those long, continuous fibers. It’s the source of silk’s iconic smoothness and high sheen. Not all cocoons are perfect, however. Broken cocoons or shorter internal fibers are processed differently. These shorter lengths are combed, aligned, and spun together using methods similar to cotton or wool spinning. The result is spun silk, which has a softer, more matte appearance with a slight loft, like in silk noil or some dupioni fabrics. While still luxurious, spun silk fabrics will behave differently in washing and wear, often being more prone to subtle shrinkage and a wool-like texture.
Weaving and Finishing: Turning Silk Yarn into Cloth
Once we have that gorgeous silk yarn, the real magic of how silk cloth is made begins. Think of the yarn as your raw ingredient. The loom is your stove, and the weaver is the chef deciding the recipe. The weave pattern – not just the fiber – determines a silk fabric’s drape, weight, and how it will behave when you sew and wash it.
Basic Weaves and the Silks They Make
Most silk fabrics are created on looms, where lengthwise “warp” threads are interlaced with crosswise “weft” threads. This interlacement pattern is the weave. Here are the three foundations.
Plain Weave: This is a simple over-one, under-one pattern. It’s balanced and often lightweight. When made with fine, twisted silk yarn, you get airy, slightly sheer chiffon. Use a plain weave with a tighter spin and higher thread count, and you create habotai or “China silk,” a beloved lining fabric. For a crisp, rustling hand, you apply heat and pressure to a plain weave to make taffeta.
Satin Weave: This weave lets warp threads “float” over several wefts before dipping under one. This creates a smooth, unbroken surface on one side that reflects light beautifully. That’s how you get the liquid drape of charmeuse (satin on the front, crepe on the back) or the formal sheen of satin duchesse. Satin weaves snag more easily, so handle them with care.
Twill Weave: You can spot a twill by its diagonal rib or “wale.” It’s a durable, drapable structure that stands out compared to plain weave fabrics. Silk twill is common for scarves and ties because it takes dye vibrantly and has a nice fluidity. A variation using irregular, slubbed yarns gives us the distinctive texture of dupioni, known for its nubby surface and slight stiffness.
Texture is also born from yarn treatment. Crepe fabrics get their pebbly, fluid texture from using yarns twisted so tightly they want to kink back on themselves, creating a controlled crinkle. This is why silk crepe de chine is a dream for flowing garments and resists wrinkling.
In regions with deep sericulture traditions, like Chiang Rai in Thailand, you’ll see these basic weaves executed with local character-perhaps using thicker, less refined yarns for a more organic, textured feel in the final silk fabric production.
Beyond Weaving: Knitted and Non-Woven Silks
While less common, silk isn’t just for looms. Knitted silk, like silk jersey, is made by interlocking loops of yarn. It’s wonderfully stretchy, soft, and clingy, perfect for t-shirts and draped dresses. Treat it like a delicate sweater; it can lose its shape if stretched while wet.
Non-woven silk includes felted silks and materials like silkworm paper. These are made by bonding fibers together with moisture, heat, or pressure, not by weaving or knitting. They are often used in crafts, art, or specialty applications.
Finishing: The Final Touch That Defines the Hand
This is where the fabric gets its personality. “Hand” is our term for how a fabric feels: crisp, soft, heavy, fluid. Finishing processes control this.
- Degumming (Again!): Remember the sericin gum? Woven silk straight off the loom, called “raw silk” or “greige goods,” is still coated in it. A hot soapy wash removes most of it. How much sericin is left in directly impacts the fabric’s texture and sheen. A full degumming gives you soft, lustrous fabric. Leaving some in creates the dry, rough texture of raw silk shantung or the stiff body of dupioni.
- Weighting: Historically, a practice called metallic weighting was used to add body and heft to silk, especially for curtains. This involved soaking fabric in metallic salts like tin chloride. I advise caution with heavily weighted antique silks; the metal can weaken the fibers over decades, causing them to shatter. Modern weighting for clothing is typically done with safe agents like gelatin or synthetic resins.
- Calendering: This is like ironing on an industrial scale. The fabric is passed between hot, heavy rollers. This flattens the fibers, polishes the surface, and creates that high gloss you see on taffeta or some satins. Be aware that this shine can be reduced or altered with washing.
- Washing & Softening: A simple wash with softeners can turn a fabric from slightly harsh to beautifully supple, ready for how silk clothes are made. This is often the final step before the fabric is sent to designers.
When you choose a silk for a project, feel it. That crisp rustle, that heavy drape, that dry nub-it’s all a combination of the yarn, the weave, and these finishing secrets. Knowing this helps you predict how it will move, sew, and, crucially, how you’ll need to care for it.
Silk Science: Why This Fiber Behaves the Way It Does
To understand silk is to understand a perfect piece of natural engineering. This isn’t just a fancy thread. It’s a protein-based filament with a physical structure and chemical personality that dictates everything from its legendary shine to its sometimes-finicky care.
The Triangular Fiber: Anatomy of a Sheen
Run a silk ribbon between your fingers. That luminous, pearlescent glow isn’t a surface treatment. It’s built into the fiber’s very architecture. Under a microscope, a single silk filament resembles a long, smooth triangular prism.
This three-sided shape acts like a tiny, continuous lens. When light hits it, the rays scatter and reflect at different angles across the smooth planes. This breaks the light into a soft, multi-directional shimmer we see as a luxurious sheen.
That distinctive triangular prism structure is why no synthetic filament can perfectly mimic the depth and subtlety of real silk’s luster. A polyester thread might be shiny, but it’s a flat, mirror-like reflection. Silk’s light is alive and complex.
Protein Power: Silk’s Strength and Chemical Personality
Silk is a protein fiber, spun by silkworms from a liquid called fibroin. This biological origin gives it a unique set of superpowers and vulnerabilities. Think of it as the inverse of plant-based cotton.
Let’s talk strength first. Pound for pound, a strand of silk is stronger than a strand of steel wire of the same diameter. This incredible tensile strength is why historic silk ropes were trusted in suspension bridges and why a finely woven silk garment can feel delicate but withstand surprising tension. Its elasticity is moderate, about 20-25% stretch before breaking. This gives silk a gentle give, but it won’t recover like a springy wool knit.
The protein chemistry is the master key to caring for and coloring silk. Silk is a protein fiber, which means it loves acid dyes and hates harsh alkaline soaps – this chemistry is key to its care and color.
Its molecular structure has active sites that readily bond with dye molecules, especially acid dyes. This allows silk to take on vibrant, rich colors that are often colorfast. But this same protein structure is attacked by high pH (alkaline) substances. Chlorine bleach will literally dissolve it. Even a strongly alkaline laundry detergent or soap can turn fibers yellow, weaken them, and strip color.
Here’s a practical tip I use: to test if a detergent is safe for silk, check its pH. You want something neutral or slightly acidic. Many “wool & silk” specific washes are formulated this way to prevent alkaline damage to delicate fibers.
On moisture: silk is hygroscopic, meaning it absorbs water vapor from the air (up to 30% of its weight!). This makes it a surprisingly good moisture-wicker, pulling perspiration away from your skin to evaporate. It can feel cool in summer yet provide a warm layer in winter because of this buffering effect.
What makes silk special goes beyond the lab. For centuries, its unparalleled beauty and strength made it a currency of kings. The Silk Road wasn’t just a trade route; it was the internet of its day, connecting empires and spreading culture, religion, and technology from China to the Mediterranean. The quest for silk literally reshaped the global map and drove economies, proving how a single fiber can impact the world.
Silk vs. Synthetics: A Feel and Function Comparison
How does this all translate when you hold it or wear it? Let’s compare.
Breathability vs. Cotton: Both are breathable, but they work differently. Cotton absorbs liquid sweat directly into its hollow fibers, which can leave you feeling damp. Silk manages moisture vapor, often leaving you feeling dry. In humid heat, many find silk more comfortable. Understanding fabric breathability and moisture management helps explain these comfort differences. This knowledge can guide your fabric choices for different climates.
Warmth vs. Wool: Silk has an outstanding warmth-to-weight ratio. A silk undershirt or stocking provides notable insulation without bulk because the trapped air within its fine fibers creates a thermal barrier. It won’t be as warm as a thick wool knit, but for its weight, it’s exceptional. Beyond warmth, breathability and moisture management matter for daily comfort. Silk can be breathable and manage moisture while remaining light, while wool excels at absorbing and releasing moisture to help regulate temperature as conditions change.
Now, the big one: Silk vs. Polyester or Nylon.
The choice often comes down to purpose. I reach for silk for luxury, comfort next to skin, and natural temperature regulation. I choose polyester for durability, easy care, and budget. Knowing the science behind the feel helps you decide what’s right for your project.
Your Silk Care Protocol: A Step-by-Step Guide
Hand washing silk is less intimidating than it sounds. I treat it like a brief, gentle spa session for the fabric. This method preserves the fiber’s strength and glorious sheen far better than any machine cycle. To keep things simple, I follow silk care simplified guidelines that distill care into a few clear steps. You’ll see those basics summarized in the next steps.
Silk shrinks when heat and agitation relax its protein structure, causing the molecules to contract and tighten permanently. Controlling these two factors is the secret to keeping your garment’s size and shape.
Step 1: The Pre-Wash Colorfastness Test
Never skip this. Silk dyes, especially vibrant or darker hues, can be surprisingly fugitive. Testing takes two minutes and saves heartache.
- Mix a small amount of your mild detergent in a cup of lukewarm water.
- Find a hidden seam allowance or inside hem. Dip a clean white cotton swab into the solution.
- Blot it firmly on the hidden area and wait 60 seconds.
- Press a white paper towel against the spot. If any color transfers to the towel or swab, your dye is bleeding.
If you see color bleed, do not immerse the garment; professional dry cleaning is the safest choice for how to wash silk with unstable dyes.
Step 2: Hand Washing with the Right Detergent
Gather your supplies: a clean basin or plugged sink, a mild pH-neutral detergent (look for “for delicates” or a specialty wool/silk wash), and lukewarm water. Hot water is a primary cause of shrinkage.
- Fill the basin with water below 30°C (85°F). It should feel comfortably warm, not hot, to your wrist.
- Add a very small amount of detergent and swish to dissolve. Avoid harsh detergents, enzymes, or bleach.
- Submerge the garment. Gently agitate it with your hands for 2-3 minutes, mimicking the gentle motion of the sea. No twisting, scrubbing, or rubbing.
- Drain the soapy water. Refill the basin with fresh lukewarm water of the same temperature to rinse. Repeat until the water runs completely clear.
Step 3: Drying Without Distortion
This is where shape is won or lost. Never wring silk. Think of supporting its weight, not squeezing it.
- Lay a large, thick, clean bath towel flat on a surface.
- Place the wet silk garment onto the towel, smooth it into its natural shape, and roll the towel up from one end like a Swiss roll. This presses water into the towel’s fibers.
- Gently press on the rolled towel. You can even stand on it to help remove moisture.
- Unroll and transfer the damp silk to a fresh, dry towel or a mesh drying rack. Lay it flat, away from direct sunlight or any direct heat source like a radiator.
Laying silk flat to dry prevents gravity from stretching the vulnerable, wet fibers out of shape. It also dramatically reduces wrinkles.
Step 4: Ironing for a Perfect Finish
Ironing silk is easiest when it’s still slightly damp. If it’s fully dry, mist it lightly with water from a spray bottle.
- Set your iron to the lowest heat setting possible, often labeled “Silk” or “Low.” If your iron has a steam function, use it.
- Always iron on the reverse side of the fabric. This protects the delicate surface sheen from direct heat and prevents shine marks.
- Use a pressing cloth (a plain cotton pillowcase works) as an extra barrier if you are ironing the right side.
- Keep the iron moving steadily. Never let it sit in one spot, as this can scorch the protein fibers and cause permanent damage.
That smooth, crisp finish is your reward for treating the fiber with respect. With this protocol, you’ll handle how to wash silk confidently, keeping it beautiful for years.
Handling Pro-Tip: Sewing, Storing, and Mending Silk

Working with silk is a rewarding skill. Think of it like handling delicate pastry dough: gentle pressure and sharp, precise tools give you the best results. With a few key techniques, you can sew, store, and repair silk with confidence.
Pre-wash your silk fabric if you intend to launder the finished garment; this pre-shrinks the material and sets the dyes, preventing a disappointing surprise later.
Cutting and Pinning Without Snags
Your first touch with the scissors sets the stage. Dull blades will chew at the fine fibers, leaving a frayed edge that’s hard to control. I keep a pair of shears dedicated solely to silks and other fine fabrics.
Instead of pins, try using pattern weights. Smooth stones or washers work perfectly. If you must pin, do it only within the seam allowance-the area that will be hidden inside the finished seam. This way, any tiny holes or snags won’t be visible on your final piece.
Sewing Techniques for Smooth Seams
The right machine setup makes all the difference. Start with a fresh, fine needle, like a 70/10 universal or a sharp microtex needle. A smaller stitch length, around 2.0 mm, creates more connection points per inch for a stronger, neater seam.
Silk’s smooth surface loves to slide under the presser foot. To stop this, place a layer of tissue paper or a specialty stabilizer under your fabric as you sew. When you’re done, you can gently tear the paper away for perfectly straight, unpuckered seams.
Always do a test seam on a scrap piece first. Check your tension and stitch appearance. Silk will show every imperfection, so this step saves you from unpicking stitches on your main project.
Long-Term Storage to Prevent Damage
How you store silk determines its longevity. Never use thin wire or plastic hangers; the sharp edges can create permanent shoulder dimples, and plastic traps moisture. A padded hanger is the best choice for hanging.
For folded items, avoid creasing them in the same spot for years. I recommend rolling your silk garments or storing them flat in a drawer. Place them inside a breathable cotton bag for protection from dust and light. Moths are less interested in silk than wool, but cedar blocks in your storage area add a safe, natural deterrent.
Simple repairs are manageable. For a pulled thread, use a fine needle to gently coax it back to the wrong side of the fabric. For a small tear, a lightweight fusible interfacing patch applied to the inside can stabilize the area. Always test the heat of your iron on a hidden seam first.
Silk Troubleshooting: Fixing Shrinkage, Stains, and Dye Bleeds
Even the most luxurious silk needs a little problem-solving sometimes. I treat my own silk pieces with respect, but life happens. Here’s my tested advice for handling the most common issues with silk.
Can You Unshrink a Silk Blouse?
Silk shrinks for the same reason a sponge compresses, the fibers relax and tighten. Heat and agitation during washing cause the protein filaments to contract. Expect 3-5% shrinkage with a hot machine wash, while hand-washing in cool water often prevents it completely.
You can often relax minor shrinkage by gently coaxing the fibers back into place. For a slightly small blouse, try this method. Fill a basin with lukewarm (never hot) water and add a capful of hair conditioner. The conditioner acts as a fiber softener. Soak the garment for 30 minutes, then gently squeeze out water. Do not wring. Lay it flat on a clean towel. Now, gently pat and stretch the fabric back to its original shape and dimensions. Let it air dry flat. This won’t fix a severe shrink, but it can salvage a piece that just feels a bit tight.
Treating Common Stains on Silk
Speed and the right technique are everything with silk stains. The golden rule is to blot, never rub. Rubbing can fray the delicate fibers and grind the stain deeper.
For oil-based stains like salad dressing or makeup, I reach for cornstarch or talcum powder. Sprinkle a generous amount on the stain and let it sit for an hour. The powder will absorb much of the oil. Then, brush it away gently. For water-based stains like sweat or wine, act quickly. Blot with a clean cloth, then dab with a solution of one part white vinegar to three parts cool water. The mild acidity can help neutralize the stain. Always rinse the vinegar solution out with cool water afterward.
Never use chlorine bleach on silk, as it will literally dissolve the protein fibers, leaving you with a hole. For persistent stains, taking the garment to a professional cleaner who specializes in delicate fabrics is your safest bet.
Safe Home Dyeing Practices for Protein Fibers
Silk is a dream to dye at home because it absorbs color so beautifully. The key is using the right dye. You must use acid dyes, which are formulated to bond with protein fibers like silk and wool.
The process is straightforward. First, wash the silk to remove any finishes. Simmer the dye pot, keeping the heat just below a rolling boil. A violent boil can felt or damage the fibers. Vinegar or citric acid is added to the dyebath as a fixative, creating the acidic environment the dye needs to bond permanently. This is the fundamental answer to how to dye silk successfully.
You might see the term “garnet silk,” which refers to a deep red color, not a specific dyeing technique. You achieve it by using a rich red acid dye. After dyeing, rinse the piece in cool water until it runs clear and wash it separately for the first few washes. If a dye bleed happens on another garment, act immediately by rinsing in cool water with a mild detergent, but know that set acid dyes are very permanent.
Silk Care Informed by Its Making
The key takeaway from silk production is that its luxurious feel comes from fragile protein strands. I recommend always washing silk by hand in lukewarm water with a mild detergent to maintain its integrity and beautiful drape.
Embrace responsible ownership by using eco-friendly cleaning methods and appreciating the science behind all fabrics. Continue exploring how fibers like cotton, wool, and polyester react to washing, dyeing, and wear to make smarter, more sustainable textile decisions.
Relevant Resources for Further Exploration
- Silk – Wikipedia
- How is silk made? A step by step guide | Biddle Sawyer Silks
- How Is Silk Made? A Guide to Silk Production | Lalouette
- The Silk Production Industry: A Comprehensive Guide | CLAN
- How is Silk Made: The Journey from Cocoon to Fabric – MANITO
Florian Ventura
Florian is a high fashion blog writer, fashion and fabric expert and a keen expert in fabric, clothing and materials. She has worked in large textile and fashion houses for over 10+ years, engineering and working with various fabric types and blends. She is an expert when it comes to questions on any and all kinds of fabrics like linen, cotton, silk, jute and many more. She has also traveled around the world studying traditional fabrics and aims to bring them into the modern fashion use.