
Can You Overdye Brown, Burgundy, or Red Fabric?
You have a bold-colored garment that no longer suits you, and you’re worried that painting over these deep tones will only lead to a muddy, disappointing result. I can tell you from my dye lab experience that this worry is valid, but the project is absolutely possible with the right plan.
We will cover the simple color theory that predicts your new shade, why your fabric’s fiber content matters more than its current color, how to select the correct dye type, and my professional tips for vibrant, even coverage.
The Textile Science of Overdyeing: It’s a Mixing Party
Overdyeing is exactly what it sounds like. You apply a new dye over an existing fabric color. Think of it as giving your fabric a color bath, not painting it white first.
The core principle is simple. Your starting color and your dye color will mix. I imagine them like wet paints swirling together in the dye pot. A red shirt overdyed with blue won’t give you a pure blue. You’ll get deep purples, moody violets, or even a rich brown, depending on the shades.
But there’s a critical factor paint doesn’t have. The dye must chemically bond to the fiber molecules. If the dye is wrong for the fiber, it just coats the surface. It will rinse right out in the wash, leaving you with a faded, sad version of the original.
The most important step happens before you even open the dye jar: you must identify your fabric’s fiber content.
Your Fabric’s Fiber is the Boss
Fibers fall into families. Cellulose fibers come from plants (cotton, linen, rayon). Protein fibers come from animals (wool, silk). Synthetic fibers are human-made (polyester, nylon). Each family “eats” dye differently.
You choose your dye type for the fiber, never for the starting color. Can you dye silk? Absolutely, but you need the right dye for its protein structure. A dye made for cotton will simply refuse to stick to silk.
Can You Dye a Dark Fabric Lighter? The Realistic Answer
I hear this question all the time. The honest answer is no, not in the way you hope. Commercial fabric dyes are transparent, like stained glass. They tint what’s underneath, they don’t cover it like opaque wall paint.
You cannot dye a dark brown pair of pants to a pastel yellow. You can only move them to a darker, muddier version of yellow-think olive drab or mustard. For a noticeable color shift, your chosen dye color must be significantly darker than your starting fabric. A burgundy dress overdyed with a navy blue might become a glorious, deep aubergine.
Match Your Dye to Your Fiber: A Quick Guide
Use this as your cheat sheet. I focus on dyes you can realistically use at home.
For Cotton, Linen, Rayon (Cellulose Fibers)
Reach for fiber-reactive dyes, like Procion MX. These are my favorite for cellulose. They form a permanent covalent bond with the fiber, which is a science-y way of saying the color becomes part of the fabric itself. They work especially well on cotton and other cellulose fabrics like linen. For wool or synthetic fibers, you’ll typically use different dye types and methods.
They need a helper called a fixer, usually soda ash, and work best in warm water. The colors are vibrant and wash-fast.
For Wool and Silk (Protein Fibers)
Protein fibers love acid dyes. These dyes need an acidic environment to bond, which you create with white vinegar or citric acid. Gentle heat is also crucial to open up the fiber scales so the dye can enter.
My pro-tip for silk: keep the heat low and stir the pot constantly. This preserves silk’s beautiful, fluid drape and prevents ugly water marks from forming. High heat or letting it sit can make silk feel stiff and dull.
For Polyester and Nylon (Synthetic Fibers)
How can you dye polyester fabric? It’s the trickiest home dye job. Polyester requires specialized disperse dyes and sustained, near-boiling heat. You almost always need a stovetop method and a pot you dedicate only to dyeing.
Nylon is a little more forgiving. It can sometimes be dyed with the same acid dyes used for wool, but the results are less predictable. Always do a test swatch before dyeing nylon to ensure colorfastness.
The Blended Fabric Dilemma
A 50/50 cotton-polyester blend is a common challenge. If you use a cotton dye, only the cotton half will accept the color. The polyester threads will stay their original shade.
This can create a cool, heathered effect, which I sometimes aim for. But if your goal is a solid, uniform color, overdyeing a major blend with a single dye type won’t work. The fiber is still the boss, and in a blend, you have two bosses with different rules.
When NOT to Overdye: Your Risk Assessment
Before you heat a single pot of water, you need to look your garment in the eye and be honest. Overdyeing is a transformation, not a miracle. Some starting points will lead to disappointment, or even ruin your piece. I’ve pulled too many failed experiments from the dyebath to let you make the same mistakes.
Fabrics With Stain-Resistant, Water-Repellent, or Permanent Press Finishes
These are the invisible walls that will stop your dye. Modern fabrics are often treated with chemical finishes. A stain-resistant tablecloth, a water-repellent (DWR) windbreaker, or a no-iron cotton shirt has been coated. That coating acts like a shield, especially when trying to dye water-resistant fabrics.
The dye molecules simply cannot penetrate the fibers. You’ll end up with a splotchy, pale result, and the dye will wash right out. Check the care label for words like “stain release,” “soil repellent,” or “easy care.” If it says it repels water in its current state, it will repel dye, too.
Your safest bet is to only overdye natural fibers like plain cotton, linen, rayon, wool, or silk that have no advertised special finishes.
Fabrics That Are Not Colorfast
This is the most common pitfall. If the original dye bleeds in the wash, it will hemorrhage in a hot dye bath. You aren’t just adding a new color, you’re mixing paints. A bleeding red shirt underdyed with blue won’t give you a rich violet. It will give you a murky, brownish purple.
You must test for colorfastness. I do this every single time. Mix a little hot water and a splash of clear vinegar in a bowl. Submerge a hidden seam or hem area for 10-15 minutes. If the water tints, that dye is loose and will run.
Seeing dye bleed in a simple soak test is your clear sign to stop the project, as the original color will muddy your beautiful new dye job.
Extremely Delicate Fabrics
Overdyeing is a physical process. It requires sustained heat and constant agitation to get an even color. Fabrics that can’t handle this will felt, distort, or tear.
Think of a loosely woven, fragile vintage silk chiffon or a hand-knit lace shawl. The simmering water and stirring can be too aggressive. For delicate protein fibers like silk or fine wool, special cold-water acid dyes exist, but they require careful handling and won’t work on cellulose fibers like cotton.
If you wouldn’t machine wash the item on a gentle cycle, you probably shouldn’t try to overdye it with standard methods.
Items With Non-Removable Details
Look beyond the fabric. Examine every inch for:
- Leather or suede patches
- Screen-printed logos with plastic-based ink
- Glued-on sequins or appliqués
- Plastic buttons, zippers, or grommets
- Elastic that is sewn-in (not in a casing)
The dye bath is hot, often near a simmer. Plastic can warp and melt. Glue can dissolve, releasing details into your pot. Leather will absorb dye unpredictably and may be ruined. Dye can also stain plastic zippers and buttons a different, often uneven, color.
Unless you are prepared to remove these details before dyeing and reattach them after, choose a simpler, detail-free garment for your project. A basic cotton tee or a pair of linen pants is a perfect candidate. A complex jacket with multiple trims is a recipe for disaster.
The Essential Pre-Dye Ritual: Scouring
Think of your fabric like a paint-stained wall. You wouldn’t slap a new color over old, greasy paint and expect it to look good or last. Scouring is your primer. I never skip scouring; it is the single most reliable way to ensure your overdye color is even, vibrant, and permanent. This step removes the invisible barriers between your dye and the fiber.
Scouring is the deep cleaning of fabric to strip away oils, dirt, dust, and chemical finishes applied during manufacturing. These residues repel water and dye, causing ugly splotches and weak color. A properly scoured fabric absorbs water instantly and uniformly, which is the only way dye can penetrate every fiber evenly.
Step-by-Step Scouring Guide
Your method changes based on fiber content. Getting this wrong can felt wool or damage delicate silks.
For Cotton, Linen, Rayon, and other plant-based fibers:
- Use your washing machine’s hottest water setting.
- Add 1-2 teaspoons of a textile detergent like Synthrapol or a scoop of washing soda (sodium carbonate). Avoid regular detergent with optical brighteners or fabric softener.
- Run a full cycle. The hot water and alkali break down and lift away natural waxes and processing chemicals.
For Wool and Silk (animal fibers):
- Hand wash in a basin or use the machine’s gentle/wool cycle with warm water, never hot. Hot water felts wool.
- Use a gentle, pH-neutral soap like a wool wash or baby shampoo. Agitate minimally.
- Rinse thoroughly in water of a similar temperature to avoid shocking the fibers.
- Press water out gently; do not wring. Handle wet silk with extra care as it loses strength.
For Polyester, Nylon, and other synthetics:
- Use a hot machine wash with a standard detergent to dissolve spinning oils and static-reducing finishes.
- You can add a tablespoon of baking soda to help cut grease. Skip fabric softener.
- These fibers don’t absorb water like naturals, but scouring ensures the dye has a clean surface to bond with.
After scouring, do not let the fabric dry. Your fabric must go into the dye bath soaking wet and evenly wetted. A dry spot will resist dye, leaving a light patch. If you must pause, keep your fabric wrapped in a damp towel. This pre-wetting also helps reduce creases that can cause tie-dye-like lines in your solid overdye job. Proper attention to fabric moisture is crucial, especially when dyeing or bleaching fabrics.
Your Overdyeing Color Map: Brown, Burgundy, Orange, Red

Let’s get practical. Overdyeing isn’t magic, it’s basic color mixing. Think of your starting fabric color as the first layer of paint. The new dye you add is the second layer. They mix on the fiber.
This guide is organized by the color you’re starting with, because that’s how most people’s questions come up. Your most powerful tool is a simple color wheel: adding a primary color (blue, yellow, red) will shift your fabric in that direction, while adding its opposite (complementary) color will mute or neutralize it toward brown or gray.
How to Overdye Brown Fabric
Brown is a neutral, a dark mix of all three primary colors. Overdyeing it doesn’t create bright new hues, but enriches and shifts its temperature and depth.
- Blue over brown: This cools it down. You’ll get deep, sophisticated charcoal-browns, slate grays, or a moody blue-black. It’s one of my favorite ways to refine a dated brown garment.
- Green over brown: This creates earthy, natural tones. Expect deep forest greens, rich olive drabs, or mossy browns. The result feels very organic.
- Red or Burgundy over brown: This warms it back up. The brown becomes a richer chestnut, a warm chocolate, or a ruddy mahogany. It adds a lot of cozy depth.
Because brown fabric is already dark and saturated, you must use a strong, concentrated dye solution to see any visible shift in color. A weak dye bath will barely register.
How to Overdye Burgundy Fabric
Burgundy is a deep red with strong blue undertones. It’s essentially a dark, cool red-violet. This starting point gives you elegant, complex results.
- Blue over burgundy: This intensifies the blue notes. You’ll move toward deep plum, luxurious aubergine, or a black with a purple cast. This answers the common “can you dye red fabric blue?”-yes, but on burgundy, you get plum, not sky blue.
- True Red over burgundy: This pushes it back toward a warmer, brighter crimson or cherry red. It counteracts some of the blue undertones.
- A touch of Yellow (or Gold) over burgundy: This introduces an orange note, creating sophisticated rusty reds, burnt sienna, or terra-cotta shades.
Be cautious: adding green (red’s complement) to burgundy will neutralize it into a murky, brownish-gray. This can be a desired effect for a muted look, but it won’t stay vibrant.
How to Overdye Orange Fabric
Orange is a bold secondary color, a mix of red and yellow. It’s vibrant, which means it reacts powerfully to new dyes.
- Blue over orange: Blue and orange are complements. They neutralize each other. This is how you tame a bright orange into earthy, usable colors. The result depends on the blue: a navy creates a deep brown, a teal can make an olive green-brown, and a royal blue makes a neutral gray-brown.
- Red over orange: This amplifies the red component. Your orange will intensify into a fiery red-orange, a traffic-light red, or a tomato red. It becomes hotter and deeper.
- Green over orange: Another complementary-like mix (green contains blue). This creates muted, natural tones-think mossy brown, khaki, or dull olive. It’s great for toning down brightness.
How to Overdye Red Fabric
Bright red is a common starting point and a perfect lab for seeing color theory in action. Remember, you are mixing with the existing red, not covering it completely.
- Blue over red: This creates purple family results. A little blue makes violet or fuchsia. More blue brings you to deep plum, maroon, and eggplant. The more blue you add, the deeper and cooler the purple becomes.
- Green over red: Red and green are direct complements. They cancel each other’s vibrancy. You will not get green. You will get muted browns, taupes, muddy khakis, or gray-browns. This is a perfect way to salvage a garish red item.
- Black or Navy over red: This creates a wonderfully deep, tonal black with a warm, red undertone. It’s far more interesting than a flat jet black and is a professional trick for achieving depth.
- Yellow over red: This introduces orange. You’ll get shades like coral, burnt orange, or terra-cotta, depending on the ratio. It’s a sunny, warm shift.
The Hands-On Process: A Universal Step-by-Step
Overdyeing is a powerful technique, but success lives in the details of your process. This workflow is your reliable foundation, which you then tweak based on your specific fiber and dye type.
Think of this as your recipe framework: the core steps stay the same, but you’ll swap ingredients (dye types) and adjust cooking times (temperatures) for cotton versus silk.
Materials and Safety Setup
Gathering the right tools before you start is non-negotiable. It keeps you safe and your results clean.
- A dedicated stainless steel or enamel pot you will never again use for food.
- Rubber gloves that cover your wrists.
- A basic dust mask (N95) for handling powdered dye.
- Long-handled stainless steel spoons or sticks for stirring.
- A plastic tablecloth or sheet to protect your workspace.
- Access to a sink, laundry tub, or hose for rinsing.
I keep a pot, spoons, and measuring cups labeled “DYE ONLY” in my studio. This rule protects your family from chemical residues and prevents weird flavors in your next batch of soup.
The Dyeing Steps (Adapt as Needed)
Follow these steps in order. Rushing or skipping prep is the main reason for splotchy, disappointing color.
Step 1: Prepare Your Dye Bath
Always start by reading your dye’s instructions. For fiber-reactive dyes (best for cotton, linen, rayon), you’ll dissolve the powder in a little warm water first. For acid dyes (for silk, wool, nylon), you often dissolve dye in hot water separately, then add it to a warm bath with an acid like vinegar or citric acid. The key is to get the dye fully dissolved so it looks like smooth, colored ink before your fabric goes in, especially when working with synthetic fabrics that can be trickier to dye evenly.
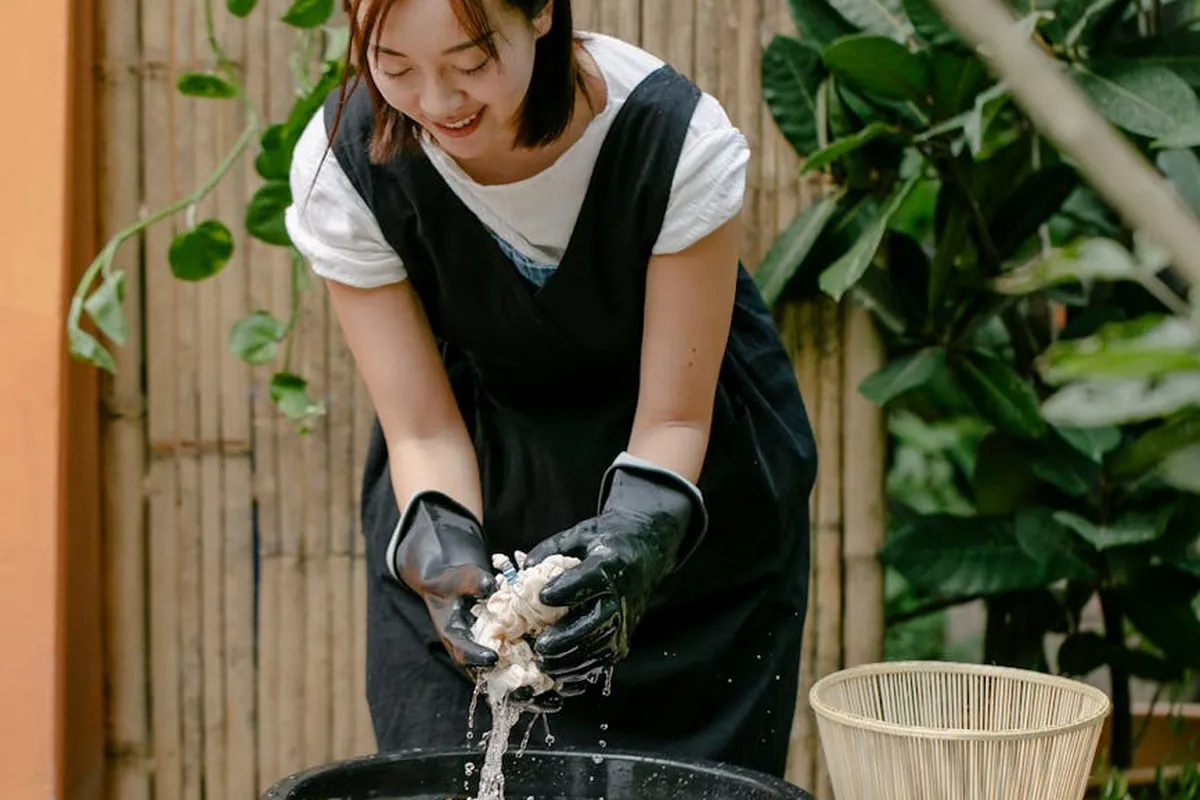
Step 2: Introduce the Wet, Scoured Fabric
Your fabric must be absolutely soaking wet and clean. I wash it in hot water with a bit of dish soap (to remove oils) and rinse thoroughly. This is called scouring. A dry or dirty spot will resist dye. Gently squeeze out excess water, then submerge the fabric in the bath. For the next 10-15 minutes, stir and agitate constantly. This initial movement is what prevents uneven patches.
Step 3: Maintain Heat and Time
Now, bring the bath to the dye’s required temperature and keep it there. For most fiber-reactive dyes on cotton, that’s around 105°F (40°C) for an hour. For acid dyes on silk, it’s often a simmering 180-200°F (82-93°C) for 30 minutes. Gentle, steady heat fixes the color; a rolling boil can felt wool or damage silk. Stir occasionally to ensure evenness.
Step 4: The Gradual Rinse
Do not shock the fabric with cold water. Lift it from the bath and run your first rinse under water that’s close to the dye bath’s temperature. Gradually make the rinse water cooler over several minutes. Rinse until the water runs nearly clear. This gradual cooling helps set the dye molecules in place after the fabric has been soaked in the dye.
Step 5: Final Wash and Dry
Wash the dyed fabric by itself in your machine on a gentle cycle with a mild, dye-free detergent. This removes the last bits of unfixed dye. Especially when dyeing delicate fabrics. Finally, air dry or tumble dry according to the original fiber’s care label. Your overdyed fabric is now colorfast and ready.
Troubleshooting and Handling Pro-Tips
Even with the best color theory, overdyeing can surprise you. Here’s how to solve the most common issues.
Why is My Result Muddy or Dull?
You aimed for a deep plum but got a murky gray-brown. This frustrating result usually has one of three causes.
Cause 1: The starting color and dye color were complements. On a color wheel, colors opposite each other (like red and green, or orange and blue) are complements. When you mix them, they neutralize each other, creating browns and grays. Overdyeing a red shirt with a green dye won’t make a brighter green, it will make a muddy brown. I always check the wheel before mixing.
Cause 2: The original fabric dye bled into the new bath. This is common with cheaply dyed reds and burgundies. The original dye wasn’t fixed well to the fiber. When you heat the dye pot, it releases, mixing uncontrollably with your new dye and creating a murky, unpredictable color.
To fix it, perform a bleed test before you dye. Snip a small, hidden piece of the fabric or a seam allowance. Simmer it in clear water with a dash of vinegar (for protein fibers) or washing soda (for cellulose fibers). If the water colors, the original dye will bleed. Your best bet is to try a different garment.
Cause 3: Inadequate scouring left a barrier. Fabric finishes, body oils, and detergent residue repel dye. If you didn’t scour well, the dye can’t penetrate evenly, sitting on top and washing away to leave a pale, dull version of your intended color.
The corrective step is always to re-scour. For cotton, I simmer it in a pot with a teaspoon of washing soda. For wool or silk, a warm bath with a gentle, pH-neutral soap does the trick.
How to Get an Even Color vs. a Variegated Look
The technique you use determines whether your result is uniform or artistically patchy.
For a perfectly even, solid color, you need consistency.
- Use a very large pot or bucket. The fabric should swim freely, with at least a gallon of water per pound of material.
- Keep the water moving. Stir slowly and constantly for the first 10-15 minutes after adding the dye. I use a stainless steel spoon dedicated to dyeing.
- Keep the fabric open. Unfold it completely, avoid tight wrinkles, and submerge it fully.
This preparation lays the groundwork for troubleshooting dyeing later. When issues arise, having these steps in place makes it easier to identify where things went wrong.
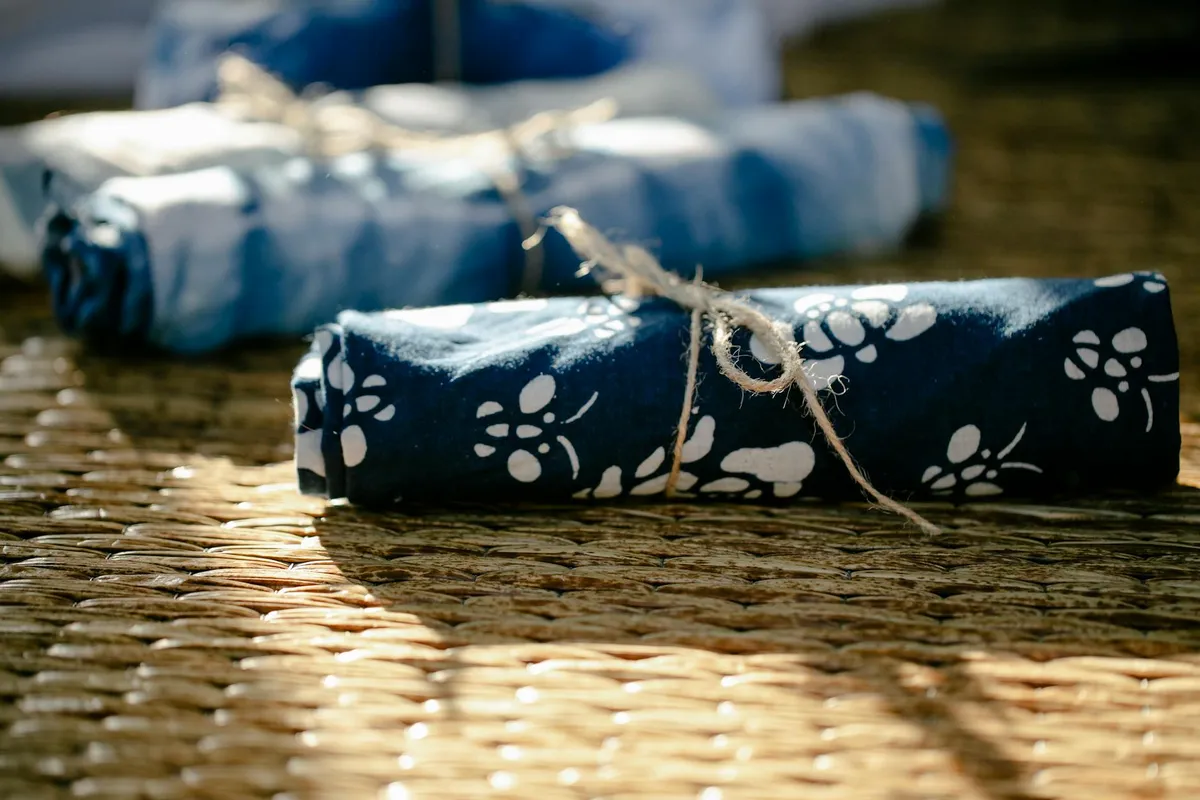
For a trendy, variegated, or tie-dye effect, you want to control where the dye lands.
- Use a much smaller amount of water, just enough to dampen the fabric thoroughly. A spray bottle is great for this.
- Manipulate the fabric first. Twist it tightly into a rope, bunch it with rubber bands, or scrunch it into the pot.
- Apply dye selectively. Use squeeze bottles, brushes, or even just pouring dye over certain sections. The dye will struggle to penetrate the tightly bound areas, creating natural light and dark patches.
Pair this with spray fabric dyes diy techniques for even more control. We’ll cover quick spray methods in the next steps.
Remember, cellulose fibers like cotton need constant heat for even dyeing, while protein fibers like wool take color more slowly and can benefit from a gradual temperature rise.
The Textile Expert’s Care & Handling Protocol
Your work isn’t done when you rinse the dye out. Understanding fabric dye permanence helps you plan aftercare for lasting color. Proper aftercare locks in the color and keeps the fabric healthy.
Aftercare is absolutely key to longevity. The first few washes are critical for removing any loose, unfixed dye molecules.
- Wash the item alone for the first 3-5 washes. Use cool or lukewarm water and a mild, dye-free detergent.
- I always add a color-catching sheet to the wash. This traps any fugitive dye that releases, protecting the fabric itself.
- Rinse until the water runs completely clear before the first laundry cycle. Any hint of color means more dye is coming out.
Dry naturally away from direct sunlight. The sun’s UV rays are the fastest way to fade any dye, especially rich reds and browns. Lay the item flat or hang it in the shade to dry. This also prevents tension or stretching in damp, heavy fabric.
Iron according to the base fiber’s needs, using a press cloth if needed. If the dyed surface feels slightly chalky, that’s unfixed pigment. Ironing directly can scorch it onto your iron. Always use a cotton press cloth or a piece of parchment paper between the iron and the fabric. Use the heat setting appropriate for the fiber, not the dye.
Final Textile Science Notes for Overdyeing
I always begin with a swatch test. This simple step shows how the existing color interacts with the new dye and confirms the dye is suited to your fabric’s fiber for a lasting result.
Choose biodegradable dyes and ethical sources for animal fibers to dye responsibly. Your hands-on knowledge of fabric properties and care deepens each time you handle a textile, making you a more effective steward of your materials.
Citations and Authoritative Sources
- Overdye 101: How to Dye Colored Fabric + Color Mixing Chart
- r/dyeing on Reddit: Overdye Guide?
- Overdyeing Patterns – Rit Dye
- OVER DYEING A PRINT: HOW TO DYE A PRINT TO BE ANY COLOR USING RIT DYE – BURIED DIAMOND
Florian Ventura
Florian is a high fashion blog writer, fashion and fabric expert and a keen expert in fabric, clothing and materials. She has worked in large textile and fashion houses for over 10+ years, engineering and working with various fabric types and blends. She is an expert when it comes to questions on any and all kinds of fabrics like linen, cotton, silk, jute and many more. She has also traveled around the world studying traditional fabrics and aims to bring them into the modern fashion use.