
How Do You Iron, Steam, and Apply Patches to Nylon Fabric?
You’re looking at your nylon jacket or pack, iron in hand, and wondering how to avoid a shiny, melted disaster. I get it, the fear is real, but you can tame this synthetic fabric with the right know-how.
We will cover prepping your fabric, nailing the right iron temperature, using a steamer effectively, and securely attaching patches without damage.
What Makes Nylon Unique? Fiber Properties and Heat Sensitivity
Nylon is a synthetic polymer, which is a scientific way of saying it’s a human-made material built from long, chain-like molecules. This structure is its superpower and its biggest care challenge. Unlike natural fibers that can char, the nylon polymer chain doesn’t just burn away when overheated. It softens, then melts into a hard, shiny plastic blob. This fundamental difference is why you must treat heat around nylon with extreme caution.
Let’s compare it to cotton. If your iron is too hot on cotton, the fabric might turn a yellowish-brown and smell burnt-this is scorching. You can sometimes gently scrape off the top layer of damaged fiber. With nylon, there’s no coming back from a melt. The fibers fuse together permanently, leaving a stiff, ruined patch. I’ve seen this happen in seconds on a forgotten ironing board.

Beyond its heat sensitivity, nylon has a distinct feel and performance. It often has a sleek, smooth hand, incredible strength for its weight, and absorbs very little moisture. This last point is key for steaming. Because nylon isn’t thirsty like cotton, steam doesn’t get absorbed deep into the fiber; it mostly relaxes the fabric’s surface. You’re softening the wrinkles, not penetrating the yarn.
This section answers the common question, “can nylon fabric be ironed,” by starting with the why. Knowing it can melt, not burn, changes everything about how you approach the task.
Nylon Fabric Spec Sheet: Material Data Table
This table gives you the core data you need for informed fabric care. Think of it as a quick reference guide before you start any project.
This data directly informs every piece of care advice that follows, from ironing temperature to why a patch might not stick.
Washing and Drying Nylon: The Foundation for Good Pressing
You cannot press a clean crease into a dirty fabric. This is my golden rule for ironing, and it starts in the wash. Nylon is a synthetic polymer, a type of plastic that is incredibly strong and resilient, but heat is its careful companion.
Start by turning your nylon garment inside out. This protects the outer surface from abrasion in the machine. Use cool or lukewarm water-never hot. Hot water can set some body oils and stains into synthetic fibers, making them permanent. Choose a mild, liquid detergent. Avoid powdered detergents and fabric softeners entirely. Powders can leave a residue, and softeners coat the fibers, which is terrible for technical fabrics like rain jackets or activewear that need to breathe and wick moisture.
Proper washing removes the oils and dirt that, if left behind, can literally bake into the fabric during ironing, leaving you with a shiny, stained patch. The gentle cycle is your best friend here, minimizing stress on the fibers.
For drying, you have two safe paths. The first is air drying flat or on a line. This is the gentlest method and guarantees no heat damage. The second is machine drying on a low heat or permanent press setting. High heat is the enemy. It doesn’t just weaken nylon fibers over time, it can actually set wrinkles in place, making them harder to remove later. It can also cause a subtle, permanent distortion or glossiness on the fabric surface.
While nylon is highly resistant to the kind of shrinkage you see in cotton, extreme heat doesn’t shrink it so much as melt or distort it. Think of it like a plastic bag held near a flame-it doesn’t get smaller, it warps and changes shape. Low heat tumble drying or air drying preserves the fabric’s original dimensions and hand. That said, nylon’s heat tolerance has limits: direct flame or prolonged high heat can cause it to burn or melt, not just warp. This is why discussions about nylon fabric heat resistance burning appear in care guides and safety resources.
The Textile Expert’s Pro-Tip: Checking for Coatings
Before your iron even gets warm, you must play detective. Many nylon garments, especially outdoor gear, swimwear, and some linings, have special coatings. A Durable Water Repellent (DWR) finish or a polyurethane laminate gives you waterproofness, but direct heat will destroy it.
Always check the garment label first. Look for words like “waterproof,” “coated,” or “laminated.” If you see them, put the iron away. Steaming might be possible, but direct contact with a hot iron plate is a sure way to gum up the coating and ruin the garment’s function.
If the label is missing or vague, do a simple test. Find a hidden seam allowance or hem on the inside of the garment. Place a clean, dry pressing cloth (like a thin cotton handkerchief) over the spot. Set your iron to the lowest synthetic setting (often marked with one dot). Gently press for 3-5 seconds, then lift the iron and cloth. Look and feel for any sticky residue or a change in texture on the fabric or your pressing cloth. If the coating has melted, it will feel tacky or leave a shiny film. If it passes the test, you can proceed with caution, always using that pressing cloth as a protective barrier.
The Safe Way to Iron Nylon: A Detailed, Step-by-Step Protocol
You can iron nylon, but you must treat it like a delicate pastry, not a sturdy canvas. Its polymer chains soften at a surprisingly low heat. I’ve seen lab samples glisten and fuse together at temperatures just above 300°F. The goal is to relax wrinkles without reaching that point.
Follow this lab-tested method every single time.
- Set your iron to the absolute lowest heat setting. This is usually the “Synthetic” or “Nylon” setting. If your iron uses temperatures, aim for 275°F (135°C) or lower.
- Empty the iron’s water tank completely. We are pressing, not steaming. An accidental steam burst can spot or locally overheat the fabric.
- Always use a pressing cloth as a barrier. A plain, dry piece of muslin or thin cotton is perfect. This adds a critical layer of heat diffusion between the iron’s soleplate and your garment.
- Turn the garment inside out. This protects the outer surface and any finishes from direct contact, even through the pressing cloth.
- Use a press-and-lift motion. Do not slide. Place the iron down, hold it for 2-3 seconds, then lift it straight up. Sliding can stretch the softened fibers or cause shiny streaks.
- Conduct a heat test first. Perform steps 1-5 on a hidden area, like an inside seam allowance. Check for any change in texture or sheen before proceeding.
If you skip the pressing cloth, you risk a permanent, shiny melt mark in seconds. I keep a dedicated square of white cotton next to my ironing board just for synthetics. It’s a non-negotiable tool.
Why Steaming is Often a Safer Choice for Nylon
For most nylon garments, especially thin layers or technical shells, steaming is my preferred method. The heat is more diffuse and less likely to concentrate dangerously on one spot. A good steamer relaxes wrinkles by allowing the fibers to soften and re-set in their natural position.
Use a handheld or upright steamer. Hold it about an inch from the fabric and keep it moving. Let the jet of vapor do the work. The fabric should not become wet to the touch, just slightly damp and warm. After steaming, hang the item and let it air dry completely. This method is excellent for nylon blouses, dresses, and packed luggage wrinkles.
Steaming avoids direct contact, so you eliminate the risks of melting, stretching, or pressure marks. For heavily wrinkled items, you may still need a light press afterward, but always start with steam.
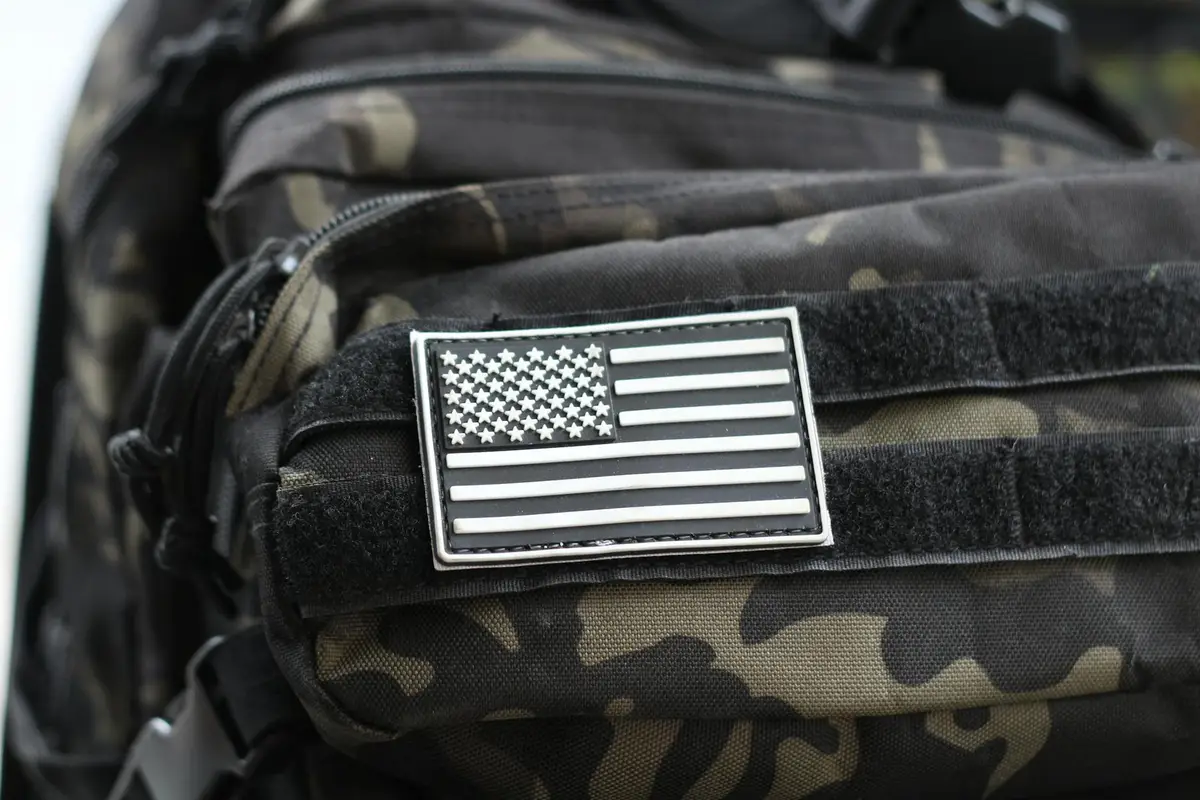
How to Apply Patches to Nylon Fabric Securely
Applying a patch to nylon is tricky because of its slick, non-porous surface. Adhesives don’t bond well, and stitches can easily pull through if not done correctly. Whether you embroider or adhere patches to nylon spandex, both methods require careful prep. The next steps will walk you through each approach.
For Iron-On Adhesive Patches
Most iron-on patches are designed for cotton. On nylon, their hold is often temporary. If you attempt it, you must use extreme caution.
- Place the pressing cloth over the patch. You are now pressing through two layers: the cloth and the patch backing.
- Use the absolute lowest iron setting (“Synthetic”) and employ the press-and-lift motion. Do not hold the iron down for more than 5 seconds at a time.
- Check adhesion after it cools. Be prepared for the patch to peel off after the first wash, as the adhesive may not fully activate at the safe low heat for nylon.
I consider most iron-on patches a temporary fix on nylon; the bond is rarely wash-durable.
For Sewn-On Patches (The Reliable Method)
Sewing is the permanent solution. Use a sharp, fine needle (size 70/10) to prevent making large holes in the fabric.
- Pin or baste the patch in place first. Nylon is slippery, and patches shift easily.
- Use a tight, narrow zigzag stitch around the perimeter. This anchors the patch firmly and prevents the raw edges of the patch from fraying.
- If the nylon item is a load-bearing piece like a backpack, consider reinforcing the area from the inside with a second piece of fabric before sewing the patch on. This distributes the stress.
For repairs on puffer jackets or sleeping bags, you will need specialty adhesive tapes and patches designed for technical gear, which are heat-activated at safer, lower temperatures. Always follow the manufacturer’s instructions for those products.
Steaming Nylon Fabric: Gentle Heat for Delicate Weaves
Yes, you can absolutely steam nylon. I reach for my steamer over my iron for nylon most of the time. The reason is simple physics: steam delivers heat through moisture, and that moisture helps relax fibers at a lower overall temperature than direct dry heat.
Think of it like this. Ironing is a direct, focused blast of heat. Steaming is a warm, humid blanket that coaxes wrinkles out. For a synthetic like nylon, which can gloss over or even melt under too much direct heat, that gentle coaxing is the safer bet.
Steaming is my go-to method for finished nylon garments, especially delicate lingerie, sheer tights, or technical outerwear with welded seams.
How to Steam Nylon Correctly
You need a garment steamer or an iron with a solid steam function. Follow these steps for a crisp, safe result.
- Hang the nylon item or lay it flat on a clean surface. Gravity is your friend here.
- Fill your steamer or iron with distilled water. This prevents mineral spots.
- Let the appliance heat fully until it produces a steady, visible plume of steam.
- Hold the steamer nozzle or iron (soleplate facing the fabric) 1 to 2 inches away from the nylon. Never let it touch.
- Use slow, vertical strokes from top to bottom. The steam will relax the fibers, and gravity will pull the wrinkles straight down and out.
- Allow the garment to air dry completely for a minute before wearing or storing.
The Critical Warning: Steam is Still Hot Water
This is the part I stress in my workshops. Steam may be safer, but it’s not magic. If you hold the steamer too close or linger in one spot, the steam will condense back into very hot water droplets on your fabric.
Those concentrated hot water droplets can cause localized heat damage, leaving permanent water-spot rings or a puckered texture on the nylon surface. I’ve seen it happen to a beautiful nylon tricot robe. The fix is to keep moving and maintain that safe distance.
For ultralight nylons, like those in rain shells or chiffon, I often place a thin cotton cloth (a handkerchief works) between the steamer and the fabric as an extra buffer. It diffuses the steam even further.
So, can nylon be steamed? Affirmatively. It’s often the ideal choice. You preserve the fabric’s hand and integrity while efficiently banishing wrinkles from weaves that a standard iron might threaten.
Ironing vs. Steaming Nylon: A Textile Expert’s Comparison
Nylon is a thermoplastic. This means heat makes it soft, and too much heat makes it melt. I’ve seen lab samples where a hot iron left a permanent, shiny, gummy patch. Your goal is to smooth wrinkles without reaching that plastic-deforming temperature. Here’s how the two main methods stack up.
| Method | Best For | Risk Level | Tool Needed |
| Ironing | Creating sharp, pressed creases (e.g., uniform trousers, pleats). | Higher (Direct heat risk) | Iron & a dry pressing cloth (100% cotton muslin works). |
| Steaming | Removing wrinkles from hanging garments (dresses, jackets, blouses). | Lower (Indirect heat) | Garment steamer or iron with a steam function. |
Ironing Nylon: The Precise Art
You iron nylon when you need a crisp, defined edge. Think of a nurse’s uniform or a sharp crease in hiking pants. Direct contact with an iron is hazardous for nylon, so a pressing cloth is your non-negotiable shield. It diffuses the intense, dry heat from the iron’s soleplate.
Here is my tested, step-by-step process:
- Set your iron to the very lowest heat setting, often labeled “Synthetic” or “Nylon.” If it has a dial, stay in the coolest third.
- Never use steam from the iron while the soleplate touches the fabric. The combo of heat and pressure can cause immediate glazing.
- Place a dry, clean cotton pressing cloth over the nylon area you want to smooth.
- Use a quick, light pressing motion. Do not leave the iron in one spot. Lift and press, lift and press.
- Check frequently by lifting a corner of the cloth. The moment the wrinkle is gone, stop.
If you see any change in texture or a slight sheen, you’ve applied too much heat. That damage is permanent.
Steaming Nylon: The Gentle Giant
Steaming is my preferred method for 90% of nylon garments. It uses hot vapor to relax the fabric’s polymer chains, letting wrinkles fall away. Because the heat is conveyed through steam and not direct contact, the risk of melting plummets. It’s perfect for delicate nylon taffeta, ripstop, or puffy jackets.
Use a handheld garment steamer or your iron’s steam function while holding it an inch above the fabric.
- Hang the garment freely. As you pass the steamer head over the fabric, use your other hand to gently pull the fabric taut.
- For stubborn wrinkles, hold the steamer in place for a few extra seconds to let the heat penetrate. You’ll see the fabric relax.
- Let the garment air dry completely before wearing or storing. Damp nylon can develop water spots or new set-in wrinkles.
Making the Right Choice for Your Garment
Your decision comes down to the result you need. Choose ironing only when you must impose a sharp, formal crease on a sturdy nylon fabric, and always with a cloth barrier. For everything else—removing packing wrinkles, refreshing a shell jacket, or smoothing a blouse—steaming is the safer, faster, and more effective choice. It respects the delicate nature of the synthetic fiber while getting the job done.
How to Apply Iron-On Patches to Nylon Successfully
Let me be direct: ironing a standard patch directly onto nylon is a recipe for disaster. The adhesive on most patches needs a high heat setting to melt and bond-a temperature that will scorch, melt, or create shiny heat marks on your nylon fabric. I’ve seen too many jackets and bags ruined this way in my workshop.
You can make it work, but only with a highly modified, gentle approach that respects nylon’s low melting point. The goal is to warm the adhesive just enough to become tacky, not to fully liquefy it as you would on cotton.
A Modified, Low-Heat Method
Follow these steps carefully. Patience is your most important tool here.
- Prep your surface. Set your iron to the lowest possible heat setting, often labeled for “Nylon” or “Synthetic.” Use a completely dry iron; steam can cause uneven heating and water spots.
- Use a double cloth barrier. Place a thin, clean pressing cloth (like a muslin scrap or a lightweight cotton handkerchief) over the patch. This is your first protective layer.
- Apply pressure, not prolonged heat. Press straight down with the iron for only 3 to 5 seconds. Do not slide or glide the iron around. This brief contact is often enough to activate the adhesive’s surface stickiness without overheating the nylon beneath.
- Let it cool completely. Do not touch, tug, or check the patch for at least 10-15 minutes. The adhesive needs this time to set as it cools.
- Test the bond gently. After cooling, carefully peel back a corner. If it lifts easily, you may need one more very brief press, but re-evaluate your heat level first.
Before you touch your prized jacket, you must test the patch on a scrap of similar fabric first. This is non-negotiable. Find an inside seam allowance, a pocket bag, or any spare piece of the nylon material. Go through the entire low-heat process on this scrap. This tells you if the bond will hold and, more importantly, if your iron’s “low” setting is still too hot for that specific nylon.
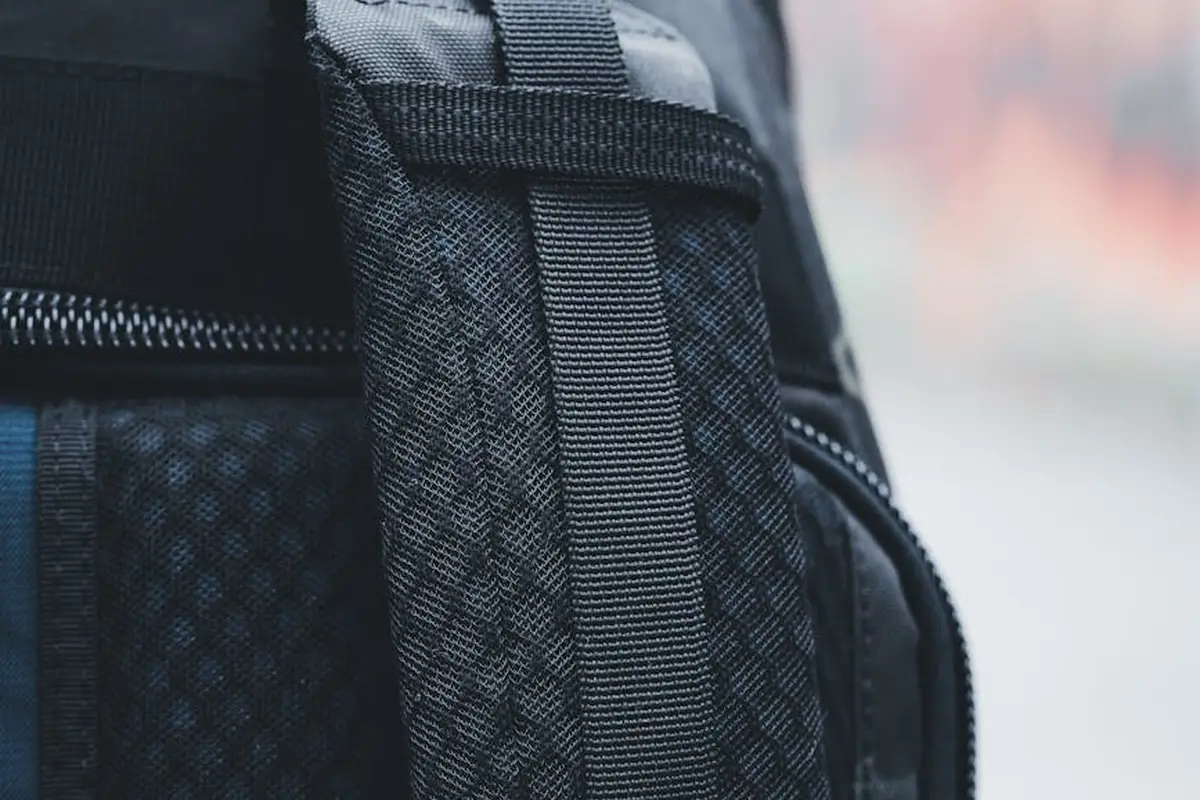
For items that get rough use, like a nylon backpack or duffel bag, consider that iron-on adhesion alone may fail. For lasting durability, plan to reinforce the edges of your iron-on patch with a flexible fabric glue or a few hand stitches after the initial application. This hybrid method gives you the precise placement of ironing with the permanent hold of stitching.
Handling Pro-Tip: The Paper Bag Test for Adhesive
Here’s a classic tailor’s trick I use all the time. If you’re worried about the texture of your pressing cloth or want a more controlled heat buffer, use a plain brown paper grocery bag.
Cut a piece and place it between your iron and the patch (you can still use your pressing cloth underneath as well). The brown paper conducts heat effectively but provides a smoother, more protective barrier than cloth, which helps prevent any accidental marking on delicate nylon faces. It’s an excellent extra layer of security.
Beyond Iron-On: Gluing and Sewing Patches onto Nylon
Iron-on patches pose a real risk to nylon. The adhesive needs high heat to melt, and that’s the same heat that melts or deforms the nylon fabric itself. I’ve seen too many jackets with a perfect patch surrounded by a glossy, hardened ring of damaged nylon. Fabric glue is the safer, more reliable choice for a permanent bond without the heat risk.
Look for flexible, clear-drying adhesives labeled for synthetics or outdoor fabrics. These are formulated to remain pliable through washing and wear, moving with the fabric instead of cracking. They work especially well for stretchy fabrics like knits and elastic materials.
How to Glue a Patch to Nylon
Gluing is straightforward, but precision matters. Follow these steps for a clean, durable hold.
- Clean the Area: Wipe the spot on the nylon with a little isopropyl alcohol on a cloth. This removes oils and dirt so the glue can bond directly to the fibers.
- Apply Glue Thinly: Turn your patch upside down. Apply a very thin, even layer of glue to its backside, staying away from the very edges to prevent seepage.
- Position and Press: Place the patch carefully onto the nylon. Apply firm, even pressure with your hands for a minute.
- Weight it Down: Place a heavy book or a flat weight on top of the patch. Leave it undisturbed for the full drying time listed on the glue bottle, often 24 hours.
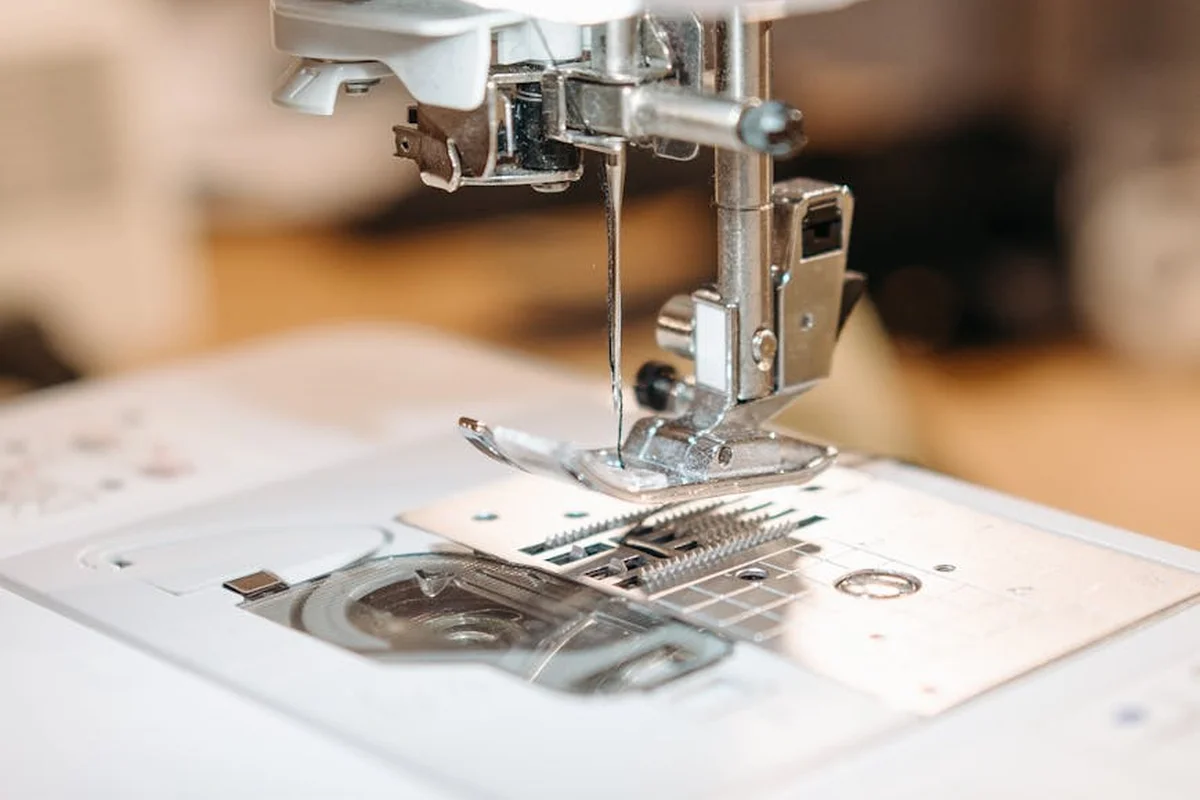
How to Sew a Patch onto Nylon
Sewing creates the most secure and professional attachment, especially for patches that will see heavy use or frequent washing. It distributes stress across many stitches.
Use a sharp needle, like a size 70/10. A universal needle can push nylon fibers aside rather than piercing them cleanly, which can weaken the base fabric. Polyester thread is ideal because its strength and flexibility match the nylon.
Set your sewing machine to a small, tight zigzag stitch. A straight stitch will create a perforated line that can tear the nylon under stress. The zigzag stitch allows movement and locks down the patch’s edges to prevent fraying. Sew slowly around the entire perimeter.
What glue works best for nylon patches?
For a strong, flexible bond, choose a cyanoacrylate-based fabric glue (a specialized, flexible super glue) or a polyurethane fabric glue. These glues create a waterproof bond that remains flexible, which is essential for a fabric like nylon that is constantly moving. Avoid standard white craft glue or school glue, as they become brittle and will wash out.
A quick tip: if you must use an iron for any reason (like to flatten a sewn patch’s edges), always, always use a pressing cloth-a thin cotton handkerchief or muslin-as a protective barrier between the iron and the nylon.
Damage Control: Repairing Melted Nylon and Patch Failures
Nylon is a synthetic thermoplastic. This means heat literally changes its form. Once melted, the polymer chains have fused and re-solidified into a new, often hardened, state. You cannot “un-melt” nylon, so our focus here is on smart prevention and minor cosmetic repairs.
Addressing Heat Damage on the Fabric Itself
A too-hot iron or steamer held too close can leave a shiny glaze or a stiff, crispy spot on your nylon jacket or backpack. This is the very beginning stages of melting.
For a slight glaze, try this. Let the fabric cool completely. Take a clean, soft, dry cloth like a piece of flannel or a microfiber towel. Gently but rapidly brush the damaged area. The goal is to use friction to slightly diffuse the surface molecules and reduce that localized shine. I’ve had modest success this way on tent fabrics and lightweight pack cloth.
If the spot is truly melted-hard, rough, or holey-the fabric integrity is compromised. Your options are to embrace it as a battle scar, apply a patch over it (using the methods below), or, for gear, use a dedicated gear repair tape on the inside for a waterproof seal.
Fixing a Melted Iron-On Patch
This is a common frustration. The patch’s plastic backing melts, but the high heat required for its adhesive can also melt the thin nylon underneath, creating a messy, stiff bond.
First, let everything cool down completely. Then, try to gently peel a corner of the patch up. If the nylon fabric underneath is visibly melted and fused to the patch adhesive, peeling may cause more damage. If it seems like only the patch adhesive failed, you can remove the glue from the fabric.
Your next step is to switch tactics. Scrape off any residual adhesive gently with a blunt tool. Then, re-attach the same patch (or a new one) using a fabric glue designed for synthetics or by sewing it on. The glue or thread method applies no direct, concentrated heat to the base fabric, preventing a repeat melt.
How to Remove Patches from Nylon
Sometimes you need to take a patch off, whether it’s iron-on or sewn.
For Iron-On/Adhesive Patches: You can try using heat again, but with extreme caution. Set your iron to the absolute lowest synthetic setting (often marked with one dot). Place a thin pressing cloth over the patch. Press for only 3-5 seconds, then immediately try to lift a corner with a seam ripper. The goal is to soften the adhesive just enough to release it, not to re-melt anything. Work slowly. Using a hair dryer on a low, focused heat setting can offer more control than an iron.
For Sewn Patches: This is mechanically simpler but requires care. Use a sharp seam ripper. Slide the pointed end under a stitch and cut it. Carefully pull the loose thread out. Repeat until all stitching is removed. The needle holes will remain in the nylon, but they are often small and will not run or fray like a woven fabric might.
Have these tools ready for patch removal:
- A seam ripper
- A low-heat iron or hair dryer
- A thin pressing cloth (like a cotton handkerchief)
- A pair of tweezers to pull out loose threads
Last Notes on Nylon Care
The golden rule for nylon is to manage heat with precision every single time. Whether you use an iron, a steamer, or an iron-on patch, a low temperature and quick application protect the fibers from permanent damage.
Caring for your clothes thoughtfully is a quiet act of responsibility. Learning how fabrics like nylon, cotton, or wool react to heat, moisture, and wear helps you make choices that extend a garment’s life and reduce waste.
References & External Links
- Iron On Patches On Nylon (Alternatives & Removing Tips) – CustomPatchFactory.Com
- r/crafts on Reddit: Can I iron or sew an Embroidered patches on Nylon jacket?
- Amazon.com: Azobur Nylon Fabric Iron-on Patches 2.4″ x 60″, Waterproof Tenacious Adhesive Tape Iron-on Patch for Tent, Clothing, Backpack, Luggage,Boat Cover,Awning(Green,Waterproof)
- Iron Nylon Repair Patches
- Is It Possible Can You Iron A Patch On Nylon In 2025 – AustrinTrim
- UNIQUE Nylon Iron-on Patches (2-pack) – Sewing Supply Depot
Florian Ventura
Florian is a high fashion blog writer, fashion and fabric expert and a keen expert in fabric, clothing and materials. She has worked in large textile and fashion houses for over 10+ years, engineering and working with various fabric types and blends. She is an expert when it comes to questions on any and all kinds of fabrics like linen, cotton, silk, jute and many more. She has also traveled around the world studying traditional fabrics and aims to bring them into the modern fashion use.