
How Big Is a Yard of Fabric? Your Complete Guide to Dimensions and Conversion
You’re about to cut into a new project, or you’re staring at an online listing, and that nagging question hits: is one yard of fabric actually enough? I’ve been there in the studio, tape measure in hand, and I can tell you that getting it right comes down to more than just length.
This guide will walk you through the standard dimensions of a fabric yard, how bolt width changes everything, how to convert yards to meters and inches, and my method for planning projects so you never come up short.
Executive Summary: The Yard at a Glance
A yard of fabric is always 36 inches long. That’s 3 feet, or about 0.91 meters.
This is a linear measurement of length, not a measure of area, which is the most common point of confusion. The problem is that fabric width is a completely separate number. It can range from a narrow 36 inches for some linens to 60 inches or more for drapery fabrics.
When you buy “one yard,” you are only deciding how long of a piece to cut from the roll. The width is predetermined by the fabric mill. This width directly dictates how much usable material you have for your project.
Here are quick, reliable width guidelines for common fabrics I’ve measured countless times:
- Quilting Cotton: Almost always 44/45 inches wide. It’s the workhorse of craft cotton.
- Lightweight Wool Suiting & Crepe: Often 54 to 60 inches wide. The wider cut is more efficient for tailored garments.
- Heavy Wool Coating & Melton: Typically 54 to 58 inches wide. These dense fabrics need loftier weaving looms.
- Silk Charmeuse & Habotai: Usually 45 inches wide. Silk fibers are precious, so mills optimize width for yield.
- Linen for Garments: Commonly 55 to 60 inches wide. Linen’s natural slubs and texture work well in wider formats.
- Polyester & Nylon Broadcloth: Frequently 58 to 60 inches wide. Synthetic fibers allow for very stable, wide weaves.
Defining a Fabric Yard: Length, Width, and Why It Gets Confusing
Let’s answer the primary question directly. A yard of fabric is 36 inches in length. You can also think of it as 3 feet, or 0.9144 meters for a precise metric conversion.
The width is the wild card, and it’s the single most important factor after fiber content when planning a project. Imagine a roll of paper towels. The length of sheets you pull off the roll is your “yardage.” The width of the roll itself is your “fabric width.” You need to know both numbers to know what you’re getting.
When someone asks, “how long and wide is a yard of fabric?” they are really asking for two separate pieces of data. You must provide both: the fixed length (36″) and the variable width (e.g., 44″, 60″). A store listing should always state both, like “44/45″ Wide Cotton Poplin.”
For smaller cuts, the math is simple. A quarter yard is 9 inches long (36 ÷ 4). A half yard is 18 inches. The width of that cut remains the full width of the fabric bolt.
I always remind my students to account for shrinkage in their yardage, especially for natural fibers. If you buy 1 yard (36″) of a cotton that shrinks 5%, you’ll finish with about 34.25 inches in length after a warm wash. Always pre-wash your fabric the same way you’ll launder the final item, then re-measure. This step saves so many projects.
This width variability also affects dyeing. A yard of 60-inch wide fabric has nearly 50% more surface area than a yard of 44-inch wide fabric. You’ll need significantly more dye for the wider piece to get the same color depth. Always calculate dye requirements by projected area, not just by yardage.
Why Fabric Width Isn’t Standard: A Fiber and Manufacturing Story
When you ask how big a yard of fabric is, I need to know the width. This isn’t a trick. Fabric width depends on the machinery that made it, the fiber’s own personality, and what the cloth is meant to do.
Historical handlooms produced narrow widths, often just 27 to 36 inches. Seamstresses would stitch panels together to make wider garments. Modern industrial looms changed everything. They are massive, efficient, and designed for speed. A mill sets its loom width to maximize output for a specific fabric’s end use.
The width of your fabric is a direct result of the industrial process chosen for its fiber content and final purpose.
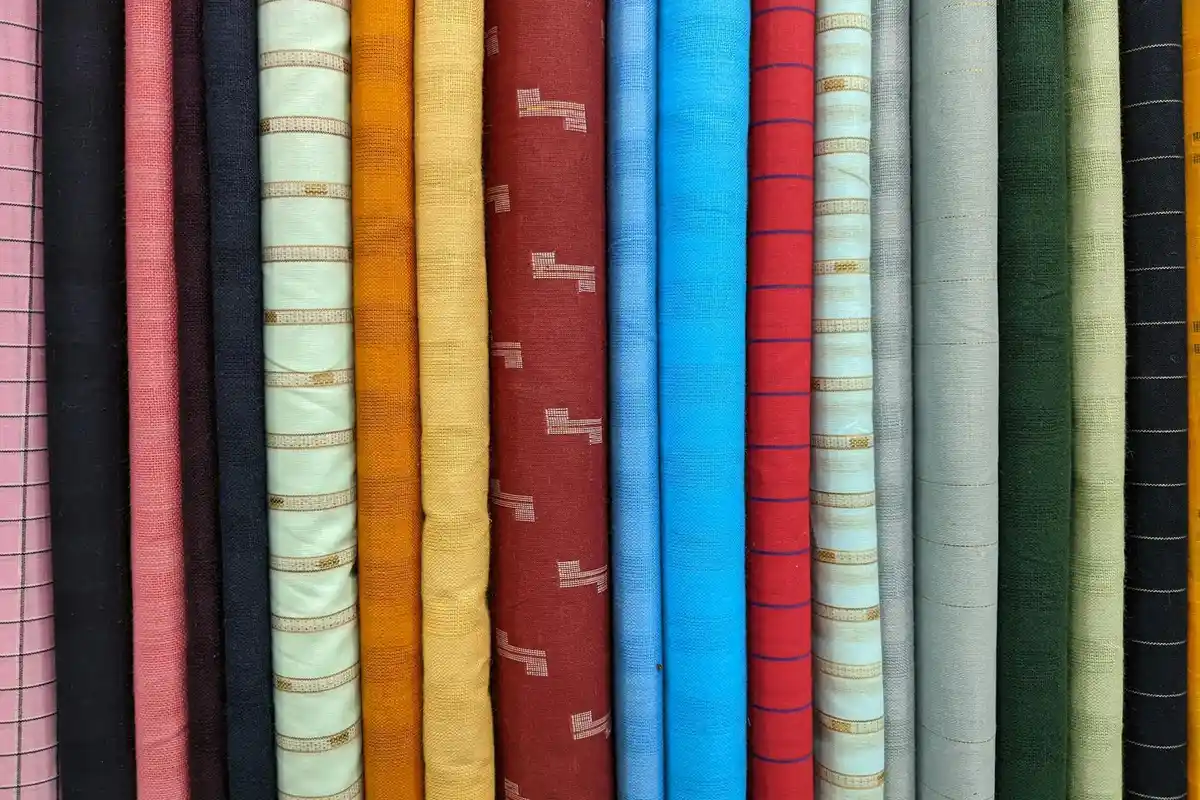
Common Fabric Widths by Type
While you can find exceptions, these widths are reliable guides. I always measure twice when working with a new bolt.
| Fabric Type | Common Widths | Why This Width? |
| Cotton (Quilting & Calico) | 44″, 45″ | Optimized for quilt patterns with minimal waste. Often a legacy width from older loom sets. |
| Cotton (Apparel & Bottomweight) | 58″, 60″ | Wider for cutting pant legs or full skirts from a single layer, saving time. |
| Wool (Suiting, Coating) | 54″, 58″, 60″ | Wool fibers are often spun into heavier yarns. The wider width accommodates the bulk of a coat or suit pattern. |
| Silk (Charmeuse, Habotai) | 45″, 54″ | Related to traditional loom widths for fine, delicate fibers. The 54″ width is common for linings. |
| Polyester/Nylon (Apparel) | 54″-60″ | Mirrors wool and cotton apparel widths for similar pattern use. Often used for linings and activewear. |
| Polyester/Cotton Blends (Quilting) | 44″ | Follows the quilting cotton standard for compatibility in projects. |
| Upholstery & Drapery | 54″, 60″, and even 118″ | Extremely wide to avoid seams in large furniture covers or curtains. |
The Critical Impact on Your Project
This width variation isn’t just trivia. It changes the math completely. Area is what you’re really buying. A yard is always 36 inches long, but the width is the variable.
Let’s do the math I do in my head at the shop. A yard of 44″ wide fabric gives you 1,584 square inches (44 x 36). A yard of 60″ wide fabric gives you 2,160 square inches. That wider yard has over 36% more material. For the wool flannel example, a 60″ wide yard has nearly 50% more area than a 44″ wide cotton yard.
This affects your pattern layout, cost-per-project, and how much you need to buy. A pattern drafted for 60″ fabric might not fit on 44″ fabric, even with the same yardage length.
My non-negotiable pro-tip: always confirm the exact width before you purchase, especially online. Never assume it’s “the standard.” Your project success depends on this single number.
The Shrinkage Factor: Your Yard Today Is Not Your Yard Tomorrow
When you buy fabric, the yardage on the bolt is measured in its current, unwashed state. I think of this as the fabric’s “before” photo. That crisp new cotton or fluffy wool hasn’t yet met water and heat, which permanently change its dimensions. This initial state is often called “loom state” or “finished” fabric, but “finished” here refers to the mill’s processing, not your washing machine.
Shrinkage isn’t a flaw. It’s a fundamental property of how fibers relax and tighten after the tensions of spinning and weaving. The first proper wash is when it happens. With cotton-linen fabrics, shrinkage often shows up during that first wash or in the dryer. Understanding how wash and dryer cycles affect them helps you anticipate the change and plan pre-shrinking steps.
How Different Fibers Behave
Not all fabrics shrink the same way. Knowing your fiber is the first step to predicting its behavior.
- Cotton, Linen, and other Plant Fibers: These are like sponges. They absorb water, which causes the fibers to swell and the yarns to contract. You can typically expect 3-5% shrinkage, but some loose weaves or unprocessed cottons can shrink 10% or more. I always pre-wash these.
- Wool and other Animal Hair Fibers: Wool is unique. It doesn’t just shrink; it can felt. Agitation, heat, and rapid temperature changes cause the scales on the wool fibers to lock together irreversibly. A hot wash can turn a sweater into a doll-sized garment, so always treat wool with a cold, gentle hand.
- Silk: Silk experiences moderate shrinkage, usually around 3-7%. The real risk with silk is color bleeding or water spotting, so I test a corner first and usually hand-wash.
- Polyester, Nylon, and other Synthetics: These have minimal shrinkage from washing, often less than 1-2%. The fibers are essentially heat-set during manufacturing. Their main reaction is to high heat in the dryer, which can melt or warp them.
Your At-Home Shrinkage Test: A Fabric Scientist’s Method
Don’t guess. Test. This simple method removes the mystery and gives you real numbers to work with.
- Cut a perfect square from the edge of your new fabric. I use a 10-inch by 10-inch square. Mark the dimensions clearly with a water-soluble pen or tailor’s chalk.
- Wash and dry this test square exactly how you plan to launder the final garment. Use the same detergent, water temperature, and dryer setting (or air-dry method).
- Once completely dry, measure the square again. Lay it flat and measure both the length and width.
- Calculate the percentage of shrinkage. For example, if your 10-inch side is now 9.5 inches: Shrinkage = [(Original – Final) / Original] x 100. So, [(10 – 9.5) / 10] x 100 = 5% shrinkage.
Do this for both length and width, as they often shrink differently. Now you know precisely how much fabric you will lose.
Why Pre-Washing is Non-Negotiable
Skipping the pre-wash is the most common mistake I see. You might sew a perfectly fitted shirt, only to have it become too small and misshapen after its first wash. Pre-washing your fabric before you cut a single pattern piece is the only way to ensure your handmade garment will remain the correct size for its entire life. It also removes factory finishes and checks for colorfastness. Think of it as part of the sewing process, not an optional step. Fabrics with the least shrinkage respond best to this approach. Choosing low-shrinkage fabrics and following proper washing guidelines can help keep your fit intact. Your future self, wearing a garment that still fits, will thank you.
How to Calculate Yardage for Your Project (The Right Way)
Forget just measuring length. The most common mistake I see is buying a yard of this and a yard of that without considering the fabric’s width. You are not buying a line of fabric, you are buying an area of fabric, and the usable width is just as important as the length you cut.
Think of it as “fabric width efficiency.” A wider bolt gives you more room to lay your pattern pieces side-by-side, which often means you need less total length.
Width Changes Everything: A Practical Example
Let’s say you’re making a simple midi skirt from a pattern that calls for two main panels. If you choose a standard quilting cotton that’s 44 inches wide, you’ll likely need to cut each panel one after the other along the fabric’s length. That might require 2 full yards.
Now, imagine you choose a beautiful wool crepe that’s 60 inches wide. Because the fabric is wider, you can often fit both skirt panels side-by-side across the width, cutting the required length in half. You might only need 1.5 yards, saving material and money.
Your Mental Yardage Calculator
You don’t need complex software for basic projects. Use this fabric scientist-approved mental check:
- Add Up the Longest Dimension of each major pattern piece. For a simple top, that’s often the “center front” piece from shoulder to hem.
- Consider Your Fabric Width. Subtract about 2 inches per side for selvages you won’t use, giving you your “usable width.”
- Do the Division in Your Head. Can the total width of your pattern pieces fit across the usable fabric width? If yes, you only need the length of your longest piece, plus a little for hem. If no, you’ll need multiple lengths.
The simple idea is: (Total Width of Pattern Layout) divided by (Fabric Usable Width) tells you how many “rows” of pieces you need to cut, which dictates your yardage.
When You Need Extra: The Complications
This basic math gets tweaked by fabric character. Some materials demand more yardage, and it’s not a suggestion.
- Nap & Pile: Fabrics like velvet, corduroy, or a fuzzy wool have a directionality (nap). You must cut all pieces with the pile running the same way, usually top to bottom. You can’t flip pieces upside-down to save space.
- Directional Prints: Large stripes, plaids, or any print with a clear “up” (like a floral vine) acts just like a nap. Everything must be oriented the same.
- Pattern Matching: For stripes or plaids, you need extra length to shift the pattern on your fabric until the lines match perfectly at the seams. I always add at least the size of one pattern repeat, often more.
For napped, directional, or matched fabrics, buy an extra 1/4 to 1/2 yard minimum. It is cheaper than the heartbreak of a one-way project gone wrong. Always lay out your full pattern on the floor (or a large table) with the fabric folded as you plan to cut before you make that first snip.
Step-by-Step Care & Handling Protocol Before You Cut
Buying fabric is just the first step. The real work begins before your scissors touch the cloth. Pre-treating your yardage is non-negotiable. This process locks in the final dimensions and behavior of the fabric, so your finished project won’t warp or shrink later. I treat every new piece of fabric like a wild horse that needs gentling before it can be ridden.
Your goal is to simulate the lifetime of care the finished item will receive, all in one go, before you cut a single pattern piece. Skipping this is the most common reason for a handmade garment to end up too small.
For Cottons, Linens, and Their Blends
These plant-based fibers love water and heat, which is why they shrink. We use that to our advantage upfront.
- Machine wash on a warm cycle (around 40°C or 105°F). This temperature relaxes the fibers enough to let them contract.
- Tumble dry on a medium heat setting until completely dry. The mechanical action and heat of the dryer induce the final bit of shrinkage that air-drying might miss.
- Iron the fabric while it is still slightly damp. This gives you a crisp, stable surface that is infinitely easier to cut and pin. A dry, wrinkled cotton is a nightmare to handle accurately.
Expect typical shrinkage of 3-5% in length and width after this process, which is why we buy extra. For quilting cottons, I often do this cycle twice to be absolutely sure all shrinkage is done.
For Wool
Wool is alive with microscopic scales. Heat, agitation, and sudden temperature changes make those scales lock together permanently, a process called felting. We must avoid this at all costs to preserve the fabric’s dimensions and drape, especially when dealing with boiled wool.
- Always hand-wash in a basin of cool, not cold, water. I use water that feels comfortable to my wrist.
- Use a detergent specifically formulated for wool or hair. These are pH-balanced to keep the fiber scales smooth.
- Gently swish the fabric. Never agitate, scrub, or wring. Imagine you are bathing a sleeping cat.
- Rinse in water of the same temperature. Press the water out gently; do not lift and twist the heavy, wet mass.
- Lay the fabric completely flat on a drying rack or towels. Gently pat and stretch it back to its original purchased measurements-this is called blocking. Let it air-dry completely away from direct heat.
This gentle method prevents felting, keeping your wool yardage soft, lofty, and exactly the size you need for your pattern – an essential part of wool fabric production.
For Silk
Silk is a protein fiber, strong but easily damaged by harsh treatment. Its dyes can also be surprisingly fugitive. Caution is key. Knowing about silk fabrics—types, properties, and care— helps you choose the right handling. This care preserves texture and luster.
- First, always test for colorfastness. Snip a small corner or use an off-cut. Wet it with cool water and press between two layers of white paper towel. Any color transfer means dry cleaning is the safer choice.
- If the color is stable, hand-wash in cool water with a mild, neutral pH soap. Silk loses strength when wet, so handle with care.
- Never wring silk. Roll it in a clean towel to press out excess moisture.
- Lay it flat to dry, away from sun, which can weaken the fibers. You can iron silk on a low setting while it is still slightly damp to restore its beautiful luster.
Pre-treating silk this way removes any finishing chemicals and ensures any minor relaxation happens before you cut, not after you sew.
For Synthetics (Polyester, Nylon, Acrylic)
These man-made fibers are generally stable but are highly sensitive to heat, which can cause permanent wrinkles, shrinkage, or a melted, shiny glaze.
- Machine wash on a cool or cold cycle. This is sufficient to remove any mill finishes without applying stress.
- Tumble dry on a low heat setting or, even better, hang to dry. High heat is the enemy; it can set creases you can never iron out.
- If you must iron, use the lowest possible synthetic setting. Always use a pressing cloth between the iron and the fabric. A direct hot iron can scorch or melt synthetic fibers in an instant, leaving a hard, shiny patch.
For synthetic blends, follow the care instructions for the most delicate fiber in the mix. A poly-cotton blend should be treated like cotton, but with a cooler dryer temperature to protect the polyester component.
Textile Expert’s Note: Cutting, Grain, and Rotary Blade Longevity
Knowing a yard’s dimensions is one thing. Using it correctly is another. Let’s talk about the cut.
Why Cutting on the Grain Matters
Every woven fabric has a grain. The lengthwise grain runs parallel to the selvage (the finished edge). The crosswise grain runs from selvage to selvage. Cutting your pattern pieces aligned with the correct grain is non-negotiable for a professional result.
Think of the lengthwise grain as the backbone of your garment. It has the least stretch and provides stability. You almost always want the main vertical seams of a garment-like the center front or back-to run along the lengthwise grain. This ensures the fabric hangs straight and doesn’t twist around your body.
The crosswise grain has a bit more give, or mechanical stretch, because of the way threads bend over and under each other. It’s often used for horizontal elements. Cutting off-grain, at a wonky angle, distorts this built-in structure. The result is a finished piece that pulls, twists, and never sits right.
How Long Does a Rotary Blade Last Cutting Fabric?
Your blade’s lifespan isn’t measured in days, but in yards of specific fabric. A sharp rotary blade is a safety tool; a dull one is a hazard that can slip or mangle your material.
Blade wear depends entirely on what you’re cutting. Synthetics like polyester and nylon are notoriously abrasive on a microscopic level. They’ll dull a blade much faster than lightweight, natural fibers like cotton lawn. Tightly woven fabrics, such as canvas or denim, also demand more from a blade than a loosely woven linen.
I change my blade at the first hint of trouble. Don’t wait until it’s completely useless. The pro tip is to change blades at the first sign of dragging, skipped threads, or needing multiple passes to cut through. A fresh blade glides; a dull one chews.
Handling Different Fabrics When Measuring and Cutting
Your approach should change with your material. Here’s how I handle two extremes.
For slippery fabrics like silk charmeuse or polyester satin, stability is key. I lay them on a large, clean cutting mat and use pattern weights instead of pins, which can distort the delicate weave. I measure and mark with tailor’s chalk or a water-soluble pen, and I make my cuts with a fresh rotary blade in one confident motion. Pinning can cause these fabrics to slither and misalign.
For stable fabrics like wool melton or quilting cotton, you have more leeway. These fabrics tend to “grip” themselves and the cutting surface. You can safely use pins within the seam allowance. I still recommend a rotary cutter for long, straight cuts on cotton fabrics, but a sharp pair of fabric shears works perfectly on stable wools. Just ensure the fabric is perfectly flat and on-grain before you commit to the cut.
Troubleshooting Common Yardage and Care Problems
You have your fabric. You know the dimensions. Then reality hits: the material itself can change. Here is how to manage the most common issues that affect your yardage after purchase.
“My fabric shrank more than I planned!”
Shrinkage eats into your usable yardage. It is not a flaw; it is a property of the fibers. Think of a sponge (cotton) versus a spring (wool). They shrink differently, so you fix them differently.
For cotton, linen, and other plant-based weaves, try steam stretching. These fibers shrink because the threads swell and tighten. You can sometimes coax them back, especially when dealing with linen fabric.
- Wash and dry the fabric as you normally would, letting it shrink fully.
- Lay it flat on an ironing board. Pin the corners if needed.
- Using your iron on the highest steam setting, hover over the fabric, blasting it with steam. Do not press down hard.
- While the fabric is hot and damp, gently pull it lengthwise and widthwise to your desired measurements.
- Let it cool and dry completely before moving it. This can recover a surprising amount, especially with linen.
For wool, blocking while damp is your only hope for minor shrinkage, but felting is permanent. Animal fibers like wool have scales that lock together with heat, agitation, and moisture. If your wool sweater just got a little snug, you can try this.
- Soak the item in cool water with a bit of wool wash.
- Gently press out water-never wring.
- Lay it flat on a towel, shape it to the exact dimensions you need, and pin it in place.
- Let it air dry completely. This can restore shape and some length.
If the wool felted (it looks matted, thick, and stiff), that change is irreversible. The fibers have permanently fused.
“The colors bled when I pre-washed!”
This is a dye problem, not a fabric problem. Vibrant reds, navies, and purples on cotton and silk are famous for this. Always test first.
To test for colorfastness, cut a small swatch. Place it in a glass of warm water with a drop of mild detergent. Agitate it a little. Wait 10 minutes. If the water tints, your dye will run.
For fabric that fails the test, you have two main tools: dye fixatives and color-catcher sheets.
Dye fixatives, like sodium chloride for fiber-reactive dyes, work by chemically bonding loose dye molecules to the fiber. Follow the product instructions carefully. They work best before the first wash.
Color-catcher sheets are a brilliant safety net for every wash. Toss one or two in with your load. They absorb loose dye in the water, preventing it from settling on other fabrics. I use them whenever I wash dark or new items.
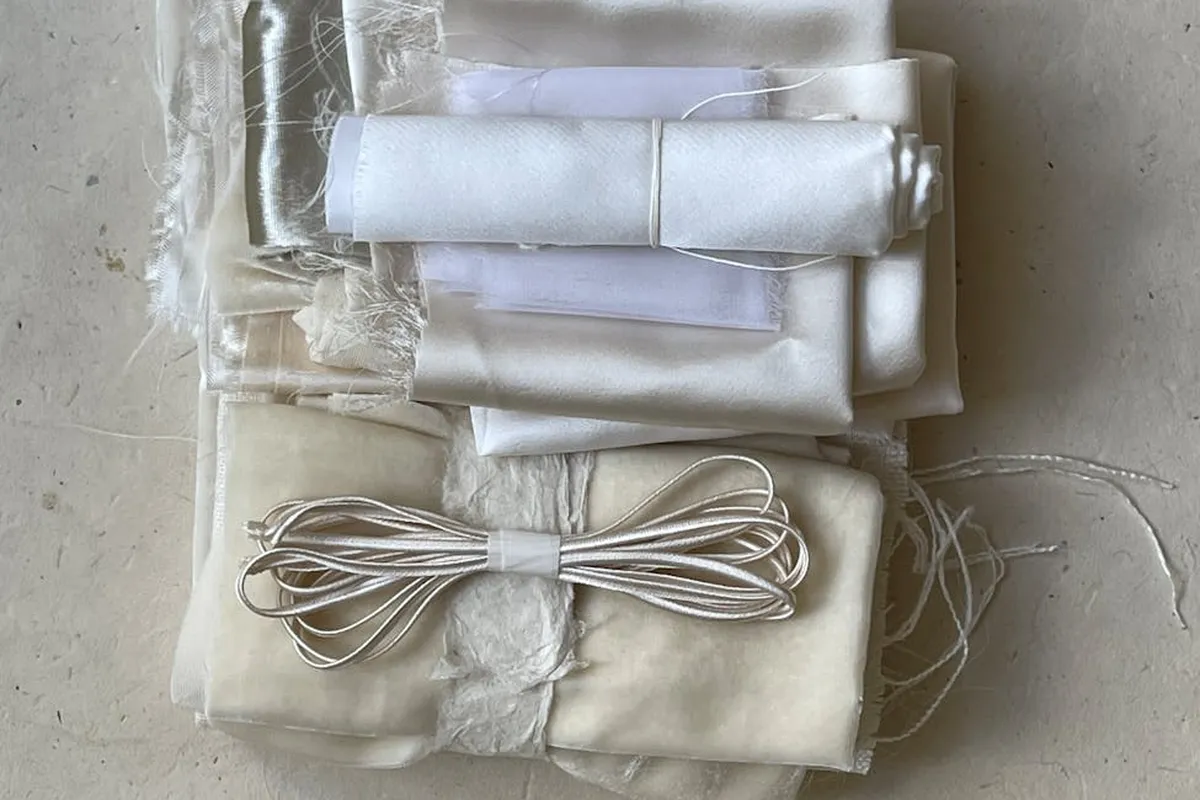
“I bought a cut, not a full yard.”
Fat quarters, half-yards, and remnant pieces are treasures for mending and small projects. The key is to store them so they stay usable.
Do not crumple them into a bin. Fold them neatly. For pieces smaller than a fat quarter, I wrap them around cardboard pieces cut from cereal boxes. This prevents deep creases and makes it easy to see what I have.
Label everything immediately. Write the fiber content, yardage, and source on a piece of masking tape stuck to the fold. Your future self will thank you when you need a matching patch for a cotton shirt or a scrap of silk for a mend.
Store similar fibers together. Keep your plant-based cottons and linens in one stack, your delicate silks and wools in another, and your synthetics separate. This way, when you need a specific type of fabric for a repair, you are not digging through a mixed pile.
Quick Reference Chart
| Fabric Type | Typical Widths | Key Shrinkage Behavior | Recommended Pre-Wash Method |
| Cotton (Quilting) | 42″, 44″, 45″ | Can shrink 3-5% lengthwise. Woven types shrink more than knits. | Machine wash warm, tumble dry medium. Steam press. |
| Cotton (Apparel) | 45″, 58″, 60″ | Shrinkage is often widthwise. Denim can shrink over 10%. | Wash as you plan to for the garment (hot for sheets, cool for dresses). |
| Linen | 54″, 58″ | Significant initial shrinkage (5-10%), but steams back well. | Machine wash warm, tumble dry low or air dry. Steam aggressively while damp. |
| Wool (Coating) | 54″, 60″ | Minimal relaxation shrinkage. Felts with heat/agitation. | Dry clean or steam-only. Avoid immersion washing. |
| Wool (Flannel/Suiting) | 54″, 60″ | Can shrink or stretch out of shape if mishandled. | Professional pressing recommended. Test a swatch for water spotting. |
| Silk (Habotai, Charmeuse) | 45″, 54″ | Can water spot and lose luster. Minimal shrinkage if handled gently. | Hand wash cool with pH-neutral soap or dry clean. Never wring. |
| Polyester & Nylon | 45″ to 60″+ | Negligible shrinkage from wash, but can melt or glaze with high iron heat. | Machine wash cool. Tumble dry low. Use a low-heat iron. |
| Poly-Cotton Blend | 44″, 60″ | Shrinkage reduced by synthetic content (often 1-3%). | Machine wash warm, tumble dry medium. Wrinkles less than pure cotton. |
Yardage Wisdom for Lasting Textiles
Always pre wash fabric to prevent shrinkage before you make your first cut. I test a swatch first to see exactly how materials like cotton, wool, or polyester blends react, so your final project keeps its intended size and fit. This helps prevent shrinkage from changing the finished measurements. It’s a quick, pre wash step that keeps projects predictable.
Treat every yard you purchase as a commitment to sustainable making by learning its fiber science. Understanding how silk dyes, nylon wears, or cotton shrinks lets you care for textiles responsibly, extending their life and reducing waste.
Expert Resources and Citations
- Fabric Size Chart – How many feet in a yard?
- r/sewhelp on Reddit: How much fabric is a yard? A 1/2 yard?
- How Big is a Yard of Fabric? 2025 Guide
- A Yard of Fabric is how BIG? Stitch Clinic
- Quilter’s Paradise – Free Fabric Measurement Conversion Calculator
Florian Ventura
Florian is a high fashion blog writer, fashion and fabric expert and a keen expert in fabric, clothing and materials. She has worked in large textile and fashion houses for over 10+ years, engineering and working with various fabric types and blends. She is an expert when it comes to questions on any and all kinds of fabrics like linen, cotton, silk, jute and many more. She has also traveled around the world studying traditional fabrics and aims to bring them into the modern fashion use.