
How Do You Print, Heat Press, and Treat Nylon Fabric for Adhesion?
Worried your design will peel right off that sleek nylon jacket? I have fixed this in the lab, and with the right approach, nylon can hold vibrant, durable prints.
We will cover nylon’s unique properties that affect adhesion, essential pre-treatment steps, precise heat press settings, and aftercare for long-term wear.
What Makes Nylon So Slippery and Heat-Sensitive?
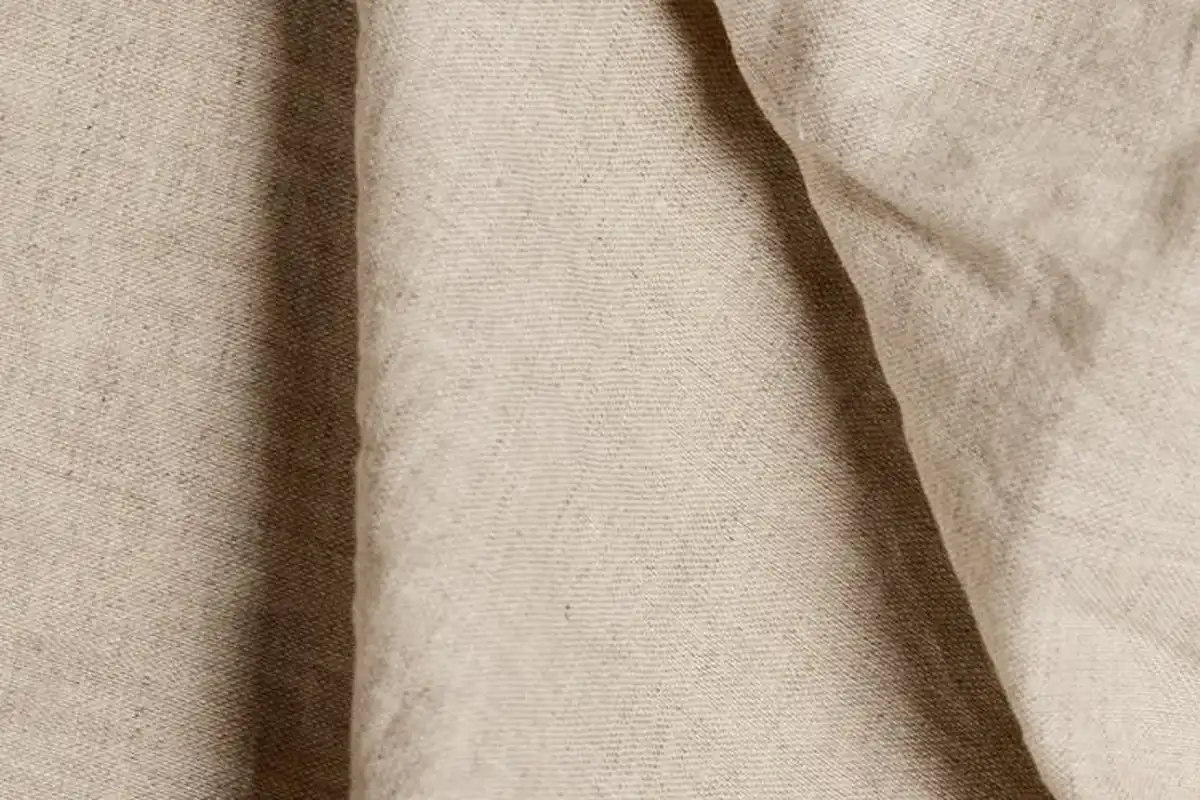
To understand how to stick anything to nylon, you first have to understand what it is. Nylon is a synthetic polymer, which means it’s a long chain of man-made molecules all linked together. Think of it like a smooth, uncooked spaghetti strand.
This structure gives the individual fibers a very sleek, non-porous surface. There are no tiny scales like on wool or natural microscopic crevices like in cotton. That slick surface is the main reason prints and adhesives struggle to get a grip; there’s simply nothing for them to physically latch onto.
Run your hand over a cotton tee and then a nylon jacket. The cotton has a slightly grippy, matte hand. The nylon feels slippery and almost glossy. Wool feels fuzzy and springy. Nylon lacks that natural texture, which is great for repelling water but tricky for adhesion.
Here’s the crucial part: nylon is thermoplastic. This means it softens and becomes malleable when heat is applied, rather than burning immediately like a natural fiber would. This heat sensitivity is your biggest challenge and your greatest tool—when applied correctly, heat can help fuse coatings and transfers to the fabric itself. But too much heat causes glazing, shrinking, or melting into a hard, plastic lump.
Not all nylons are identical for projects. A tightly woven ripstop nylon (like in tents) has a very flat surface. A nylon taffeta has a crisp drape and smooth hand. Nylon jersey is knit and has stretch. A tight, flat weave like ripstop gives the most stable base for adhesion, while a stretchy knit requires methods and materials that can move with the fabric. Understanding ripstop nylon fabric properties—such as high tear resistance and minimal stretch—can guide your choice of primers and coatings. This helps explain why a flat, stable weave often provides the most reliable adhesion surface.
The Nylon Fabric Spec Sheet: Know Your Material
Before you press or print, check your fabric against this guide. Treat it like a quick reference sheet.
| Property | Typical Characteristic | Direct Impact on Adhesion |
| Breathability | Low to Very Low | Liquid adhesives or thick plastisol inks can trap moisture and body heat underneath, leading to discomfort and potential peeling. Water-based solutions need excellent drying. |
| Shrinkage Rate | Low (1-3%) with high heat | Always pre-wash and dry nylon on a warm setting before applying any design. Any residual shrinkage will happen later, distorting or cracking your print. |
| Heat Tolerance | Melts at ~428°F (220°C). Begins to soften and glaze around 300°F (150°C). | This is your critical window. Your heat press or iron must have precise, even temperature control. I always start low (280°F) and test on a scrap piece first. |
| Stretch Factor | Varies: Woven=Low, Knit=High | For stretchy nylon, you must use a stretch vinyl or a flexible ink formulation. A rigid transfer will crack on the first wear. |
Use this sheet to diagnose problems. If your vinyl is peeling, check if you used a stretch product on a woven fabric. If the fabric glazed shiny, your heat was too high. Knowing these numbers turns adhesion from guesswork into a repeatable process.
Preparing Your Nylon Fabric: The Non-Negotiable First Step

Think of a new piece of nylon fabric like a non-stick pan. It’s designed to resist things sticking to it. Factories apply invisible coatings called “sizing” or “softeners” to make the fabric easier to handle on high-speed machines. For you, these finishes are the enemy of good print adhesion. Skipping prep is the number one reason prints crack, peel, or fail to stick. Washing your nylon fabric before any project is not a suggestion-it’s a mandatory step for professional results.
Your Nylon Pre-Wash Care & Handling Protocol
Follow these steps exactly. Consistency here saves frustration later.
- Check the Care Label: First, see if the manufacturer lists a maximum temperature. If not, proceed with this guide.
- Use Warm Water: Fill your sink or basin with warm water, around 40°C (104°F). This is hot enough to dissolve the water-soluble finishes without setting stains or causing excessive wrinkling.
- Add a Mild Detergent: Use a small amount of a clear, dye-free liquid detergent. Avoid powders that might not fully dissolve and avoid any detergent with built-in fabric softeners.
- Agitate and Soak: Submerge the fabric and gently swish it for a minute. Let it soak for 15-20 minutes. You might see the water become slightly cloudy-that’s the finishes coming off.
- Rinse Thoroughly: Drain the soapy water and rinse the fabric under cool, running water until the water runs completely clear.
- Air Dry Flat: Gently squeeze out excess water. Do not wring it, as nylon can crease permanently. Lay the fabric flat on a clean towel or drying rack, away from direct heat or sunlight, until it is bone-dry.
Never use a dryer or fabric softener in this prep stage; heat can prematurely set any residual finish and softeners coat the fibers in a new barrier. Your goal is pure, clean nylon fibers.
A Note for 3D Printed Nylon Substrates
If you are heat-pressing a transfer onto a 3D-printed nylon object from an Ender 3, Bambu Lab, or similar printer, the principle is identical: you must prepare the surface. The layer lines and any release agents act just like factory finishes. Lightly sand the print area with fine-grit sandpaper (like 400-grit), then wipe it clean with 99% isopropyl alcohol and a lint-free cloth. This creates a slightly textured, perfectly clean surface for the adhesive to grip.
Testing for Colorfastness
If your nylon fabric is already dyed a dark or vibrant color, you need to know if that dye will run or bleed when heat is applied during pressing. Here’s a simple test for colorfastness that I use in the lab and at home.
- Find an inconspicuous area, like a seam allowance or the very edge of your fabric.
- Dampen a clean, white cotton cloth or paper towel with warm water.
- Press the damp white cloth onto the nylon fabric firmly for 30 seconds.
- Check the white cloth for any color transfer.
If you see any dye on the white cloth, the fabric’s color is not stable and may bleed under the heat press, potentially ruining your transfer and project. For colored nylon, I recommend using a lower application temperature and a protective Teflon sheet or parchment paper between your heat plate and the fabric as an extra precaution, especially since nylon fabrics can sometimes have uneven dyeing.
How to Print on Nylon: Inks, Transfers, and Direct Methods
Printing on nylon feels different from working with cotton or polyester. The fabric is sleek and often has a low surface energy, meaning many common inks just slide off or crack. I handle this fabric often in my workshop, and I’ve learned that success comes from matching the method to your setup. You have three reliable paths: screen printing, heat transfer paper, or direct-to-garment machines.
Let’s break them down one by one.
Screen Printing with Specialty Inks
Screen printing is my go-to for bold, durable designs on performance wear like jackets or bags. You must use inks formulated for synthetic fibers, as standard water-based inks will bead up and not bond. In the lab, we test adhesion by stretching the print and checking for cracking.
For nylon, plastisol ink is a classic choice. It sits on top of the fabric and cures into a flexible, rubbery layer when heated. I prefer low-bleed plastisol for dark nylons to prevent color migration. Another option is specialized pigment ink, which requires a binder and a very hot cure to chemically lock onto the fibers. Both are better than regular fabric markers for waterproof designs.
Using Inkjet Printable Transfer Paper
This is the most accessible method for home crafters and small businesses. You print your mirror-image design onto a special paper, then use a heat press to transfer it. The transfer paper acts as a carrier, delivering a ready-made plastic film (the ink) onto your fabric under heat and pressure. The result is a crisp image with a slight raised texture.
Here is how to print on nylon using heat transfer paper, a common FAQ I get in the studio.
- Pre-press your nylon item. Heat press it for 5-10 seconds at 270°F (132°C) to remove moisture and wrinkles. This step is non-negotiable for good adhesion.
- Print your design. Use an inkjet printer and the correct transfer paper for light or dark fabric. Always mirror the image.
- Trim the paper close to the design to avoid transferring excess film.
- Press with steady pressure. For most nylons, I set my press to 320°F (160°C) for 15 seconds. Too little heat won’t melt the adhesive; too much can scorch the fabric.
- Peel the paper while hot for a glossy finish, or let it cool for a matte look. Always follow your specific paper’s instructions.
Direct-to-Garment (DTG) Considerations
DTG printers spray ink directly onto the garment, like a fancy fabric printer. It’s fantastic for complex, full-color photos. Printing nylon on a DTG machine requires pretreatment-a liquid primer sprayed onto the fabric so the ink can grab hold. Without it, the ink will wash right out.
This method is best left to professional shops. The pretreatment chemistry is tricky, and the cure requires a conveyor dryer, not just a heat press. For a one-off project, the setup cost and effort usually don’t make sense compared to transfer paper.
Choosing Your Method: Home vs. Professional Use
Your choice hinges on your tools and goals. Let’s compare the pros and cons.
- Heat Transfer Paper (Best for Home)
Pros: Low startup cost, needs only an inkjet printer and heat press. Forgiving on fabric blends. Cons: The print has a distinct handfeel and can crack over time with heavy stretching. - Screen Printing (Best for Pros & Bulk Orders)
Pros: Extremely durable, soft handfeel, cost-effective for many items. Cons: Needs screens, a press, and proper ventilation for ink curing. Messier setup. - Direct-to-Garment (Professional Only)
Pros: Photographic quality, no color limits. Cons: High machine cost, requires precise pretreatment and curing, not all nylons accept the pretreatment well.
The Science of Ink: What Works on Nylon and What Fails
Nylon is a polyamide, a stubborn polymer that doesn’t open its pores easily for dyes or inks. Successful inks for nylon either melt onto the surface (like plastisol) or require a chemical bond formed under high heat (like sublimation or cured pigments). Let’s talk about why specific types are chosen.
Pigment inks bond with a resin binder when cured at around 320°F (160°C). Plastisol inks are PVC-based and simply fuse into a film. Sublimation inks are a special case-they turn into a gas under heat and dye the actual nylon fibers, but they only work on white or light-colored polyesters or nylon-co-polyester blends.
Now, why others fail. Basic dye-based inks (common in home printers) or standard screen printing inks lack the necessary adhesives or thermal properties. They will wash out, rub off, or sit on the surface without bonding. I’ve seen projects ruined because someone tried to use a cotton-specific ink on a nylon backpack. It flakes off after one flex.
The Exact Heat Press Settings for Nylon: Time, Temperature, Pressure
Getting nylon to accept a heat transfer is a balancing act. This synthetic fiber is sensitive to heat. Nylon’s heat resistance varies by blend, and overheating may cause burning or scorching. Your goal is to apply enough energy to activate the adhesive on your transfer vinyl or heat transfer paper, but not so much that you damage the fabric itself.
Your safe, universal starting point for most nylon fabrics is 300°F (149°C) with medium pressure for 10-15 seconds. I always begin here in my own shop. But this is just a starting line, not the finish. The type of nylon, its weave, and the specific transfer material can all shift these numbers.
Why You Must Always Do a Test Patch First
I never skip this step, and neither should you. Find a hidden spot-an inside seam, a hem allowance, or use a scrap of the same fabric. Run your test with your chosen settings. Let it cool completely, then peel. Check two things: the adhesion of the transfer and the condition of the nylon underneath. Does the fabric feel stiff, look shiny, or show any discoloration? If so, your heat is too high.
The Consequences of Getting the Heat Wrong
Nylon tells you very clearly when you’ve made a mistake.
Too much heat, time, or pressure has one primary result: melting. You might see a greasy sheen where the fibers have glazed over. The fabric can become brittle and lose its strength. In severe cases, it will actually hole or warp. Once nylon melts, the damage is permanent.
Too little heat is a more subtle failure, resulting in poor adhesion where the transfer simply won’t stick or will peel off after the first wash. If your test patch peels cleanly off with no residue left on the nylon, you need more temperature, time, or both-increase in small increments of 10 degrees or 5 seconds.
The Critical Role of Even Pressure
Pressure is what creates the intimate contact needed for a good bond. It must be even across the entire design. This is tricky on textured nylon, like a ripstop jacket or a knitted tricot. An uneven surface creates air pockets where the transfer won’t adhere.
My fix for this is simple. I place a soft, heat-resistant pillow or a few layers of craft felt over the garment, then a Teflon sheet on top. When you close the heat press, the pillow conforms to the fabric’s texture, applying that even pressure everywhere. Just ensure your pillow material can handle the heat.
How to Heat Press Nylon: A Step-by-Step Process
Let’s walk through the full process, from setup to finish.
- Pre-press the garment. Heat your empty press to your target temperature. Place the nylon item on the lower platen and close it for 3-5 seconds. This removes moisture and wrinkles, creating a warm, flat surface for your transfer.
- Position your transfer. Place it face-up on the garment. Use heat-resistant tape to secure it if needed, but avoid tape on the nylon outside the transfer area, as it can leave a mark.
- Use a protective sheet. Always cover your transfer with a Teflon sheet or parchment paper. This protects your design and the press plates from adhesive residue.
- Apply heat and pressure. Close the press firmly. Start your timer. Stick precisely to your tested time.
- Perform a cool peel. This is the golden rule for most transfers on nylon. Open the press and let the garment and transfer cool completely to room temperature. Only then should you slowly peel off the carrier sheet. A warm peel can cause the adhesive to stretch and result in a weak bond.
Treatments and Sprays: Giving Nylon Some Grip
You can’t force ink or vinyl to stick to a slick surface. I’ve seen too many projects peel because someone skipped this step. The solution is an adhesion promoter, a primer formulated to bite into synthetic fibers.
These products work by creating a microscopically rough, chemically receptive layer. Think of it like applying a primer to a glossy wall before painting. For nylon, this modified surface gives the ink or vinyl’s adhesive something to mechanically lock onto, forming a much stronger bond.
Using an adhesion promoter is the single most effective way to ensure your design stays put on nylon fabric. Pair this with a glue or adhesive material designed for nylon to maximize longevity. Choosing the right adhesive materials helps ensure a lasting bond.
Choosing and Applying Your Treatment
You’ll find two main delivery systems: aerosol sprays and brush-on coatings. Your choice depends on your project size and workspace.
- Aerosol Spray Primers: These offer the most even, thin coat. They’re ideal for larger areas or full garments. Shake the can vigorously for a full minute as the instructions say. Hold it 8 to 12 inches from the fabric and use light, sweeping passes. You want a faint, even mist, not a wet soak. Let this tacky layer dry completely before moving to the next step.
- Brush-On or Liquid Coatings: These give you pinpoint control for small logos or patches. Use a foam brush to apply a thin, uniform layer. Be vigilant against drips or puddles, as these will create stiff spots on your final garment.
Apply any treatment to clean, dry fabric and let it cure fully before you print or press. That curing time is non-negotiable for the chemical bond to set.
A Non-Negotiable Safety Note
Listen carefully. Most of these products contain volatile organic compounds (VOCs) and propellants. You must work in a well-ventilated area, ideally outdoors or in a spray booth with exhaust fans. If you’re indoors, open windows and use fans to create cross-ventilation. Wear a respirator with organic vapor cartridges, not just a dust mask. Your lungs will thank you.
How to Treat Nylon Fabric for Adhesion: A Step-by-Step Guide
Let’s walk through the process. This is the method I use in my own studio for preparing nylon jackets and bags.
- Clean the Surface: Wipe down the nylon with a lint-free cloth dampened with isopropyl alcohol. This removes any oils, dust, or fabric finishes that could interfere.
- Prepare Your Space: Set up in your ventilated area. Lay the fabric flat on a protected surface like a drop cloth. Have your primer and applicator ready.
- Apply the Primer: Following the method above (spray or brush), apply one thin, even coat to the exact area where your design will go. A little goes a long way.
- Cure Thoroughly: Let the treated fabric dry. This can take from 15 minutes to an hour, depending on the product and humidity. The surface should be dry to the touch and not transfer any residue.
- Proceed to Print or Press: Once cured, your nylon is ready. Apply your heat transfer vinyl or ink following its standard instructions, often with a slightly lower heat or shorter press time than for cotton. The primer has done the hard work of creating grip.
Test this process on a scrap piece of your specific nylon fabric first. It’s the best way to confirm your time, temperature, and pressure settings for a perfect, permanent bond.
Troubleshooting Failed Nylon Adhesion: What Went Wrong?
Even with the best plan, things go wrong. In the lab, a failed test is just data. At home, it’s a frustrating waste of time and material. Let’s diagnose the most common problems. Think of this as your fabric first-aid guide.
Symptom, Cause, and Solution: Your Quick Guide
Match what you see with the root cause. The fix is often simpler than you think.
| Symptom | Likely Cause | Immediate Solution & Prevention |
|---|---|---|
| Peels off immediately or within hours | Fabric wasn’t pre-washed. Oils, silicones, or finishes are blocking adhesion. | You must remove the transfer, thoroughly wash and dry the nylon to degrease it, and start over. Prevention is non-negotiable: always pre-wash. |
| Adhesive feels gummy, never fully sets | Heat press temperature was too low, or time was too short. The adhesive didn’t fully melt and cross-link. | Increase temperature in 10°F increments and/or extend time by 5-10 seconds. Do a small test first. Use an infrared thermometer to check your platen’s actual surface temp. |
| Cracking or flaking when stretched or flexed | The transfer film is too stiff for the fabric. Common with standard vinyl on lightweight, stretchy nylon. | Switch to a stretch or specialty flexible vinyl designed for performance fabrics. Ensure you’re using a warm peel technique if the product calls for it, letting it cool completely before stretching. |
| Fabric melted, scorched, or turned stiff | Heat was far too high, or dwell time was excessive. Nylon has a sharp melting point. | The damage is permanent. For next time: lower your heat press setting drastically. Use a Teflon sheet as a heat buffer. Never leave the press closed on nylon “just to be sure.” |
Solving Specific Failure Types
Some issues are visual. Others only show up later. Here’s how to tackle them.
Cracking: The Rigid Film Problem
You see tiny fissures when you bend an elbow or knee on a nylon jacket. This isn’t an adhesion failure-it’s a compatibility failure. The polymer in the transfer is like a stiff piece of plastic glued to a flexible spring. They move at different rates. I test this by crumpling the printed sample in my hand. If it crackles, it’s wrong.
Always choose a transfer medium labeled for stretch or athletic wear when working with knits or thin, flexible nylon weaves. These contain plasticizers that allow the film to move with the fabric.
Ghosting and Color Migration
Ghosting is a faint shadow of the design around the edges. Color migration is when dyes from the fabric itself bleed into your white transfer, staining it pink or blue. Both are heat and dye-set issues.
- Ghosting happens from excessive pressure. The hot plate presses the design’s impression into the fabric fibers. Slightly reduce your pressure setting.
- Color Migration is a dye stability problem. Dark or bright nylon can release dye vapor under high heat, which gets trapped under the transfer. Pre-press the bare fabric for 5-10 seconds with your heat press to try and “set” any loose dyes before applying your transfer. If migration persists, the fabric may not be suitable for hot transfers.
Melting: The Point of No Return
Nylon 6,6 melts around 500°F, but thinner fibers and weaves can gloss and distort well below that. Different synthetic blends respond differently to heat, so it’s wise to follow established heat-press guidelines for synthetic blended fabrics. If the fabric looks shiny, hard, or has visibly contracted, it’s overheated. There is no fix. This is why a test press on a scrap or hidden seam is worth every second. Adjusting temps and dwell times based on fabric composition helps prevent damage. If your press runs hot, use a Teflon sheet as an extra insulating layer between the fabric and the top heater.
Longevity Failures: What Wash Testing Reveals
The print looked perfect, but after three washes, it’s peeling at the edges or cracking all over. This is the true test of your process. Washing simulates aging-heat, agitation, and chemical exposure. Failures here always trace back to the beginning.
- Peeling After Washes: This usually points to insufficient heat or pressure during application. The bond was weak from the start and washing finished it off. Revisit your time, temperature, and pressure with a fresh test.
- Cracking After Washes: Confirms you used a film that’s too rigid. It became brittle with repeated flexing and chemical exposure from detergent.
- Adhesive Residue Left on Fabric After Peel: Often called “adhesive wash-out.” This happens when the adhesive layer wasn’t fully fused to the nylon fibers. It loosens in the wash and transfers to the drum or other clothes. The solution is to ensure you are meeting the transfer manufacturer’s exact heat requirements for synthetic fabrics.
My standard test is simple: wash the sample in warm water with regular detergent, tumble dry on medium, and check it. Do this three times. If it survives, you’ve built something durable.
Caring for Your Printed or Patched Nylon Item

Your work is done, and you have a fantastic custom piece. Now, let’s keep it that way. Treating your finished nylon item with care isn’t just about cleaning it; it’s about preserving the bond you worked so hard to create.
The Definitive Care Protocol
Follow these steps every single time you wash your item. Consistency is what prevents problems from creeping in.
- Turn the item inside out. This creates a physical barrier between the design and the agitation of the wash cycle.
- Wash in cold water only, using the gentle or delicate cycle on your machine.
- Use a small amount of mild, liquid detergent. Avoid powder detergents, heavy-duty formulations, and fabric softeners, which can leave residues that interfere with adhesion.
- After washing, always air dry. Lay the item flat on a towel or hang it in a shaded, well-ventilated area.
- Never, under any circumstances, put it in a clothes dryer. The heat is your design’s greatest enemy.
Why This Specific Care Preserves Your Work
This isn’t just a random list of tips. Each step directly counteracts a threat to your nylon and the adhered graphic.
Cold water and a gentle cycle prevent the two main causes of adhesion failure: mechanical stress and heat reactivation. Nylon is strong, but the thin layer of adhesive or ink isn’t. Vigorous washing can literally peel it away from the fibers. Heat, even from warm water, can soften the adhesive again, making it vulnerable to shifting or cracking.
Air drying is non-negotiable. The heat of a tumble dryer does more than just reactivate adhesives. It can cause the nylon fibers themselves to shrink or become distorted, which stresses and often cracks the printed layer on top. I’ve seen too many cracked and peeling designs that trace directly back to one trip through the dryer.
The Ironing Rule: A Strict Avoidance
You must never iron directly on top of a printed or heat-pressed design on nylon. If you must remove wrinkles, turn the garment inside out, place a press cloth over the design area, and use the lowest possible heat setting with no steam. Even then, proceed with extreme caution.
The iron’s concentrated heat plate can easily exceed the melting point of the plastic-based inks or the reactivation temperature of the adhesive film. The result is a shiny, melted, or completely transferred mess. It’s a permanent flaw. When in doubt, hang the item in a steamy bathroom to relax wrinkles instead.
Textile Expert’s Handling Pro-Tip
Once your nylon has its design, working with it changes. I treat printed or pressed nylon as a new composite material. The base fabric and its surface treatment must be handled as one.
Sewing Printed or Heat-Pressed Nylon
Your standard sewing setup often fails here. Nylon is slick, and the printed layer can be brittle. A universal needle will push the fabric down into the machine’s throat plate instead of piercing cleanly, causing skipped stitches and snags.
You need a sharp, thin needle designed for synthetics. I always reach for a fresh Microtex needle in a size 70/10 or 80/12; its super-sharp point pierces the printed surface cleanly without damaging the fibers beneath. For thread, polyester is non-negotiable. It has a similar elasticity to nylon, so your seams won’t pucker or break under stress like cotton thread might. If your machine has a walking foot, use it. This attachment feeds the top layer of fabric at the same rate as the bottom layer, preventing the slick nylon from shifting and stretching as you sew.
How Prints Affect Drape and Feel
Think of your ink or vinyl transfer as a coating. It sits on top of the fibers. The more area you cover, the more you change the fabric’s fundamental properties.
A full-coverage heat transfer vinyl (HTV) will create a distinctly stiffer panel. Screen-printed plastisol ink, especially in large blocks, adds a noticeable weight and reduces flexibility. This added stiffness is permanent; you cannot wash or steam it out, so factor it into your design from the start. For projects needing maximum drape, like flowing skirts or lingerie, I opt for dye-sublimation printing or very light, porous ink deposits that bond *with* the fiber instead of sitting *on* it.
Cutting Through Adhesive Treatments
This is the messy reality they don’t show in tutorials. The adhesives from heat-applied vinyls, and even some cured inks, will transfer to your cutting tools. It builds up as a gummy, sticky residue that makes your scissors drag and crush the fabric instead of slicing it.
Keep a jar of isopropyl alcohol and a clean cloth next to your cutting station. Wipe your scissor blades frequently with alcohol to dissolve the adhesive buildup and maintain a clean cut. For extensive projects, dedicate a pair of cheaper utility scissors for the initial cutting of printed nylon sheets and keep your premium fabric shears for final, precise trimming of uncoated sections.
Putting Your Nylon Knowledge to Work
The single most reliable rule for printing on nylon is to manage your heat and prepare your surface. Always pre-wash fabric to remove finishes and test your exact time, temperature, and pressure on a scrap first. This simple habit prevents most adhesion failures before they happen, especially when working with delicate or synthetic fibers like nylon.
Treating fabric well extends the life of your project and respects the resources used to make it. I encourage you to apply this same careful, testing mindset to washing, dyeing, and caring for all your textiles, from resilient polyester to delicate silk, building a deeper understanding of material science with every piece you make. For silk, gentle washing and mindful handling matter most. We’ll explore silk fabric care washing in upcoming steps.
Expert Resources and Citations
- How to Achieve a Screen Printed Finish on Nylon – STAHLS’ Blog
- Any tips to print with nylon? : r/3Dprinting
- How to Print on Nylon Fabric | China Fabric Manufacturer | Fandafabrics
- Rapid Cure Nylon Bonding Additive | Screen Print Direct
- Best Guide to Screen Printing on Nylon | American Stitch LV
- Can You Screen Print on Nylon? – Printing Beyond Cotton
Florian Ventura
Florian is a high fashion blog writer, fashion and fabric expert and a keen expert in fabric, clothing and materials. She has worked in large textile and fashion houses for over 10+ years, engineering and working with various fabric types and blends. She is an expert when it comes to questions on any and all kinds of fabrics like linen, cotton, silk, jute and many more. She has also traveled around the world studying traditional fabrics and aims to bring them into the modern fashion use.