
How Do You Dye Fabric with Powder Dyes, Indigo, and Ombre Techniques?
Dyeing fabric at home might seem intimidating, but I can assure you it’s a straightforward process with the right know-how.
This guide will give you the practical, lab-tested methods I use. We will cover prepping fabric for powder dyes, managing an indigo vat, and executing a perfect ombre dip.
What Fabric Should You Dye? Matching Fiber to Dye Type
Think of fabric fibers like different kinds of sponges. Each type has a unique structure that soaks up dye molecules in a specific way. Getting this match right is the difference between a vibrant, lasting color and a disappointing washout.
The key to successful dyeing is choosing a dye formulated for your fabric’s fiber chemistry.
Cellulose Fibers: Cotton, Linen, Rayon
These plant-based fibers are like thirsty, porous sponges. Their molecular structure has negative charges that readily bond with certain dye types. This includes fiber-reactive dyes (for the brightest, most permanent colors) and direct dyes.
So, does linen dye easily? Linen, like cotton, is a cellulose fiber and is highly absorbent. Linen can dye beautifully, but its smooth, long fibers can sometimes lead to a slightly more uneven or “frosted” look compared to cotton if the dye bath isn’t agitated enough. Its natural stiffness can also make folding for techniques like ombre trickier.
Protein Fibers: Wool, Silk, Cashmere
Animal-based fibers have a different chemical personality. Their molecular chains have positive charges that attract acid dyes. Using the wrong dye, like one for cotton, will result in very pale, non-colorfast results.
I always recommend seeking out ethically sourced, cruelty-free wools or exploring high-quality plant-based alternatives like Tencel lyocell for similar dye effects if animal welfare is a concern.
Synthetic Fibers: Polyester, Nylon, Acrylic
These are the slick, non-porous sponges. Their tightly wound polymer chains require specialized dyes, like disperse dyes, that work under high heat to force the color inside. You cannot dye polyester with a cotton dye.
When NOT to Use a Single Dye
This is the most common pitfall. A 50/50 cotton-polyester blend will react unpredictably to a single dye type. The cotton may take the color while the polyester remains nearly white, creating a speckled, heather-like effect. For predictable results, stick to dyeing fabrics made of 95% or more of one fiber type.
Handling Pro-Tip: The Critical Pre-Wash
Before any dye touches your fabric, you must wash it. Factory-applied sizing, oils, and finishes repel dye, causing splotches. Use a drop of mild, dye-free detergent in hot water (appropriate for the fabric) to strip these away. For linen, which can have a lot of natural pectin, I sometimes do two hot rinses. Never skip this step.
The Powder Dye Process: From Jar to Colorfast Cloth
The process of dyeing fabric with powder dyes involves dissolving concentrated colorant in water, immersing the prepared fabric, and using heat, time, and chemistry to permanently bond the dye to the fibers.
Powder dyes offer intense color control but demand respect for the material science at play.
Safety and Setup for Powder Dyes
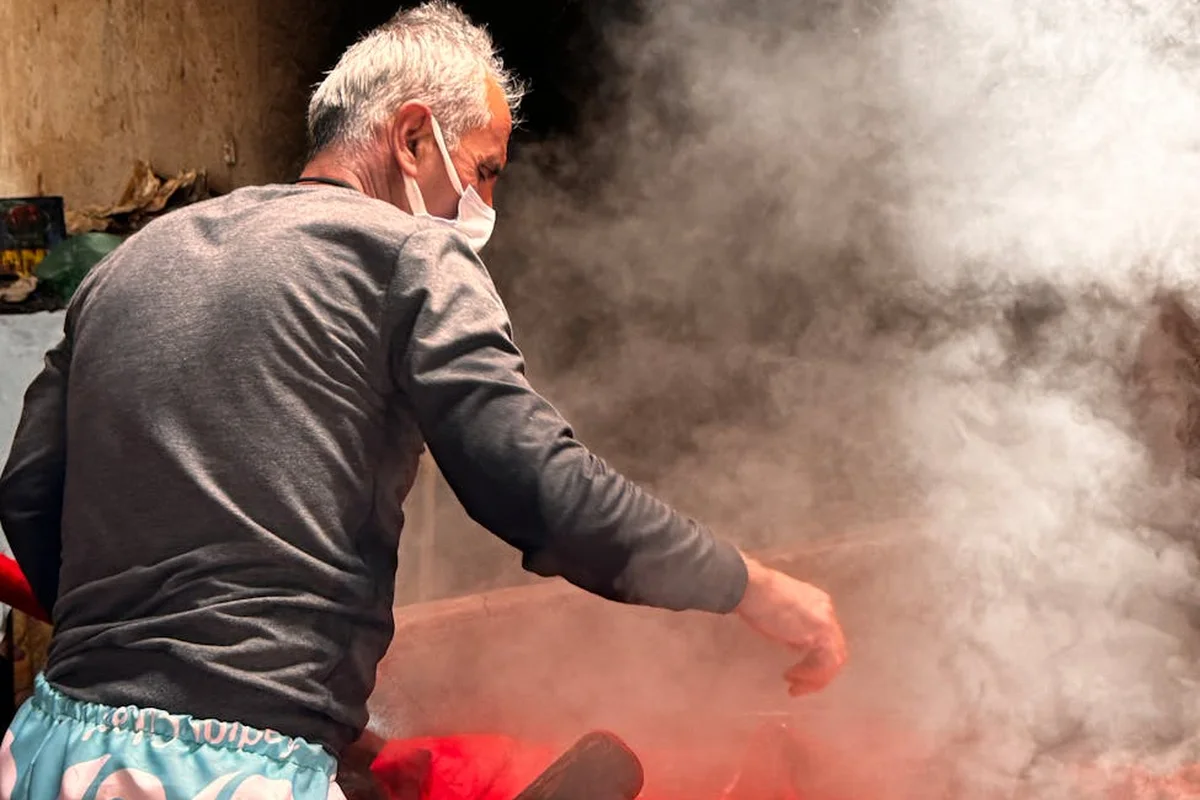
Treat dye powder like fine flour or spices you don’t want to breathe. Your workspace setup is non-negotiable for safety.
- Work in a well-ventilated area, preferably near an open window.
- Wear a dust mask (an N95 is perfect) when handling the dry powder.
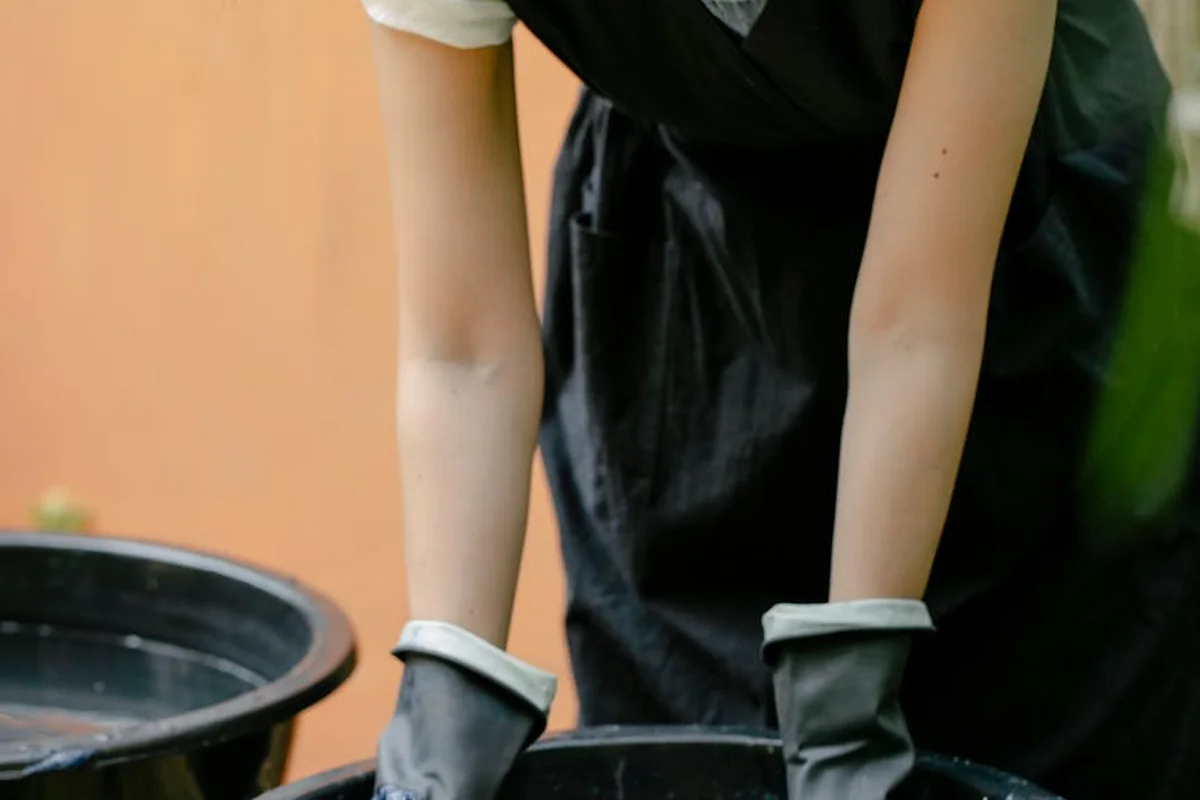
- Use protective gloves (nitrile is best) from start to finish.
- Cover your workspace with plastic sheeting or old cardboard.
- Dedicate stainless steel or enamel pots and utensils to dyeing only.
Mixing and Applying Your Dye Bath
Consistency is everything here. A poorly mixed bath means uneven color.
- Dissolve Completely: In a separate container, mix the powder dye with a few ounces of very hot tap water (about 140°F/60°C) to make a smooth, lump-free paste. Then, stir this paste into your main dye pot.
- Get the Ratios Right: For fiber-reactive dyes on cotton, a standard ratio is 1 teaspoon of dye powder per 1 pound of dry fabric in 3 gallons of water. Always check your specific dye’s instructions.
- Temperature and Chemistry: For cotton/linen, maintain a bath between 105°F-140°F (40°C-60°C). Add non-iodized salt (it acts as an electrolyte) and, if using a fiber-reactive dye, a fixative like soda ash later in the process.
- Agitate for Evenness: Submerge your pre-wet, squeezed-out fabric. Stir slowly and constantly for the first 10-15 minutes, then frequently for the full duration (often 30-60 minutes). This prevents those dreaded lighter spots.
Vibrant color on cotton requires the right dye type and a properly maintained bath, while using that same dye on wool will give you only a faint, temporary tint.
Setting the Dye: A Step-by-Step Guide
Rinsing properly locks the color in and prevents future bleeding onto other clothes.
- Initial Rinse: Wearing gloves, lift the fabric from the bath and gently squeeze. Rinse it under cool running water until it runs mostly clear.
- Warm Wash: Wash the dyed fabric alone in your machine with a small amount of mild detergent on a warm, gentle cycle. This removes any loose dye particles.
- Final Check: Rinse again by hand. If the water is still colored, repeat the warm machine wash.
- Heat Set (For Cellulose & Synthetics): Once dry, iron the fabric on the appropriate setting or tumble dry on medium heat. The heat helps further bond the dye molecules to the fiber.
For protein fibers like wool, the setting happens in the acidic dye bath itself (often with vinegar or citric acid), and you must avoid sudden temperature changes during rinsing to prevent felting.
Indigo Dyeing: The Science of the Vat and Oxidized Blue
Indigo is a different beast from your kitchen pot of Rit dye. Chemically, it’s a vat dye. That means the pigment is not soluble in water to start. You must first remove oxygen from the dye bath in a process called reduction. This turns the indigo a greenish-yellow. Only when your fabric is pulled from this reduced vat and exposed to air does it oxidize, locking that iconic blue onto the fibers.
What is the indigo dyeing process, and how does it differ from other dyes? Think of powder dyes like food coloring stirred into water; the color is immediately available. Indigo requires a two-step chemical reaction. You submerge fabric into the reduced, yellowish vat, then hang it to let the air work its magic. The blue develops before your eyes. This unique chemistry is why you can achieve deep, colorfast blues that have been prized for centuries.
How do you prepare an indigo vat for dyeing? For home dyers, a pre-reduced indigo or a fructose vat is the most accessible method. The goal is to create an oxygen free environment with the right pH.
- Fill a bucket with warm water (about 110°F is ideal).
- Dissolve 1 tablespoon of pre-reduced indigo powder in a cup of warm water to make a paste.
- Add the paste to the bucket and stir gently.
- Add 4 tablespoons of fructose or white sugar and 6 tablespoons of pickling lime (calcium hydroxide) to the vat. These are your reducing agent and alkali.
- Stir very slowly to avoid adding air bubbles. A coppery sheen with yellow-green bubbles should form on top. This is the “flower,” and it protects the reduced dye below from oxygen.
Always wear gloves and eye protection when handling the alkali (lime), and work in a well ventilated space.
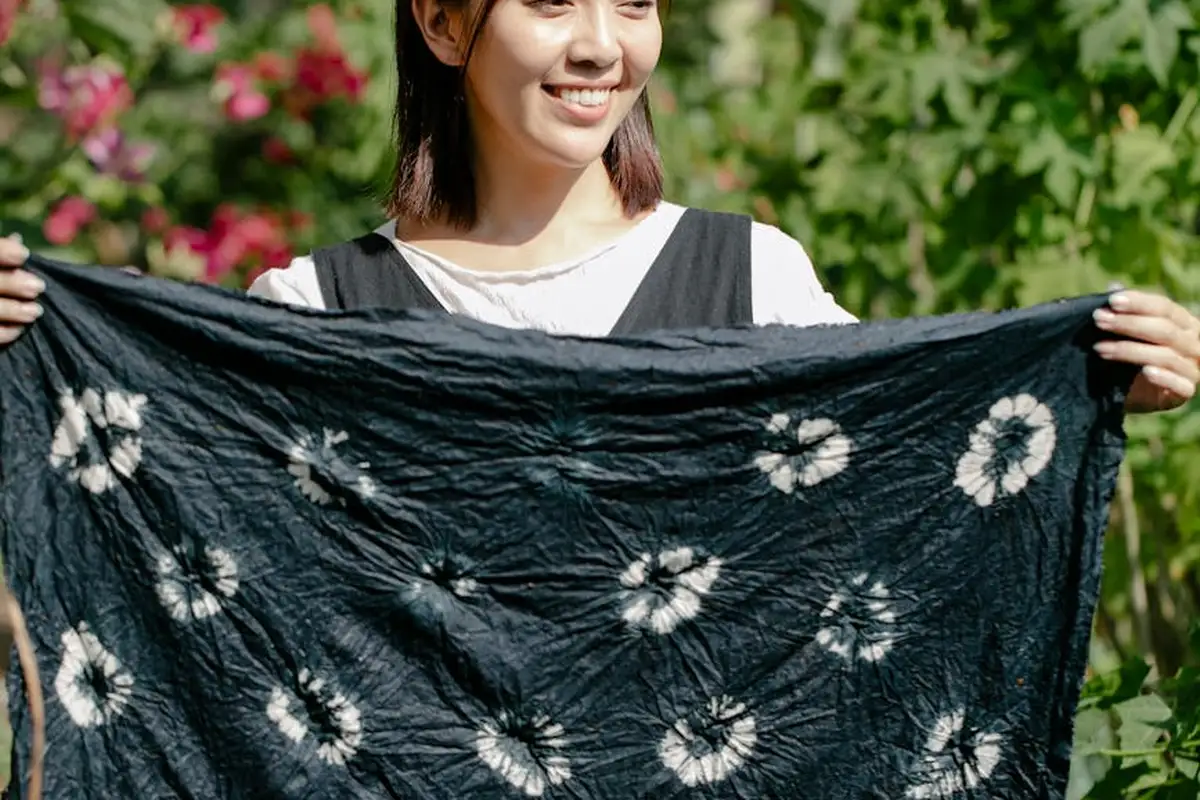
What is the shibori technique, and how is it used with indigo? Shibori is the Japanese art of shaped resist dyeing. By folding, stitching, binding, or clamping the fabric before dipping it in the indigo vat, you physically block the dye from reaching certain areas. When you untie the fabric after dyeing and oxidizing, stunning white patterns emerge against the blue ground.
The magic of indigo is in the build up: multiple short dips, with full oxidation to green then blue between each, create a deeper, richer color than one long soak ever could. Let the fabric turn completely blue and feel dry to the touch before dipping again.
Preparing and Maintaining Your Indigo Vat
A healthy vat is a living thing. For the simple fructose vat described above, maintenance is straightforward. After a dye session, let the vat settle undisturbed for a few hours. The sediment will fall to the bottom. You can carefully ladle out the clearish yellow liquid from the top third into a clean container, then pour it back, leaving the sludge behind. To reactivate it for your next session, add a little more fructose and a pinch of lime, stir slowly, and wait for the flower to return. Keep it covered and in a warm place, and a vat can last for weeks.
- Key Ingredients: Pre reduced indigo powder, fructose (or hydros/sodium hydrosulfite as a stronger reducer), calcium hydroxide (pickling lime), warm water.
- Key Safety: Alkalis like lime can irritate skin and lungs. Use gloves, goggles, and a mask when handling powders. Never add acid to an active vat, as it can produce fumes.
Shibori and Other Indigo Techniques
You don’t need special tools to start shibori. Basic folds create timeless patterns. For itarashi (pole wrapping), you scrunch fabric onto a PVC pipe or wooden dowel, then wrap it tightly with string or rubber bands. The bound areas resist the dye, creating streaky, water like lines. For kumo (spiderweb) shibori, you pinch a point of fabric, tie a small stone or marble into the tip, then bind the fabric tightly below it with thread. This creates a radiating circular pattern. The tighter and more precise your bindings, the sharper your white resist lines will be. Remember, the fabric must be scoured and wet before binding for the dye to penetrate evenly. If you want to explore more shibori and tie dye techniques for different textures and patterns, there’s a variety of tutorials available.
Creating Ombre Gradients: Blending Color from Light to Dark
Ombre dyeing creates a smooth, gradual transition of color. Think of a sunset sky shifting from pale yellow to deep orange. You can move from light to dark with one color or blend between two different hues, like blue into green.
How do you achieve an ombre effect on fabric? You control where and for how long the dye touches the material. The main methods are dipping, pouring dye over sections, or spraying it on. Dip-dyeing is the most reliable for a clean gradient, especially for beginners.
How do you blend colors seamlessly in an ombre dye project? Success hinges on three factors: dye concentration, immersion time, and fabric positioning. For a perfect blend, you must manipulate both the strength of the dye and the amount of time each fabric section soaks in it. A longer soak in a strong dye bath gives a deep shade; a brief dip in a weak bath gives a whisper of color.
Fabric choice changes your approach. Plant fibers like crisp linen and thirsty cotton absorb dye readily and show gradients beautifully. Animal fibers like silk produce stunning ombres but need gentler handling. I move silk quickly and evenly to prevent “water spot” lines where the wet fabric folds. Synthetic fabrics like polyester require special dyes and high heat, making gradual blending much harder at home.
Let’s walk through a basic ombre using fiber-reactive powder dyes on cotton. You’ll need your dye, salt, soda ash (for fixation), gloves, and a tall container deeper than your fabric.
Dip-Dye Ombre Technique
This method relies on slowly lowering fabric into a single dye bath. The part that enters first dyes longest and darkest; the part that enters last dyes shortest and lightest.
First, prepare your fabric. Wash it to remove any finishes and soak it in plain water. It must be uniformly wet. Mix your dye powder in a small amount of warm water to make a paste, then dissolve it fully in about two cups of water. This is your concentrated stock solution, suitable for hand-dyeing synthetic fabrics and natural ones alike.
Fill your tall container with three gallons of warm water. Stir in one cup of salt until dissolved. Now, add your concentrated dye solution. The amount you add determines the darkest possible shade. For a pale ombre, use less; for a vivid one, use more. This is now your dye bath.
Here is the core process for color variation through timing:
- Hold your wet fabric vertically above the bath. Lower the bottom third into the dye. Start your timer.
- After 5 minutes, gently lower the fabric so the next third is submerged. You now have two sections dyeing: the bottom for 5+ minutes, the middle for just starting.
- After another 5 minutes, lower the fabric so the final third is just in the bath. All fabric is now submerged, but each section has had different contact time: 10 minutes, 5 minutes, and 0 minutes.
- Let the entire piece soak for a final 20 minutes. This ensures the lightest section gets some color and helps blend the transition zones.
Remove the fabric. Without rinsing, transfer it to a separate bucket with a solution of one cup soda ash in a gallon of water. Soak for 15 minutes to fix the dye. This fixation step in the soda ash bath is non-negotiable; it bonds the dye molecule to the cotton fiber permanently. Finally, rinse in cool water until it runs clear, then wash and dry.
Two-Color Ombre Blending
Blending two colors, like a sunset of pink into purple, uses a similar principle but with two dye baths. You work from both ends towards the middle.
Prepare two separate dye baths in wide, shallow pans. One is your starting color (e.g., pink), the other your ending color (e.g., purple). Use the same salt and dye concentration in each.
Take your soaked, wet fabric. Drape it so the middle section is arched up, and each end can dip into a bath. Simultaneously lower one end into the pink bath and the other end into the purple bath. The dry middle section will slowly wick moisture and dye from both sides, creating a natural blend where the colors meet.
You can control the blend point by how much fabric you immerse in each bath and by periodically lifting and re-dipping to adjust the flow. The key to a smooth two-color blend is letting the dyes migrate and mix in the damp fabric itself, not in a pot. After you achieve the gradient, fix the entire piece in a single soda ash bath.
For a more controlled approach, mix a gradient solution. In a series of jars, prepare dye solutions ranging from 100% pink to 100% purple, with intermediate blends (75/25, 50/50, 25/75). Apply these sequentially to horizontal sections of fabric using a pour or brush technique, working quickly so the edges bleed into each other.
Step-by-Step: Your Fabric Dyeing Workflow
Follow this universal protocol to turn a chaotic dye day into a smooth, predictable process. I treat it like a lab procedure, and it saves me from countless messy surprises.
The single most important step happens before you even open a dye jar: you must know exactly what your fabric is made of. Guessing leads to pale, muddy, or uneven color. Start here.
- Test Fabric Fiber Content
Perform a simple burn test on a hidden scrap. Hold it with tweezers over a sink. Cotton burns quickly with a paper-like smell and leaves soft, gray ash. Wool burns slowly, smells like burning hair, and leaves a brittle, black bead. Silk behaves similarly but with a finer bead. Polyester melts, burns with a chemical smell, and leaves a hard, black plastic bead. Nylon also melts but often smells more like celery. This tells you which dye type you need.
- Pre-Wash and Dampen Fabric
Always wash your fabric first, even if it’s new. This removes manufacturing finishes, dirt, and oils that block dye. Use a mild detergent and the hottest water safe for the fiber. Rinse well. For immersion dyeing, keep the fabric evenly damp. It helps the dye absorb uniformly, unlike a dry sponge that soaks up liquid in blotches.
- Choose and Mix Dye
Match your dye to the fiber. Fiber-reactive dyes (like Procion MX) are for plant fibers (cotton, linen, rayon). Acid dyes are for animal fibers (wool, silk). All-purpose dyes (like Rit) work on both but are less wash-fast. For powder dyes, always mix the powder into a small amount of warm water first to make a smooth paste, then dilute it in your dye bath. This prevents speckling.
- Apply the Dye
Your technique depends on your goal.
- Solid Color (Immersion): Submerge the fabric completely in the prepared dye bath. For powder dyes on cotton, you need to maintain a simmer (around 140-160°F) for 30-60 minutes, stirring often. For an indigo vat, the process is cold-you dip fabric at room temperature for a few minutes, then pull it out to oxidize and turn blue.
- Ombre Effect: Use immersion but dip the fabric gradually. In a deep pot, lower the fabric slowly, holding one end. The longer a section sits in the dye, the darker it gets. You can also apply dye from a bottle in horizontal stripes on vertical, damp fabric and let it bleed.
A note on large projects: dyeing fixed items like fabric car seats is impractical at home. You cannot achieve the consistent, hot immersion and thorough rinsing required on something that large and attached.
- Set the Dye
This fixes the color to the fiber. For fiber-reactive dyes on cotton, setting requires a fixative like soda ash and time (often 4-24 hours at room temp). For acid dyes on wool or silk, you need heat and an acidic environment like vinegar or citric acid, simmered for 30 minutes. Follow your specific dye’s instructions closely here.
- Rinse Until Water Runs Clear
Do not skip this. Rinse the fabric under cool, running water first. Gradually warm the water as excess dye releases. Keep rinsing until the water is nearly clear. This removes unfixed dye and prevents future bleeding onto other clothes.
- Dry Flat or With Low Heat
Lay knitted or delicate fabrics flat to dry to prevent stretching. You can tumble dry robust cottons on low heat to further set the dye. Avoid high heat initially, as it can set any remaining stains.
Pre-Dyeing Fabric Preparation
Pre-washing is good, but for serious dyeing-especially on crisp new cotton or linen-you need to scour. Scouring is a deep clean that strips away invisible waxes, oils, and starches applied during manufacturing.
For cellulose fibers (cotton, linen, rayon), a soak in a hot solution of soda ash (sodium carbonate) is my go-to method. Use about 1 cup of soda ash per gallon of very hot water. Let the fabric soak for 20-30 minutes, then rinse thoroughly. This slightly opens up the fibers and raises the pH, which dramatically improves dye uptake for fiber-reactive dyes. The color will be brighter and more even.
For protein fibers like silk or wool, a gentle wash in warm water with a pH-neutral soap is sufficient. Aggressive scouring can felt wool.
Post-Dyeing Setting and Rinsing
Improper rinsing is the main cause of faded, bleeding colors later. I see this mistake all the time.
Always start your rinse with cool water to shock the fabric and close the fiber’s surface, trapping dye inside. Run cool water over the fabric, gently squeezing. After a minute or two, switch to lukewarm water. Continue squeezing and agitating the fabric. Finally, use warm water. This gradual temperature increase helps rinse away dye molecules without shocking them all out at once. Also, consider the fabric’s dye soaking time, as longer soaking can affect how deeply the color has penetrated and how much dye remains to rinse.
Do a final check. Wring a small section of the fabric in a clean, white cloth. If you see any color transfer, keep rinsing. Your goal is absolutely clear rinse water. Only then is your dyed piece ready for drying and use. For best results, review the prep and troubleshooting steps for fabric dyeing before you dye more. This helps catch issues early and keeps colors even.
Care and Washing for Hand-Dyed Fabrics
That first wash after dyeing is nerve wracking. You’ve put so much work into the color. The good news is that with a little science based care, your hand dyed fabrics can stay vibrant for years. The key is understanding that the dye molecules are physically bonded to the fiber, but they can be shaken loose by harsh treatment, especially when new.
The most critical rule for any hand dyed item is to wash it alone in cool water for its first three to five washes. This prevents any loose dye from transferring to other clothes, a problem called crocking or bleeding. I always use a color safe, pH neutral detergent for this initial care.
How to Test for Colorfastness
Before you commit a whole garment to the wash, test a small area. Find a hidden seam or hem. Dampen a white cotton cloth with cool water and a drop of your mild detergent. Press it firmly onto the dyed fabric for 30 seconds. If you see color transfer on the white cloth, you know you need more rinse cycles or gentler handling. This simple test saves a lot of heartache. To help prevent color loss in future washes, a quick fabric colorfastness check can guide you. It tells you when gentler handling or extra rinses are needed.
Washing Protocol by Fiber
Your washing method must match the fiber’s personality. A hardy cotton and a delicate silk require completely different approaches to avoid felting, shrinking, or losing that beautiful dye.
For Hardy Natural Fibers (Cotton, Linen, Hemp): These plant based fibers can handle a gentle machine cycle. Use cold water and a mild, liquid detergent. The cold water protects the dye, while the gentle agitation is less stressful than a regular spin. Hot water is the enemy here, as it can cause residual shrinkage and fade dyes.
For Delicate Protein Fibers (Silk, Wool, Cashmere): These fibers must be hand washed. Fill a basin with cool to lukewarm water and a专用 detergent for delicates or wool. Submerge the garment, gently swish it for a few minutes, then let it soak for 15. For silk, I add a tablespoon of white vinegar to the final rinse water. This mild acid rinse helps restore silk’s natural pH and can make the colors gleam.
For Synthetics (Polyester, Nylon): Use a cool, gentle machine cycle. Avoid warm or hot water, as heat can permanently set wrinkles into synthetic fibers and may also affect some dyes. A cool wash keeps everything stable.
For Blends (like Poly-Cotton): Always default to the care instructions for the most delicate fiber in the blend. If it’s 60% cotton and 40% polyester, treat it like the more sensitive polyester for washing temperature and drying heat.
Drying and Ironing for Color Preservation
How you dry your work is just as important as how you wash it. The heat and agitation of a dryer are the fastest ways to fade hand dyed colors and distort fabrics.
Air drying flat is the single best method for color preservation. Lay the garment on a clean, dry towel or a mesh drying rack. Reshape it gently. This prevents stress on the seams and the dye bonds. For ombre or indigo pieces, turning the garment inside out before drying protects the surface color from friction and light.
If you must iron, use low heat and a barrier. Always check that the fabric is completely dry first. Use the lowest heat setting that works for the fiber. I place a thin, clean cotton cloth (like a muslin press cloth) between the iron and the dyed fabric. This prevents direct heat contact and that awful shiny mark called “iron shine.” For silk, use the silk/low setting and iron while the fabric is still slightly damp.
Prolonged direct sunlight will fade any dye, but indigo and some bright shades are particularly sensitive. Dry your hand dyed items in the shade or indoors to keep them looking rich for seasons to come.
Fixing Dye Mistakes and Troubleshooting Color
Even with careful planning, dye projects can go sideways. The good news is most mistakes are fixable if you understand the fiber underneath. I’ve salvaged many pieces by calmly diagnosing the problem first.
Common issues like uneven color, bleeding, or unexpected shrinkage usually trace back to a few root causes: improper fiber preparation, incorrect dye type, or rushed fixing and washing steps. Your first step is always to identify the fabric fiber, as this dictates every possible solution.
Rescuing Uneven or Pale Dye Jobs
An uneven or patchy result often means the fabric wasn’t scoured clean of oils and finishes, or it wasn’t agitated enough in the dye bath. For natural fibers like cotton or wool, you can frequently correct this.
The most reliable fix is a full over-dye with a darker or stronger shade, which will even out minor variations. For a severely pale job, simply mix a fresh dye bath using 1.5 times the original dye powder. Ensure your fabric is fully wet and submerged, and stir continuously for the first 10 minutes.
If the unevenness is localized, spot-treating is an option, though it requires a careful hand. Mix a small, concentrated amount of dye paste. Using a sponge or brush, apply it only to the lighter areas, then wrap the piece in plastic wrap and steam it for about 30 minutes to set the color. This method works best on cellulose fibers like cotton or linen.
For ombre projects, a harsh line between colors is a classic issue. To soften a stark ombre line, re-dye the entire piece using a very weak solution of your lightest color, which will gently blend the transition. Mix about one-quarter of the original dye amount in a large volume of water. Immerse the whole garment and gently agitate, paying special attention to the line, for a shorter time (10-15 minutes).
Preventing and Treating Dye Bleed
Color bleeding in the wash is frustrating, but it’s usually a sign the dye wasn’t fully set, or “fixed,” to the fiber. Prevention is always easier than the cure.
To set dye properly initially, always follow the dye manufacturer’s instructions for heat and duration, and use a fixative like salt for direct dyes or vinegar for acid dyes. For cotton dyed with fiber reactive or all-purpose dye, a thorough post-dye wash with a synthrapol-style detergent is non-negotiable to remove loose dye molecules.
If you discover a finished piece is bleeding, act quickly. Soak it in a cold water solution with one cup of white vinegar for cotton or linen, or a commercial dye fixative for wool or silk. Soak for up to an hour, then rinse in cold water until it runs clear. Wash the item alone several times in cold water to see if the bleed stops.
To fix bleeding dye that has stained another fabric, rewash the stained load immediately with a oxygen-based color-safe bleach, which can often pull the fugitive dye out. Do not use chlorine bleach, as it can set some dyes permanently. These tips also relate to removing stains from dyed fabrics. The next steps cover this topic further.
How to Convert Powder Dye for Ombre Techniques
For smooth ombre fades, you need precise control, and a liquid dye is much easier to dilute than powder. Converting your powder is simple. Dissolve the entire packet of powder dye in two cups of very hot, almost boiling, water, stirring until no granules remain. This creates a concentrated stock solution. You can then mix precise amounts of this liquid with cold water in separate buckets to create your graduating ombre shades, ensuring consistent color chemistry in each bath.
When a Dye Job Can’t Be Saved: A Realistic Risk Assessment
Some mistakes aren’t salvageable. The most common is using the wrong dye type for the fiber. All-purpose dye will not permanently color polyester or nylon. It may stain it lightly, but that color will wash out completely, leaving you with the original fabric. If your dye didn’t take on a synthetic fiber, you cannot fix it; you must start over with a disperse dye made for synthetics. Similarly, if you’ve caused severe felting shrinkage on wool by agitating it in hot water, that damage is irreversible. Recognizing these dead ends saves you time and lets you plan a fresh start with the right materials.
When NOT to Dye: Fibers and Projects to Avoid
Your excitement to transform a fabric is a powerful feeling. I love it. But knowing when to step back saves you time, money, and heartache. Dye chemistry is a partnership, and some fabrics simply refuse to cooperate under home conditions.
- Acetate or Triacetate: This is a safety issue. Many all-purpose dyes contain acetone or other solvents that can dissolve acetate fibers, leaving you with a melted, gummy mess.
- Fabrics with Permanent Finishes: Waterproof, stain-resistant, or wrinkle-free coatings are designed to repel liquids. They will also repel your dye, resulting in a blotchy, pale, or completely unchanged fabric.
- Some Tightly Woven Synthetics: Nylon can dye beautifully, but industrial nylons used in backpacks or windbreakers are often engineered for colorfastness and resist our household dye pots. The dye simply cannot penetrate the dense fiber structure.
- Linen or Cotton Blends with Synthetics: That 60% linen, 40% polyester blend you love? The linen will drink up the dye, while the polyester remains its original color. You’ll get a muted, heathery tone, not the solid shade you envisioned. Always test a swatch first.
- Very Large Items: Dyeing a set of linen sheets or a sofa cover requires a vat large enough for constant, even agitation. Without it, you get severe unevenness. Most home stovetops and pots cannot handle this.
- Animal Fiber Considerations: For wool or silk, always choose dyes labeled for protein fibers, like acid dyes. These are gentler and bond at a lower temperature. I advocate for using plant-based dyes or synthetic acid dyes that mimic natural colors, as they avoid the harsh chemical salts sometimes used in direct dyeing, aligning with a mindful approach to all materials.
Problematic Fibers and Finishes
Let’s look under the microscope. Fibers are like sponges with different appetites. Natural fibers like cotton and wool are hydrophilic-they love water and dye molecules. Many synthetics are hydrophobic; they repel water-based dyes.
Polyester requires disperse dyes and temperatures near boiling (around 200°F) to force the dye particles into the fiber. This is risky in a home pot, often leading to uneven results and potential fabric damage. That “stain-resistant” finish on your tablecloth is usually a polymer coating that forms an invisible shield. Your dye solution beads up on it like water on a waxed car.
My rule is simple: if the care label has warnings about heat or chemical treatments, that fabric is not a candidate for home dyeing nor any toxic processes at home.
Assessing Your Dyeing Project’s Feasibility
Run through this quick checklist before you heat the water. It takes two minutes and can prevent a four-hour disappointment.
- Fabric Content: What is it, really? Check the label. No label? Do a burn test. Cotton smells like burning paper, synthetics melt and bead, wool smells like burnt hair.
- Care Label Clues: Does it say “Dry Clean Only”? This often indicates a sensitive finish or fiber blend that will not survive wet dyeing.
- Dye Type Match: All-purpose dye works on cellulose (cotton, linen, rayon) and sometimes wool. Acid dye is for protein fibers (wool, silk, nylon). Disperse dye is for polyester. Make sure you have the right partner for your fabric.
- Workspace Reality Check: Do you have a pot dedicated to dyeing (never used for food)? Is it large enough to let the fabric swim freely? Is your ventilation good? Be honest about your space.
- The Swatch Test: If you’re unsure, especially with blends or mystery fabrics, cut a small piece from a seam allowance and do a test run. It’s the most reliable predictor of success.
From the Dye Pot to Daily Care
Your fabric’s fiber always dictates the rules, so matching your dye and technique to the material is the single non-negotiable step for success. Treat every newly dyed piece like a delicate specimen for its first few washes, using cool water and a pH-neutral detergent to set the color and observe its behavior. That extends to dye delicate fabrics washing—treat them with a gentle rinse to protect color. The next steps will guide that careful washing for dyed textiles.
Think of dyeing not just as decoration, but as a permanent alteration to your textile that requires informed, gentle care from that day forward. Dye permanence varies with fiber and dye type, so understanding how colors bond helps you plan for lasting, true hues. This awareness also guides how you wash, store, and handle fabrics to preserve vibrancy. I encourage you to let this hands-on knowledge deepen your respect for all fabrics, inspiring you to mend, reuse, and care for them with a scientist’s curiosity for every fiber’s unique needs.
References & External Links
- Indigo Dyeing 101: How to Dye with Indigo [Vat Types & Process]
- Indigo All-Purpose Dye – Rit Dye
- DIP DYEING FABRIC WITH INDIGO- OMBRE TUTORIAL – Onyx Art Studios
- In Color Order: DIY Indigo Fabric Dyeing Tutorial
Florian Ventura
Florian is a high fashion blog writer, fashion and fabric expert and a keen expert in fabric, clothing and materials. She has worked in large textile and fashion houses for over 10+ years, engineering and working with various fabric types and blends. She is an expert when it comes to questions on any and all kinds of fabrics like linen, cotton, silk, jute and many more. She has also traveled around the world studying traditional fabrics and aims to bring them into the modern fashion use.